RollerAssemblies
RemovingtheFrontRoller
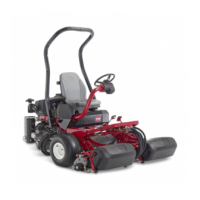
g313144
Figure83
1.Plowbolt(2each)4.Locknut(2each)
2.Frontrollerassembly
5.Pinchbolt(2each)
3.Height-of-cutarm(2each)6.Height-of-cutscrew(2each)
Note:RefertoFigure83duringthisprocedure.
1.Removethecuttingunitfromthemachineandplaceitonalevelworksurface.
Useanappropriatesupporttoraisethefrontrolleroffoftheworksurface.
2.Loosenthepinchboltsthatsecurethefrontrollershafttothefront
height-of-cutarms.
3.Removethelocknutandplowboltthatsecuresoneoftheheight-of-cutarms
tothecuttingunitsideplateandremovetheheight-of-cutarm.
4.Slidethefrontrollerassemblyfromtheremainingheight-of-cutarm.
5.Removetheremainingheight-of-cutarmfromthecuttingunitifnecessary.
InstallingtheFrontRoller
Note:RefertoFigure83duringthisprocedure.
1.Placethecuttingunitonalevelworksurface.Useanappropriatesupportto
raisethefrontofthecuttingunitoffoftheworksurface.
2.Inspecttheconditionofbothheight-of-cutscrewsandreplacethemif
necessary.Applyanti-seizelubricanttothethreadsofanewheight-of-cut
screw.
Note:Wheninstallingtheheight-of-cutarms,makesuretabofthesideplate
tsbetweentheheadandthewasheroftheheight-of-cutscrew.
3.Secureoneoftheheight-of-cutarmstothesideplatewithaplowboltand
locknut.Thetabontheheight-of-cutwashershouldbeorienteddownward
andtintotheslotoftheheight-of-cutarm.
4.Slidethefrontrollershaftintotheheight-of-cutarmattachedtothecutting
unit.
5.Slidetheremainingheight-of-cutarmontotheotherendofrollershaft.
Securetheremainingheight-of-cutarmtothesideplatewithaplowbolt,
height-of-cutwasherandlocknut.
DPACuttingUnits:ServiceandRepairs
Page8–22
Greensmaster
®
Flex1018/1021
20247SLRevA
 Loading...