barandthescrewwillbesnugagainstthe
bedknife.Thisensuresthattheheightofcut
isidenticalatbothendsofthebedknife.
6.Tightenthenutstosecuretheadjustment
enoughtoremoveplayfromthewasher.
7.Verifythattheheight-of-cutsettingiscorrect;
repeatthisprocedureifnecessary.
•Foraheightofcutgreaterthan8mm(0.312inch),
positionthetraction-unitdrumintheHIGHposition;
refertoyourmachineOperator’sManual.
•Foraheightofcutgreaterthan16mm(0.625
inch),installtheHighHeight-of-CutKit.Contact
yourauthorizedTorodistributortoacquirethiskit.
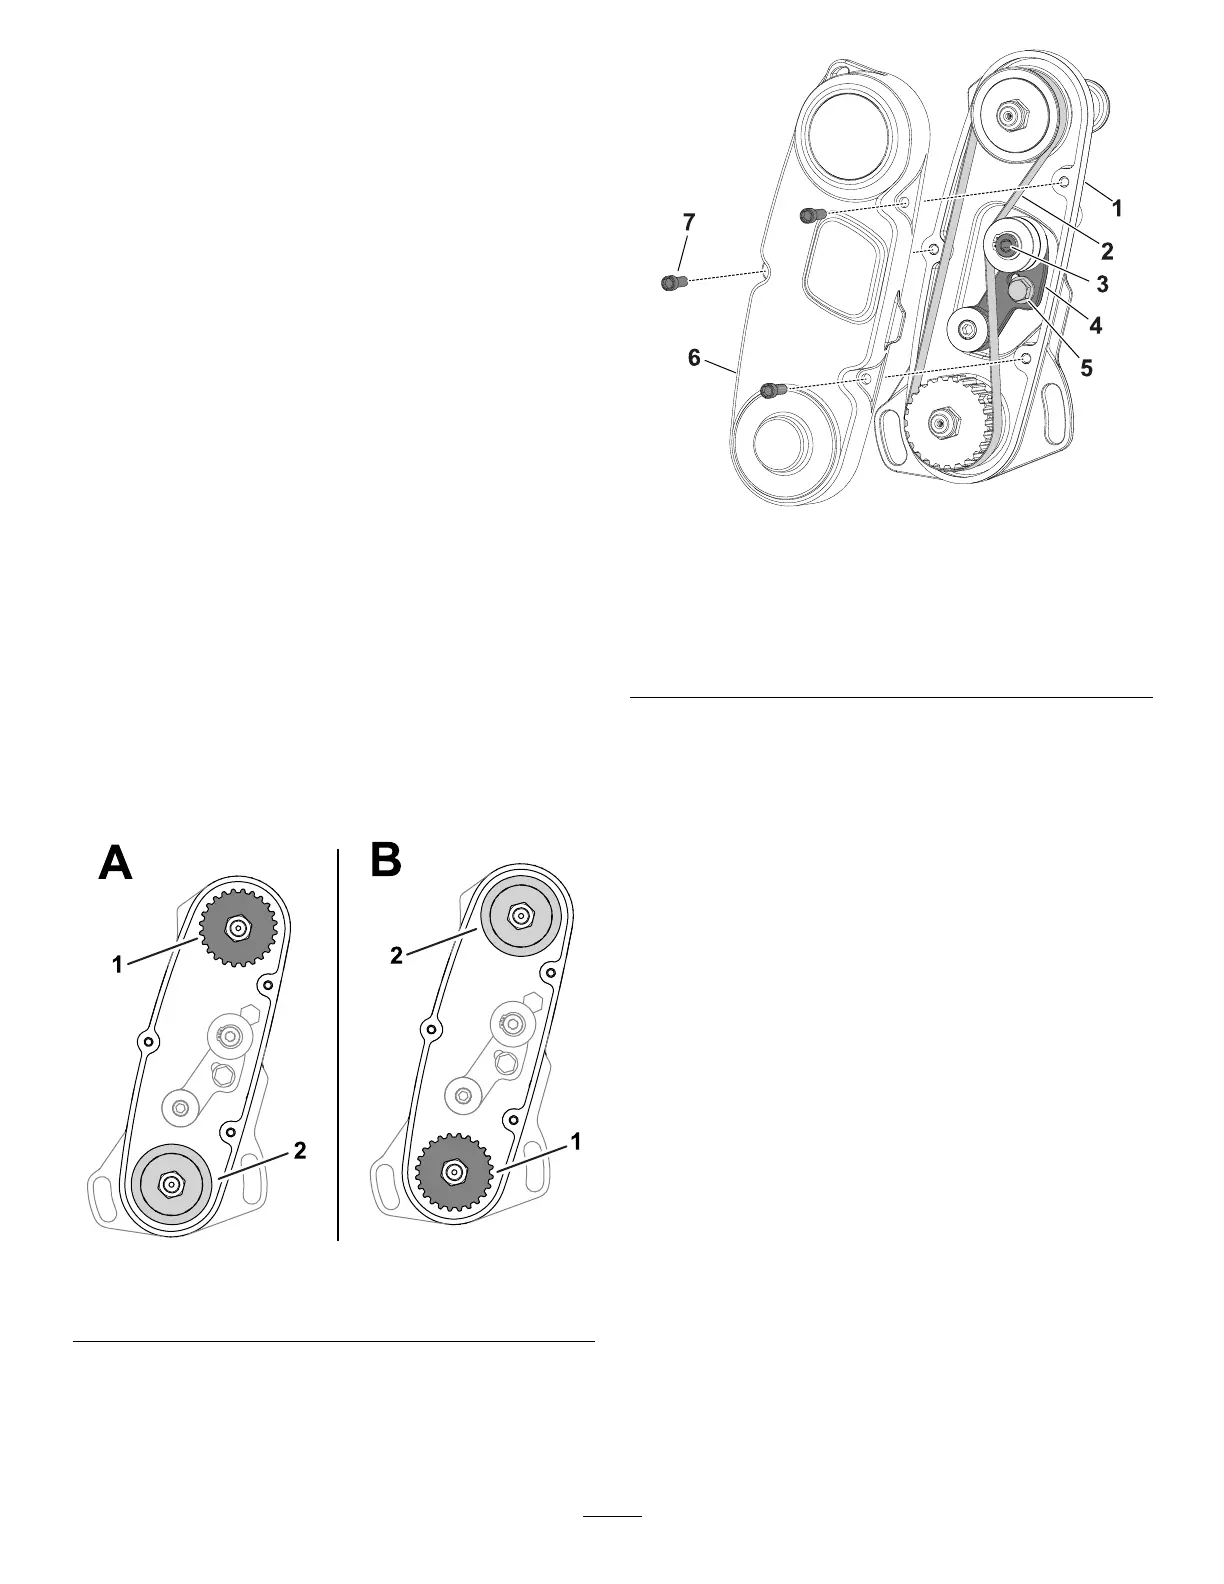
AdjustingtheClipRate
Thecliprateisdeterminedbythefollowingmachine
settings:
•Reelspeed:Thereelspeedcanbeadjustedto
ahighorlowsetting;refertoyourtractionunit
Operator’sManual.
•Reel-drive-pulleyposition:Thereel-drivepulleys
(22-toothand24-tooth)canbesetin2positions:
–HIGHposition:“A”inFigure14
–LOWposition:“B”inFigure14
Note:ThepulleypositionissettotheLOW
positionfromthefactory.
g275969
Figure14
1.Pulley(24tooth)2.Pulley(22tooth)
Toadjustthepositionofthepulleys,refertothe
followingsteps:
1.Removethebeltcovertoexposethebelt(Figure
15).
g275967
Figure15
1.Reel-drive-assembly
housing
5.Idler-armbolt
2.Belt6.Beltcover
3.Idler-arminternalhex
7.Socket-headscrew
4.Idlerarm
2.Loosentheidler-armboltandrotatetheidler
arm(Figure15)toreleasetensiononthebelt.
3.Removethebelt(Figure15).
4.Loosenthenutoneachpulley,removethe
pulleys,andusethenutstoinstallthepulleysin
yourdesiredconguration.
12