InstallingtheBedbar
1.Installthebedbar,positioningthemountingears
betweenthewashersandthebedbar-adjusting
screw(Figure18).
2.Securethebedbartoeachsideplatewiththe
bedbarbolts(nutsonbolts)and3washers(6
total).
3.Positionanylonwasheroneachsideofthe
side-plateboss.Placeasteelwasheroutside
eachofthenylonwashers(Figure19).
4.Torquethebedbarboltsto27to36N∙m(240to
320inch-lb).
5.Tightenthelocknutsuntilyouremovetheend
playfromsteelwashers,butyouareableto
rotatethembyhand.Thewashersontheinside
mayhaveagap.
Important:Donotovertightenthelocknuts
ortheywilldeectthesideplates.
6.Tightenthespringtensionnutuntilthespringis
collapsed,thenbackitoff1/2turn(Figure20).
g006505
Figure20
1.Spring-tensionnut2.Spring
7.Adjustthebedknifetothereel;refertoAdjusting
theBedknifetotheReel(page8).
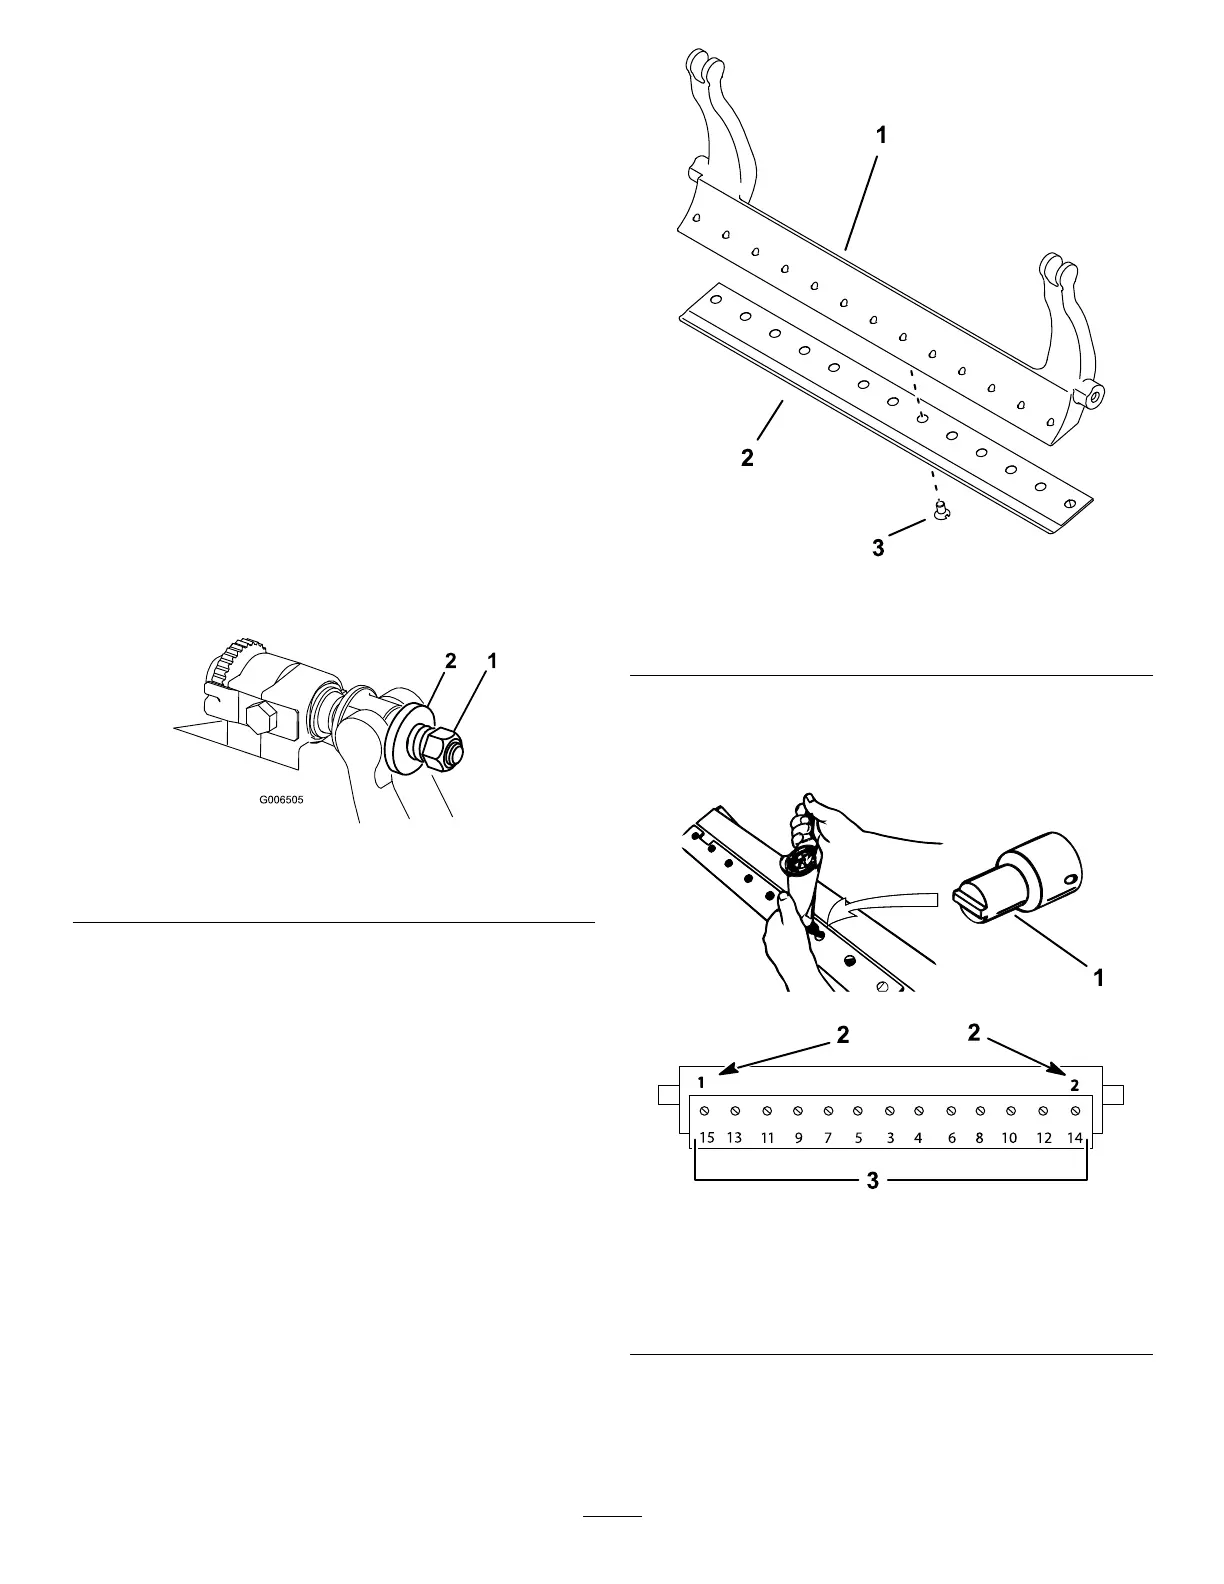
ServicingtheBedknife
InstallingtheBedknife
1.Removetherust,scale,andcorrosionfromthe
bedbarsurfaceandapplyathinlayerofoilto
thebedbarsurface.
2.Cleanthescrewthreads.
3.Applyanti-seizecompoundtothescrewsand
installthebedknifetothebedbar.
g255045
Figure21
1.Bedbar
3.Screw
2.Bedknife
4.Torquethe2outerscrewsto1N∙m(10in-lb).
5.Workingfromthecenterofthebedknife,torque
thescrewsto23to28N∙m(200to250in-lb).
g255046
Figure22
1.Bednifescrewtool
3.Torqueto23to28N∙m
(200to250in-lb).
2.Installandtorquethese
rstto1N∙m(10in-lb).
6.Grindthebedknife.
15