BedknifeGrindingSpecications
g032182
Figure24
1.Reliefangle4.Frontface
2.Topface
5.Frontangle
3.Removeburr
Standardbedknifereliefangle3°minimum
Extendedbedknifereliefangle7°minimum
FrontAngleRange
13°to17°
CheckingtheTopGrindAngle
Theanglethatyouusetogrindyourbedknivesis
veryimportant.
Usetheangleindicator(T oroPartNo.131-6828)and
theangle-indicatormount(T oroPartNo.131-6829)to
checktheanglethatyourgrinderproducesandthen
correctforanygrinderinaccuracy.
1.Placetheangleindicatoronthebottomsideof
thebedknifeasshowninFigure25.
g034113
Figure25
1.Bedknife(vertical)
2.Angleindicator
2.PresstheAltZerobuttonontheangleindicator.
3.Placetheangle-indicatormountontheedge
ofthebedknifesothattheedgeofthemagnet
mateswiththeedgeofthebedknife(Figure26).
Note:Thedigitaldisplayshouldbevisiblefrom
thesamesideduringthisstepasitwasinstep1.
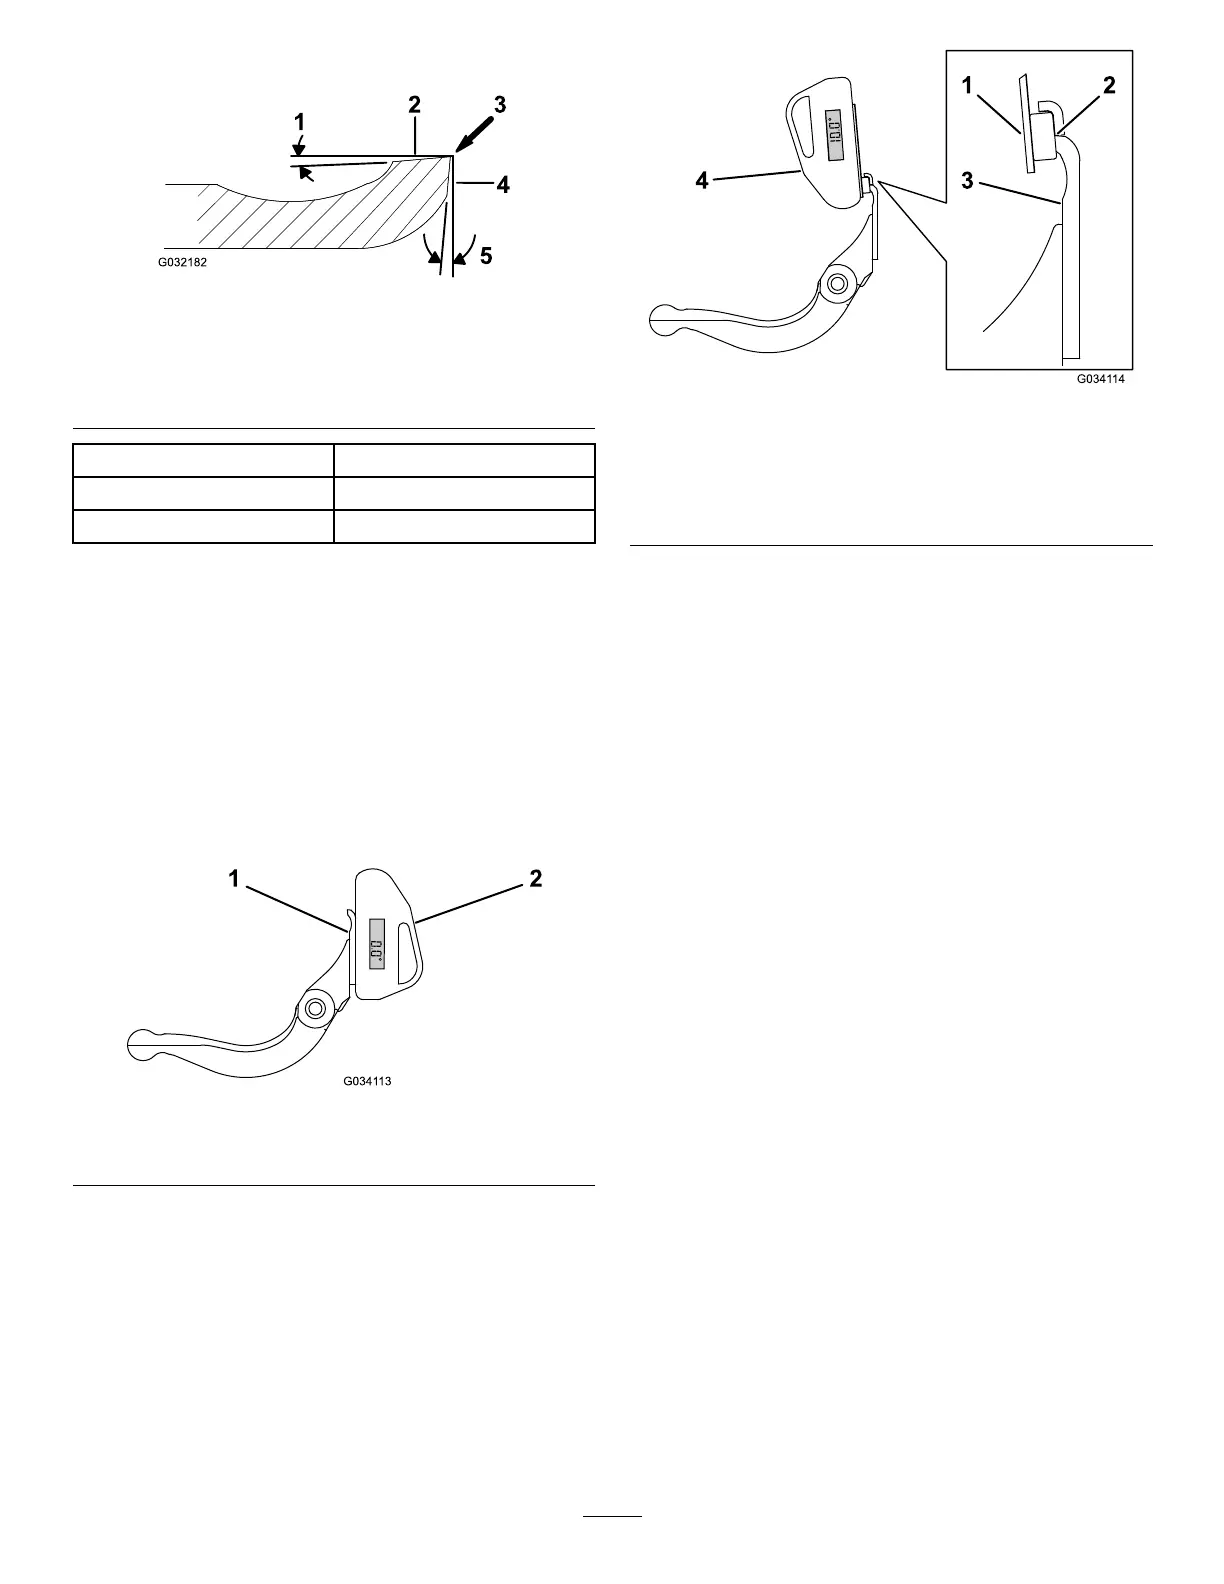
g034114
Figure26
1.Angle-indicatormount
3.Bedknife
2.Edgeofthemagnetmated
withtheedgeofthe
bedknife
4.Angleindicator
4.Placetheangleindicatoronthemountasshown
inFigure26.
Note:Thisistheanglethatyourgrinder
produces,andshouldbewithin2degreesofthe
recommendedtopgrindangle.
BacklappingtheCutting
Unit
Tobacklapthecuttingunit,usetheAccessBacklap
Kit(ModelNo.139-4342)ortheBacklapKit(Model
No.04800);refertotheoperatinginstructionsinthe
kitInstallationInstructions.Contactyourauthorized
Torodistributortoacquireoneofthesekits.
17