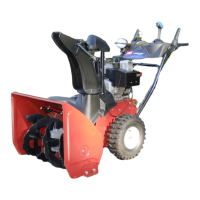
CheckingandAdjustingthe
SkidsandScraper
ServiceInterval:Yearly—Checktheskidsandthe
scraperandadjustthemifnecessary.
Checktheskidsandthescrapertoensurethattheauger
doesnotcontactthepavedorgravelsurface.Adjustthe
skidsandthescraperasneededtocompensateforwear.
1.Checkthetirepressure.RefertoCheckingtheTire
Pressure.
2.Loosenthenutsthatsecurebothskidstothe
augersidesuntiltheskidsslideupanddowneasily
(Figure34).
Figure34
1.1/2inch(1.3cm)
3.Supportthesideplatessothattheyareatleast1/2
inch(1.3cm)abovealevelsurface.
Important:Theaugerbladesmustbe
supportedabovethegroundbytheskids.
4.Ensurethatthescraperis1/8inch(3mm)above
andparalleltoalevelsurface.
Note:Ifthepavementiscracked,rough,oruneven,
adjusttheskidstoraisethescraper.Forgravel
surfaces,adjusttheskidsfurtherdowntoprevent
thesnowthrowerfrompickinguprocks.
5.Movetheskidsdownuntiltheyareevenwiththe
ground.
6.Firmlytightenthenutsthatsecurebothskidstothe
augersides.
Note:Toquicklyadjusttheskidsiftheyloosen,
supportthescraper1/8inch(3mm)offthe
pavement,thenadjusttheskidsdowntothe
pavement.
Note:Iftheskidsbecomeexcessivelyworn,you
canturnthemoverandsettheunusedsidetoward
thepavement.
CheckingandAdjustingthe
TractionCable
ServiceInterval:Aftertherst2hours—Inspect
thetractioncableandadjustitif
necessary.
Yearly—Inspectthetractioncable
andadjustorreplaceitifnecessary.
Ifthesnowthrowerdoesnotdriveintheforwardor
reversespeedsoritdriveswhenyoureleasethetraction
lever,adjustthetractioncable.
Withthetractionleverdisengaged,checkthepininthe
elongatedslotintheleftsideofthesnowthrowerabove
thetire.Thereshouldbeagapof1/32to1/16inch(1
to1.5mm)fromthefrontoftheslottothefrontedge
ofthepin(Figure35).
Figure35
1.Pin
2.1/32to1/16inch(1to1.5mm)
Ifthelefthand(traction)cableisnotproperlyadjusted,
dothefollowingsteps:
1.Loosenthejamnut.
2.Loosenortightentheturnbuckletoadjustthepin
untilitisthepropergapfromthefrontedgeofthe
slot.
3.Tightenthejamnut(Figure36).
18
 Loading...