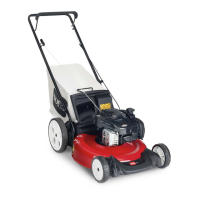
Cutting Grass
• Cut only about a third of the grass blade at a time.
For improved quality of cut, runtime, and bagging,
cut grass at a higher height of cut.
• Do not cut below 51 mm (2 inches) unless the
grass is sparse or it is late fall when grass growth
begins to slow down.
• When cutting grass over 15 cm (6 inches) tall,
mow at the highest cutting height setting and walk
slower; then mow again at a lower setting for the
best lawn appearance. If the grass is too long, the
machine may plug and cause the motor to stall.
• W et grass and leaves tend to clump on the yard
and can cause the machine to plug or the motor to
stall. A void mowing in wet conditions.
• Be aware of a potential re hazard in very dry
conditions, follow all local re warnings, and keep
the machine free of dry grass and leaf debris.
• Alternate the mowing direction. This helps
disperse the clippings over the lawn for even
fertilization.
• If the nished lawn appearance is unsatisfactory ,
try 1 or more of the following:
– Replace the blade or have it sharpened.
– W alk at a slower pace while mowing.
– Raise the cutting height on your machine.
– Cut the grass more frequently .
– Overlap cutting swaths instead of cutting a full
swath with each pass.
Cutting Leaves
• After cutting the lawn, ensure that half of the lawn
shows through the cut leaf cover . Y ou may need
to make more than a single pass over the leaves.
• If there are more than 13 cm (5 inches) of leaves
on the lawn, mow at a higher cutting height and
then again at the desired cutting height.
• Slow down your mowing speed if the machine
does not cut the leaves nely enough.
After Operation
Charging the Battery Pack
Important: The battery pack is not fully charged
when you purchase it. Before using the tool for
the rst time, place the battery pack in the charger
and charge it until the LED display indicates the
battery pack is fully charged. Read all safety
precautions.
Important: Charge the battery pack only in
temperatures that are within the appropriate
range; refer to Specications ( page 1 1 ) .
Note: At any time, press the battery-charge-indicator
button on the battery pack to display the current
charge (LED indicators).
1. Ensure that the vents on the battery and charger
are clear of any dust and debris.
g347460
Figure 14
1. Battery pack cavity 4. Battery-charge-indicator
button
2. Battery pack venting areas
5. LED indicators (current
charge)
3. Battery pack terminals 6. Handle
2. Line up the cavity in the battery pack ( Figure 14 )
with the tongue on the charger .
3. Slide the charger into the battery pack until it is
fully seated ( Figure 14 ).
4. T o remove the battery pack, slide the charger
backward out of the battery pack.
5. Refer to the following table to interpret the LED
indicator light on the battery charger .
Indicator
light
Indicates
Of f
No battery pack inserted
Green
blinking
Battery pack is charging
16
 Loading...