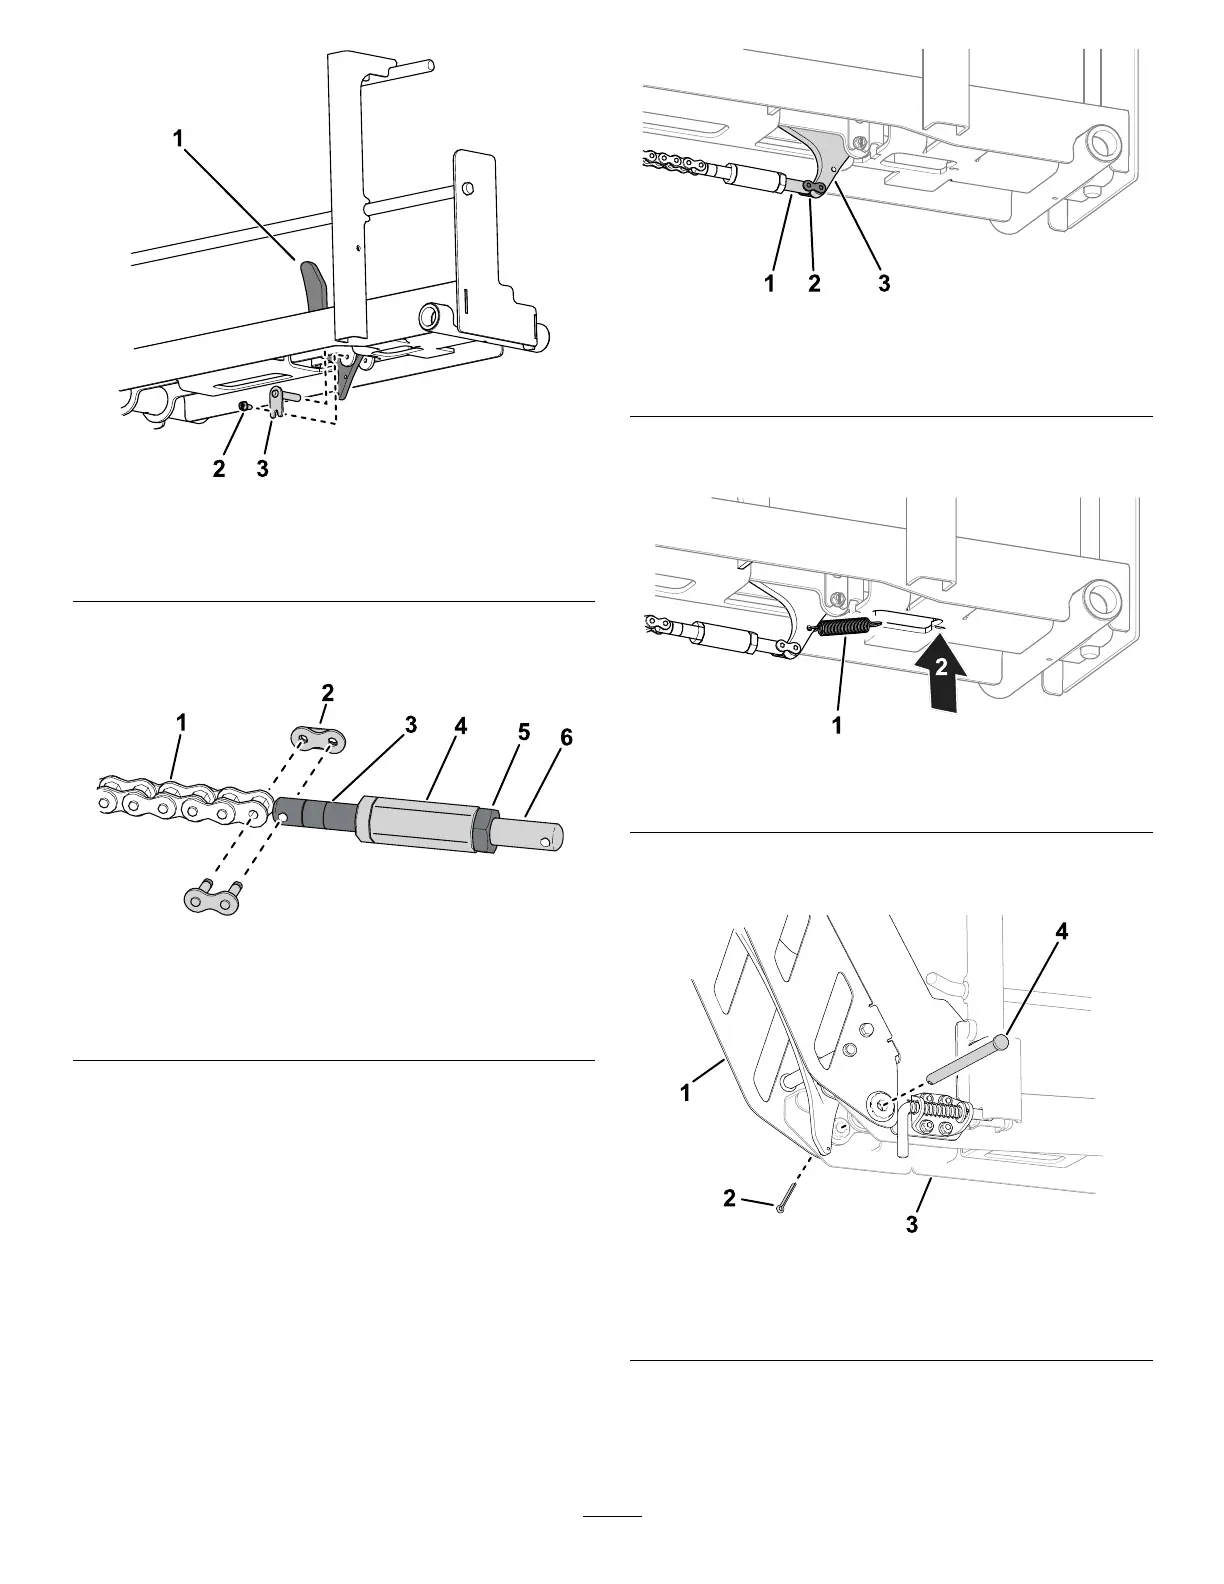
g340442
Figure12
1.Wheelstop3.Flagpin
2.Hex-headscrew
5.Useachainlinktoinstallthechaintothechain
turnbuckle(Figure13).
g348128
Figure13
1.Chain4.Hexshaft
2.Chainlink
5.Jamnut
3.Chainturnbuckle6.Chain-linkturnbuckle
6.Installthehexshafttothechainturnbuckle
(Figure13).
7.Useajamnuttoinstallthechain-linkturnbuckle
tothehexshaft(Figure13).
8.Useachainlinktoinstallthechain-link
turnbuckletothewheelstop(Figure14).
g341296
Figure14
1.Chain-linkturnbuckle
3.Wheelstop
2.Chainlink
9.Connectthespringtothewheelstopandthe
rampbottom(Figure15).
g341295
Figure15
1.Spring2.Connectthespringhere.
10.Useapivotpinandacotterpintosecurethe
rampassemblytotherailassembly(Figure16).
g349912
Figure16
1.Rampassembly3.Railassembly
2.Cotterpin
4.Pivotpin
11.Useachainlinktoconnecteachchaintothe
rampassemblies(Figure17).
6