therodisseatedatthebottomofbothnotches;refer
toFigure21.
4.Lowerthereardeectoruntilitrestsonthegrassbag.
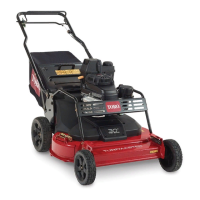
MowingwiththeGrassBag
WARNING
Aworngrassbagcouldallowsmallstonesand
othersimilardebristobethrownintheoperator’sor
bystander’sdirectionandresultinseriouspersonal
injuryordeathtotheoperatororbystanders.
Checkthegrassbagfrequently.Ifitisdamaged,
installanewTororeplacementbag.
RemovingtheGrassBag
Toremovethebag,reversethestepsinInstallingtheGrass
Bagabove.
DANGER
Themachinecanthrowgrassclippingsand
otherobjectsthroughanopendischargetunnel.
Objectsthrownwithenoughforcecouldcause
seriouspersonalinjuryordeathtotheoperatoror
bystander.
Neveropenthedooronthedischargetunnelwhen
theengineisrunning.
Side-dischargingtheClippings
Usethesidedischargeforcuttingverytallgrass.
WARNING
Thebladesaresharp;contactingthebladescan
resultinseriouspersonalinjury.
Stoptheengineandwaitforallmovingpartstostop
beforeleavingtheoperatingposition.
DANGER
Anuncovereddischargeopeningwillallowobjects
tobethrowninthedirectionoftheoperatoror
bystanders.Also,contactwiththebladescould
occur.Thrownobjectsorbladecontactcancause
seriousinjuryordeath.
Neveroperatethemachinewithoutthe
side-dischargedeectororside-dischargechutein
placeandworkingproperly.
InstallingtheSide-dischargeChute
Important:Ensurethattherear-dischargeplugisin
placebeforeyourecycletheclippings.
1.Stoptheengineandwaitforallmovingpartstostop.
2.Removethegrassbagifitisinstalledonthemachine;
referto
RemovingtheGrassBag(page14).
3.Inserttherear-dischargeplug;refertoRecyclingthe
Clippings(page12).
4.Removetheside-dischargedeectorbypullingup
onthespringthatholdsthedeectorinplaceand
removingthedeector(Figure22).
 Loading...