A
Alastair WilsonMay 17, 2025
How do you switch the unit on for heat
How do you switch the unit on for heat
General safety guidelines for public use and essential servicing precautions.
Critical safety measures for handling R410A refrigerant and high voltage electrical components.
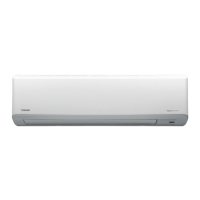
Technical specifications for the indoor unit, including capacity, power, and dimensions.
Specifications for outdoor unit connection, refrigerant, wiring, and piping details.
Critical safety guidelines for installing and servicing R410A systems, emphasizing pressure and contamination risks.
Guidance on selecting and installing appropriate piping materials for refrigerant systems.
Details on copper pipe types, flare joints, and socket joints for refrigerant piping.
Procedures and precautions for processing refrigerant piping materials.
Specifications and dimensions for flare processing and flare nuts for R410A and R22.
Steps for connecting flares and recommended tightening torques for secure connections.
Lists tools essential for R410A installation and servicing, including exclusive and general tools.
Step-by-step guide for safely recharging refrigerant into the system.
Instructions for handling refrigerant cylinders and charging methods for R410A.
Information on suitable brazing filler materials and the importance of flux.
Details on flux properties, types, and selection criteria for brazing.
Method to prevent oxidation during brazing using nitrogen gas flow.
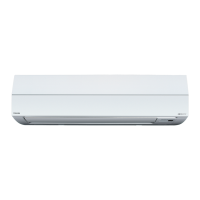
Exploded view and dimensional details of the indoor unit's components.
Schematic diagram illustrating the electrical wiring connections within the indoor unit.
Specifications for electrical components used in the indoor unit, including motors and sensors.
Diagram illustrating the flow of refrigerant through the indoor and outdoor units.
Block diagram detailing the control system logic for the indoor unit and remote controller.
Overview of the air conditioner's control system, including indoor and outdoor unit roles.
Details on the functions and responsibilities of the indoor and outdoor unit controllers.
Detailed explanation of basic operation modes and indoor fan speed control.
Description of louver control and overview of remote controller functions.
Flowcharts illustrating the operation control sequence from remote to outdoor units.
Detailed explanation of operation logic for cooling, heating, auto, and dry modes.
Details on indoor fan speed control stages in cooling operation, including manual and auto modes.
Details on indoor fan speed control stages in heating operation, including cold draft prevention.
Explanation of how capacity is adjusted and current release control protects the system.
Prevent-freezing (cooling) and prevent-overpressure (heating) controls based on heat exchanger temperature.
Control of louver position for air direction, including automatic, manual, and swing settings.
Procedures for defrost control, ECO mode, and temporary operation using the reset button.
Explanation of how the pulse motor valve controls refrigerant flow and operating stages.
Purpose and operational details of the self-cleaning function to prevent mold growth.
Procedure for selecting remote controller A or B for managing multiple indoor units.
Explanations of QUIET mode, COMFORT SLEEP mode, and short timer settings.
Details on ONE-TOUCH comfort and Hi POWER modes for automated and rapid operation.
Procedures for setting and canceling the auto restart function after a power failure.
How power failure affects timer operation and requires resetting.
Identification of remote controller buttons and basic operation mode selections.
Details on selecting AUTOMATIC, COOLING, and HEATING operations via the remote.
How to use DRY, Hi POWER, ECO, and Temporary operation modes via the remote.
How to set the ON and OFF timers for unit operation using the remote.
How to use PRESET, QUIET, and Sleep timer functions.
Explanation of various indicators on the remote controller's display screen.
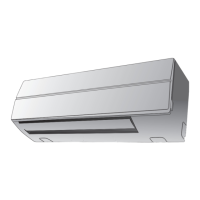
Diagram illustrating recommended installation positions for indoor and outdoor units.
Instructions for loading batteries into the wireless remote controller.
Details on optional parts, accessories, and tools required for installation.
Information on new tools required for R410A installation compared to R22.
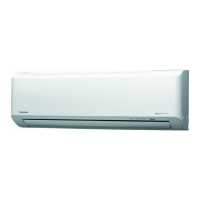
Criteria for selecting an indoor unit location and procedures for drilling mounting holes.
Guidelines for placing the remote controller for optimal signal reception.
Steps for performing electrical work, including power supply connection and wiring the main cable.
Procedures for forming refrigerant pipes and drain hoses, including insulation requirements.
Instructions for attaching drain components and connecting refrigerant pipes for various layouts.
Requirements for proper drain hose slope and step-by-step instructions for mounting the indoor unit.
Overview of topics related to outdoor unit installation, including placement and connections.
Procedures for performing a gas leak test and a system test operation after installation.
Information on setting auto restart and selecting remote controller A or B.
Overview of trouble diagnosis procedures and crucial safety precautions for the 3DV inverter.
Initial checks for power supply, voltage, and normal program operations before troubleshooting.
Methods for initial troubleshooting: flashing LED, remote self-diagnosis, and symptom analysis.
How to interpret flashing LED codes on the indoor unit for self-diagnosis.
Steps to enter service mode on the remote controller for self-diagnosis.
Table correlating check codes with causes of operation errors and recommended actions.
Continuation of the troubleshooting table, covering more error codes and solutions.
Troubleshooting steps for the indoor unit when it has no power or the fan motor issues.
Diagnostic steps for when the indoor fan motor does not operate or operates incorrectly.
Explanation of why the indoor fan motor might rotate automatically and how to inspect it.
Steps to troubleshoot problems related to the remote controller's functionality.
Diagnosing wiring failures and issues where the outdoor unit stops after starting.
Diagnostic procedures for specific error codes 1C and 1E related to sensors and gas.
Procedures for diagnosing troubles within the outdoor unit's inverter assembly.
Procedures for inspecting the indoor unit's P.C. board for defects.
Detailed step-by-step procedures for checking the P.C. board and associated components.
Layout of the P.C. board and characteristic table for temperature sensors.
Procedures for checking various indoor and outdoor unit components like sensors, motors, capacitors, and diodes.
General safety warnings and procedures for replacing main parts of the indoor unit.
Step-by-step instructions for removing and reassembling the indoor unit's front panel.
Procedures for replacing the electric parts box assembly, including sensor connections.
Instructions for removing and replacing the evaporator (heat exchanger) and the bearing component.
Steps for removing and replacing the indoor fan motor.
Instructions and precautions for reassembling the cross flow fan and motor.
Procedure for replacing the microcomputer and related P.C. board components.
Exploded view diagram and a detailed list of indoor unit parts with their numbers.
Specific parts list for the indoor unit, categorized by location and part number.
| Brand | Toshiba |
|---|---|
| Model | RAS-M24SKV-E |
| Category | Air Conditioner |
| Language | English |