EasyManua.ls Logo

Toyota HILUX ‘A’ DECK User Manual

Toyota HILUX ‘A’ DECK
32 pages
To Next Page IconTo Next Page
Page #1 background imageLoading...
Page #1 background image
Page 1 of 34
Place these instructions in vehicle’s glove box after installation is complete
Accessory Part No. PZQ70-89870
Installation Time: Approx. 4h 15min
Clean Tonneau Cover
with a mild detergent and
water solution.
Do not use abrasive
cleaners or solvents.
Care Instructions:
IMPORTANT!
Please check content of kit using this list and subsequent sketches. Advise discrepancies to TMCA at once.
Do not stand/sit or rest heavy objects on Tonneau Cover.
Do not carry open volatile chemicals with Tonneau Cover installed.
Humans or animals are not to be under the closed Tonneau Cover at any time.
Securely lock Tonneau Cover before operating vehicle.
Tonneau Cover is not dust or water tight.
If contact with volatile chemicals occurs clean Tonneau Cover with mild detergent and water solution.
PARTS, SERVICE & ACCESSORIES
MAINTENANCE
If lubrication of the locks or hinges is required use only Graphite Powder.
DO NOT use any other lubricants or oils.
HILUX ‘A’ DECK
(With Sports Bar)
September, 2016 Production Onwards
HARD TONNEAU COVER FITTING INSTRUCTIONS
TC0403c
Accessory Part No. PZQ70-89870
ISSUE 4: 09/10/18
- Check that all work practices comply with safety standards.
- Please wear appropriate clothing and use safety equipment.
Safety Notes
-
-
-
-
-
-
-
Read through the fitting instructions before installation of accessory.
Always install the accessory following the fitting instructions. Failure to do so may cause damage to the vehicle or
the accessory.
Ensure all recyclable discarded vehicle accessory components and packaging are recycled following local
recycling regulations.
It is always recommended that this accessory is fitted by a qualified Toyota Technician.
Safely store and protect any removed vehicle components.
Ensure all bare metal surfaces are protected using Automotive Bare Metal Primer and touch-up paint.
Remove all metal swarf and dust from all vehicle surfaces if surface is used for accessory installation.
General Notes
Question and Answer IconNeed help?

Do you have a question about the Toyota HILUX ‘A’ DECK and is the answer not in the manual?

Toyota HILUX ‘A’ DECK Specifications

General IconGeneral
BrandToyota
ModelHILUX ‘A’ DECK
CategoryAutomobile Accessories
LanguageEnglish

Summary

Installation Step Overview

Header Bar Mounting and Sealing

Bracket and Sports Bar Assembly

Sports Bar and Infill Panel Fitting

Sports Bar Assembly and Panel Securing

Positioning and Securing Sports Bar Assembly

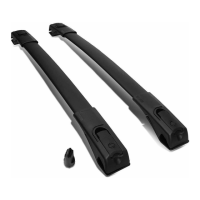
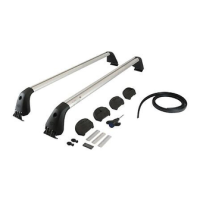
Positioning the sports bar assembly, torquing bolts for seals and attachment points.

Tonneau Cover Installation and Checks

Fitting the Tonneau Cover

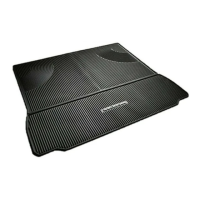
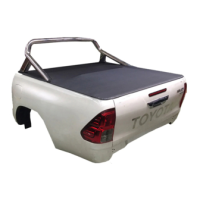
Lifting and fitting the tonneau cover to the vehicle, ensuring hinge alignment.

Securing Tonneau Hinges

Hooking hinge pins into the header bar to secure the tonneau cover hinges.

Gas Strut and Striker Assembly

Assembling Striker U-bolts

Assembling striker U-bolts with washers and nuts, setting initial height.

Electrical System Preparation

Battery Disconnection and Settings

Disconnecting the negative battery terminal and noting vehicle settings.

Wiring Harness and Connector Work

Disconnecting Junction Connector

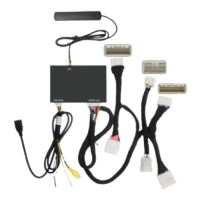
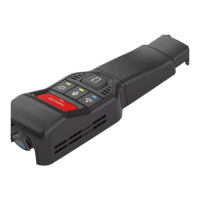
Locating and disconnecting the 20-way hybrid junction connector in the kick panel.

Wiring Harness Terminal Insertion

Inserting lock/unlock wires into new connectors and securing the secondary lock.

Relay Harness and Engine Bay Wiring

Connecting Relay Harness Terminals

Scotch locking relay harness terminals to junction connector wires and reconnecting.

Engine Bay Power Harness Routing

Routing Relay Harness Ground

Routing the relay harness ground ring terminal to the vehicle grounding point.

Securing Power Harness in Engine Bay

Feeding the power harness into the firewall grommet and securing it.

Power Harness to Fuse Box Connection

Connecting Power Harness to Fuse Block

Connecting the power harness to the accessory fuse block or directly to the battery.

Fuse Block and Battery Connections

Fuse Block Connection and Securing

Feeding extension harness wire, inserting fuse, and securing harnesses with cable ties.

Connecting Fused Power Harness

Connecting the power harness to the fused extension harness and battery terminal.

Power Harness Routing Along Chassis

Routing Power Harness Along Chassis Rails

Continuing to route the power harness along chassis rails using cable ties.

Securing Power Harness Branches

Securing Power Harness to Chassis

Securing various branches of the power harness to the chassis using cable ties.

Power Harness Entry into Tub

Feeding Harness Through 30mm Hole

Feeding a guide wire and power harness through a 30mm hole into the tub area.

Final Harness Routing and Connections

Connecting 6-Way Male Connector

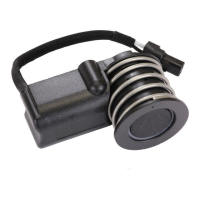
Connecting the 6-way male connector to the tonneau rail bracket.

Harness Completion and System Checks

Connecting 6-Way to Female Connector

Connecting the 6-way male connector to the mating female connector in the tonneau area.

Confirming Harness Operation

Checking tonneau cover operation, ajar feedback, and locking system functionality.

Tonneau Cover Position Adjustment

Adjusting Lid Position and Tightening

Adjusting lid position for even gaps and tightening hinge screws.

Striker and Latch Adjustment Details

Related product manuals