38
Chapter 7
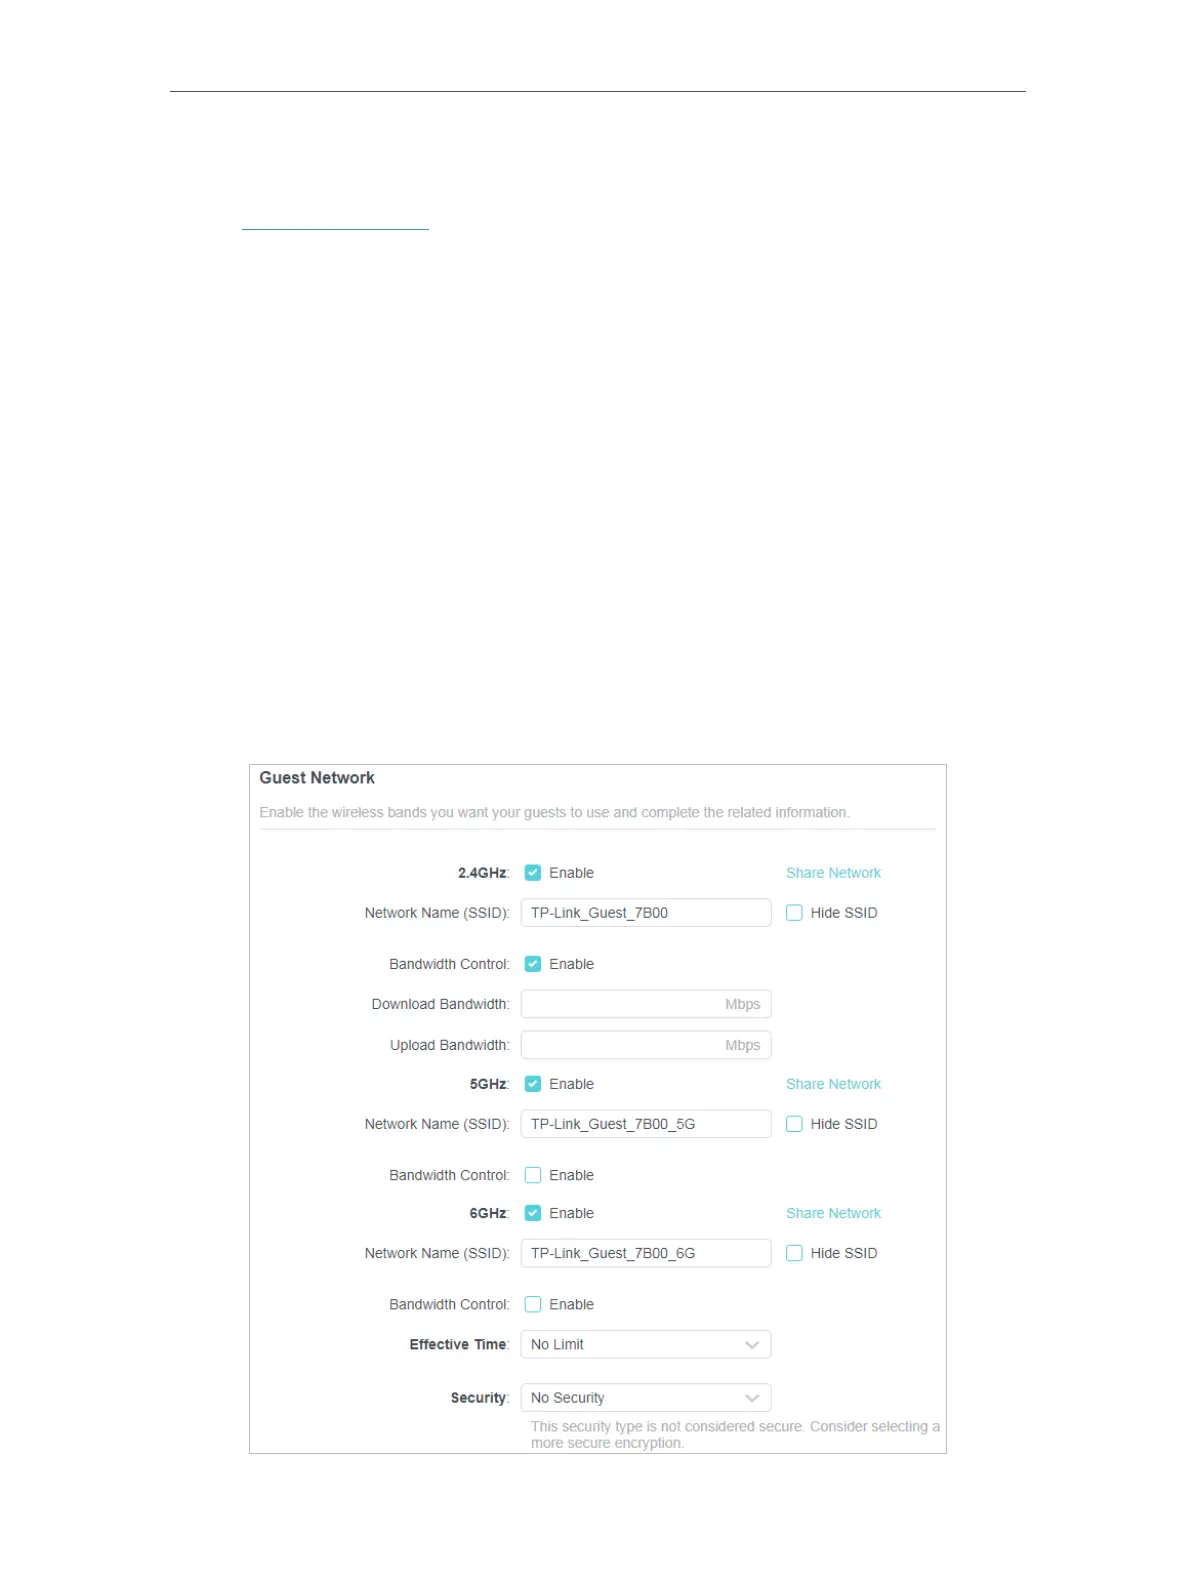
Guest Network
7. 1. Create a Network for Guests
1. Visit http://tplinkwifi.net, and log in with your TP-Link ID or the password you set for
the router.
2. Go to Advanced > Wireless > Guest Network or click Wireless on the top page. Locate
the Guest Network section.
3. Create a guest network as needed.
1 ) Tick the Enable checkbox for the 2.4GHz, 5 GHz or 6GHz wireless network.
2 ) Customize the Network Name(SSID). Don‘t select Hide SSID unless you want
your guests to manually input the SSID for guest network access.
3 ) Enable Bandwidth Control for one or all networks as you needed and customize
the download bandwidth and upload bandwidth for the network.
4 ) Select the Effective Time ( No Limit, 4 Hours, 1 Day, Custom). The guest network
will be automatically turned off after the effective time. The default No Limit
indicates that the guest network will always remain on.
5 ) Select the Security type and customize your own password. If No security is
selected, no password is needed to access your guest network.