85
Chapter 13
VPN Server&Client
1. Visit http://tplinkwifi.net, and log in with your TP-Link ID or the password you set for
the router.
2. Go to Advanced > VPN Client.
Note: Firmware update may be required to support VPN Client.
3. Enable VPN Client, then save the settings.
4. Add VPN servers, and enable the one you need.
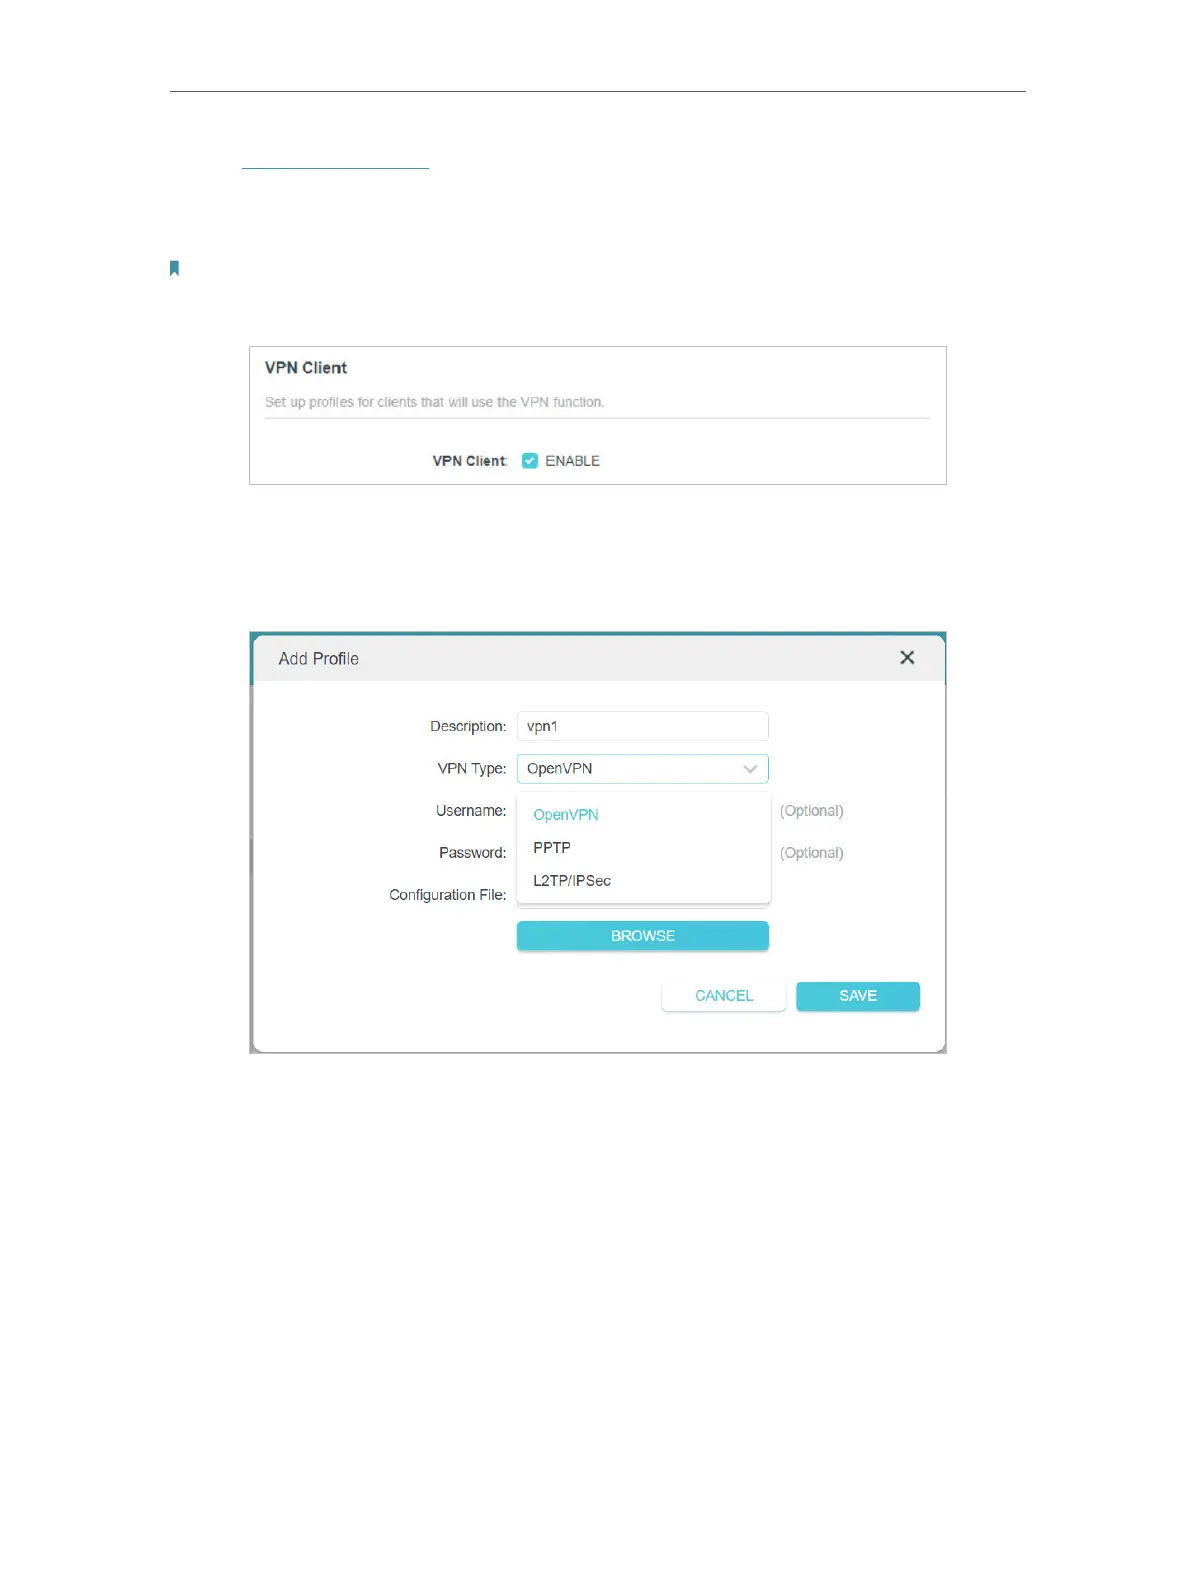
1 ) In the Server List section, click Add.
2 ) Specify a description for the VPN, and choose the VPN type.
3 ) Enter the VPN information provided by your VPN provider.
• OpenVPN: Enter the VPN username and password if required by your VPN
provider, otherwise simply leave them empty. Then import the configuration
file provided by your VPN provider.