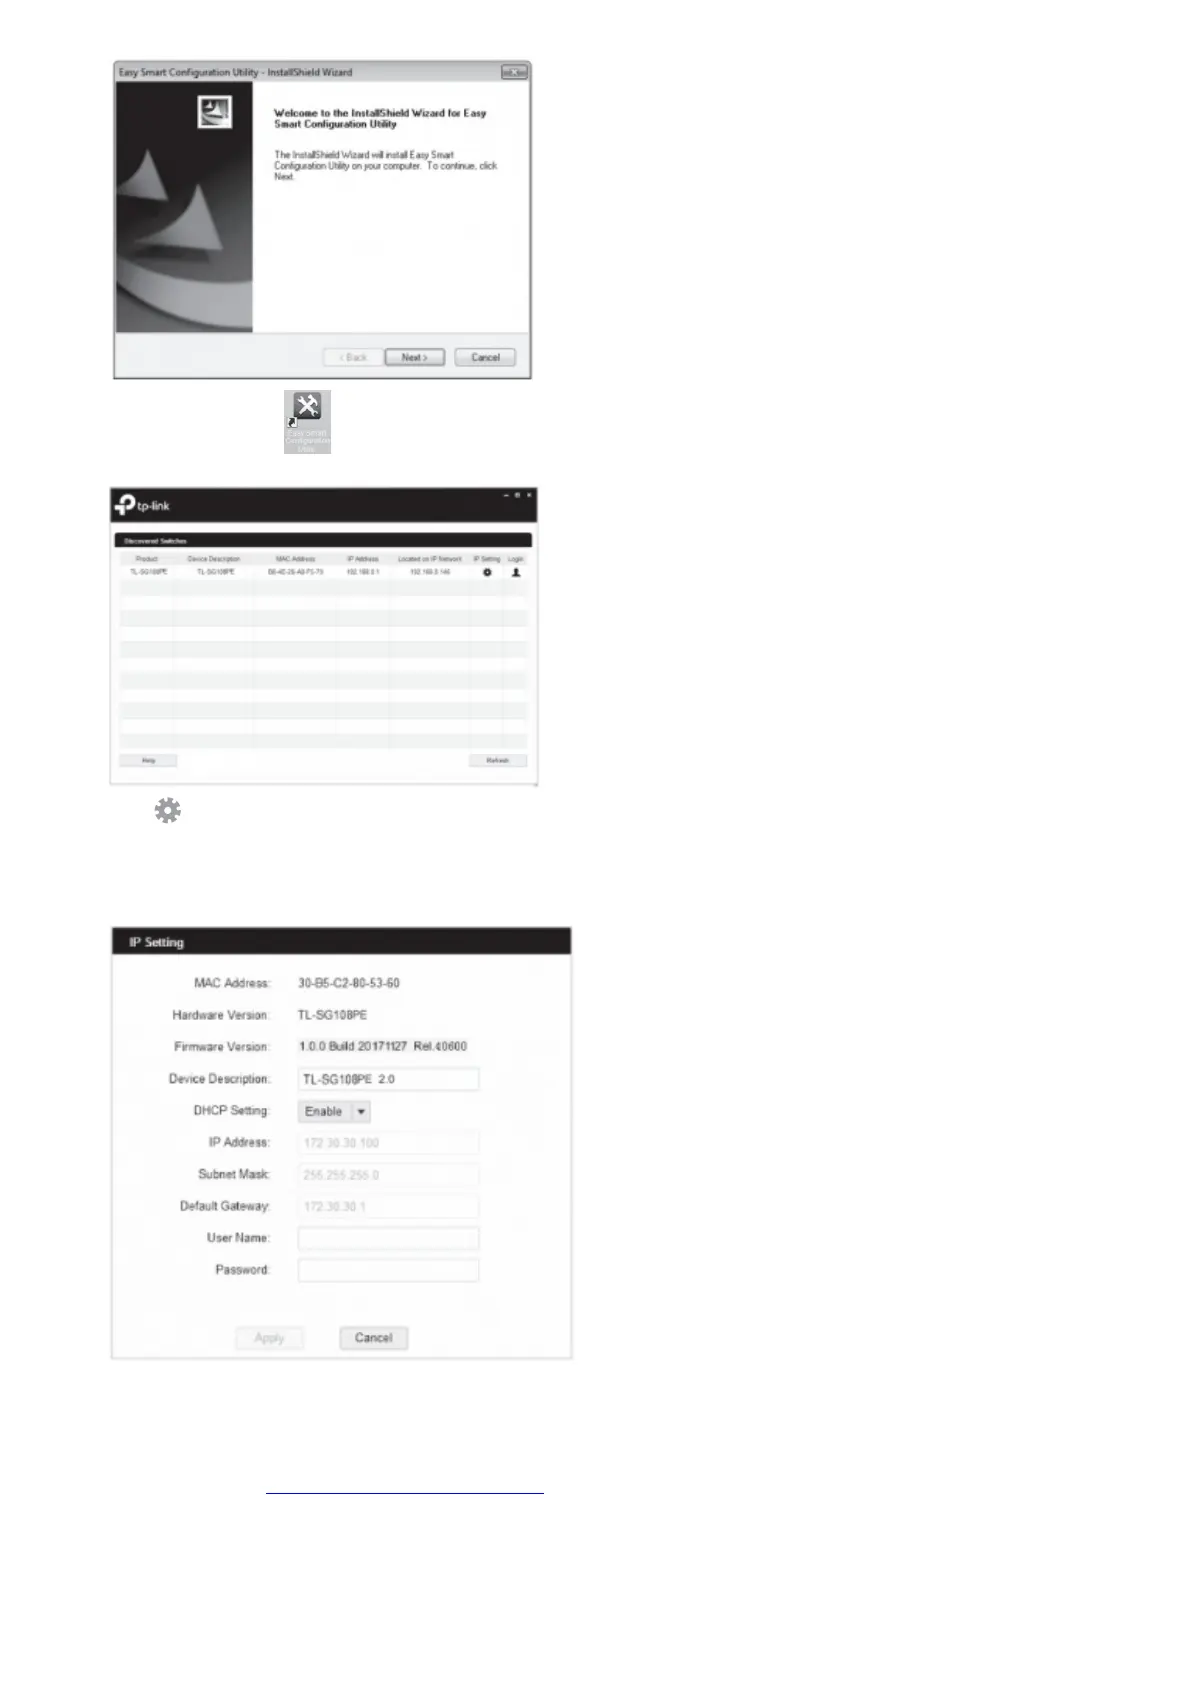
3. Double click the icon on the desktop, and the utility Home page will display a list of TP-Link switches on the local
network.
4. Click to find out IP parameters of the switch.
◙ If the switch uses an IP address assigned by a DHCP server, set your PC to obtain an IP address automatically from the
DHCP server.
◙ If the switch uses 192.168.0.1 as the IP address, configure your PC’s IP address as 192.168.0.x (”x” ranges from 2 to 254),
and subnet mask as 255.255.255.0.
5. Double click the switch that you want to configure. Log in with admin as both user name and password
Now you can configure the switch using the configuration utility. For further information, refer to the Easy Smart Configuration
Utility User Guide. Go to https://www.tp-link.com/support, search the model number of your switch, and you can find this guide
on the product Support web page.
Specifications
General Specifications
 Loading...