EasyManuals Logo

TP-Link PHAROS SERIES Installation Guide

TP-Link PHAROS SERIES
24 pages
To Next Page IconTo Next Page
To Previous Page IconTo Previous Page
Page #16 background imageLoading...
Page #16 background image
13
3. LAN Settings: Change the IP Address to 192.168.0.X (X ranges
between 2 and 253), the same subnet with the Access Point, and
click Next.
4. Wireless Client Settings:
a. Click Survey and select the SSID of the Access Point in the AP list,
then click Connect.
b. Select WPA-PSK/WPA2-PSK from the Security option, enter the
same PSK password and distance value of the Access Point, then
click Next.
5. Finish: Verify your settings and click Finish to complete the
conguration.
For more congurations, please visit https://www.tp-link.com/support to
download the User Guide of Pharos products in the download center.
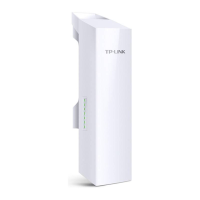
Other manuals for TP-Link PHAROS SERIES

Questions and Answers:

Question and Answer IconNeed help?

Do you have a question about the TP-Link PHAROS SERIES and is the answer not in the manual?

TP-Link PHAROS SERIES Specifications

General IconGeneral
ModelPHAROS SERIES
CategoryWireless Access Point
Frequency5 GHz
Wireless StandardsIEEE 802.11a/n
Operating Temperature70°C
ManagementWeb-based
Wireless SecurityWPA/WPA2, WPA-PSK/WPA2-PSK, WEP
Interface10/100M Ethernet
Operating ModesAccess Point, Client, Repeater
MountingPole Mounting

Related product manuals