6
3. Test Your Button
a. Press the button to test it in your
preferred location.
b. Refresh the home page on the
Tapo app to conrm its status.
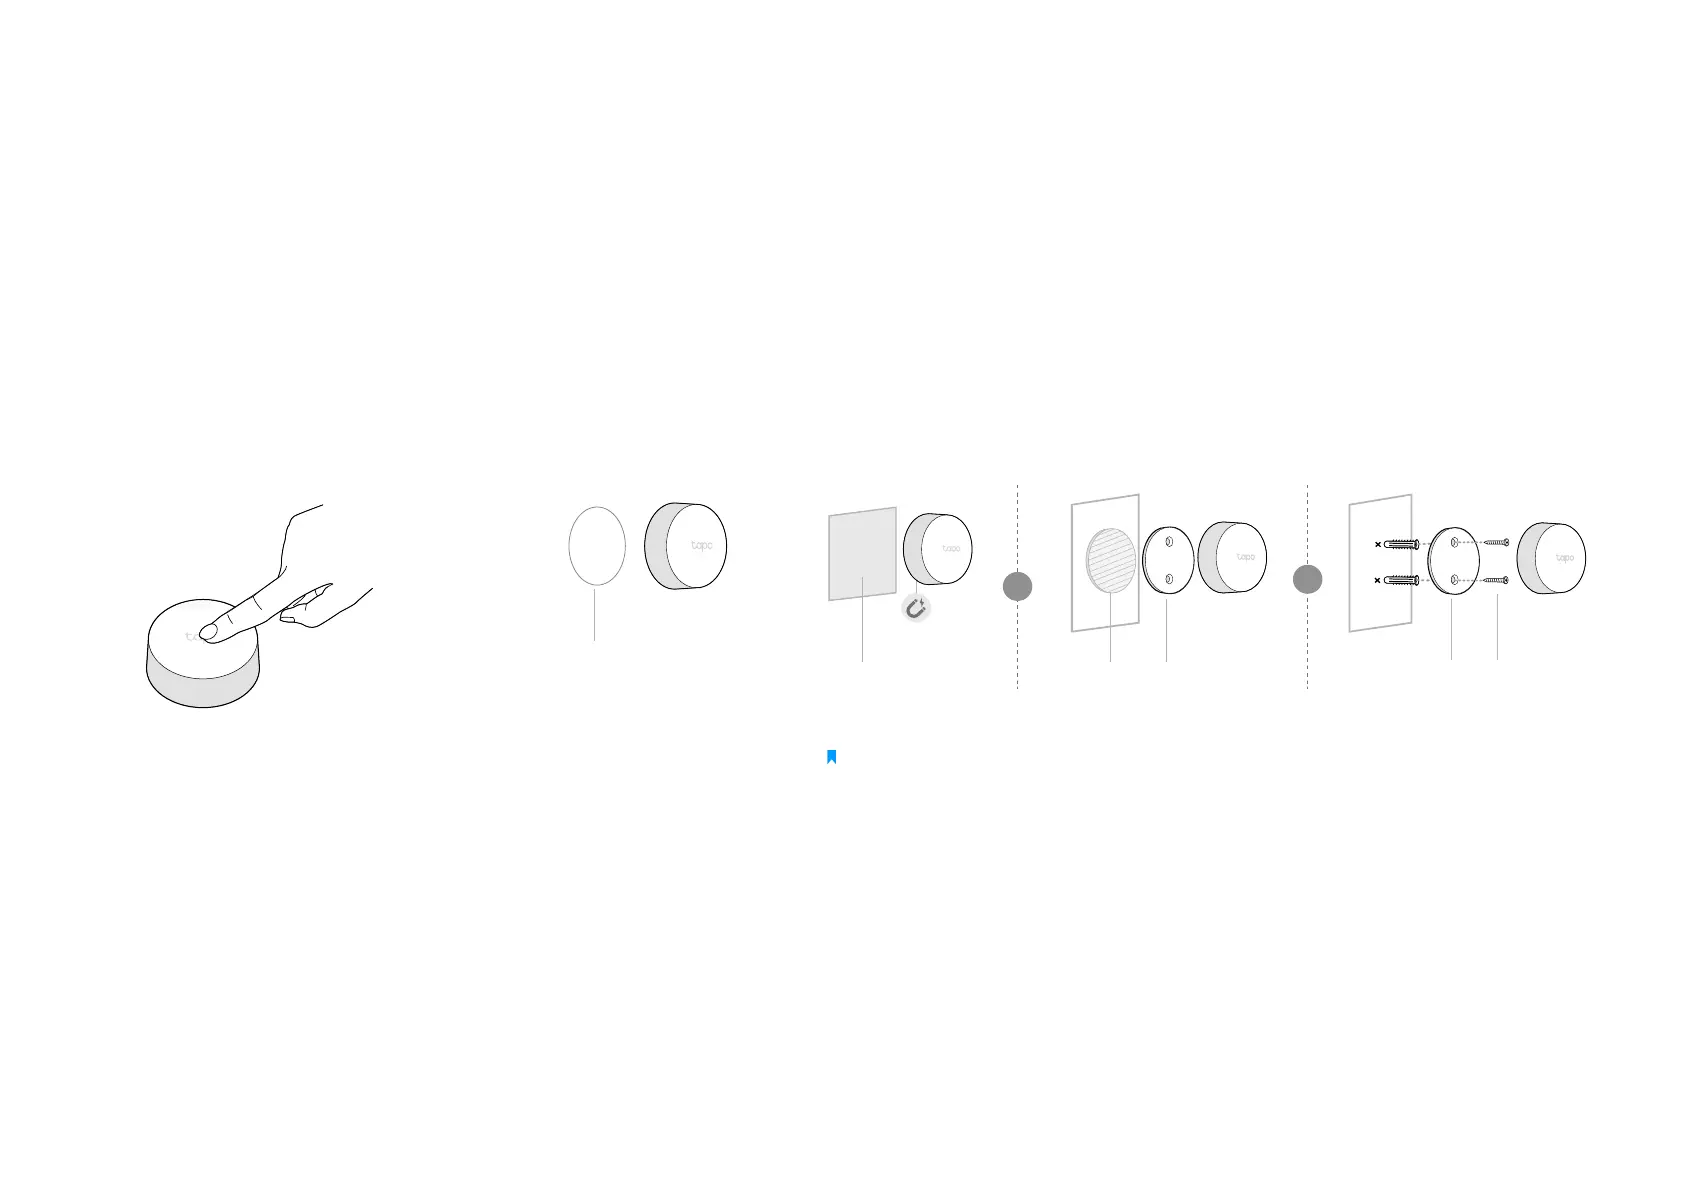
4. Secure Your Button (Optional)
a. Attach the non-slip
pad to the button to
keep it rmly in place.
b. Magnetically attach the button to metallic objects. Alternatively,
you can attach the button to the provided bracket with either
adhesive or screws.
Note: Installation height should not be higher than 6.56 ft (2 m).
Non-slip Pad
Bracket Screws
OR
Metallic Object
Adhesive Bracket
3
M
3
M
OR