When the DHCP Server is On, please make sure that IP Address Pool,
Default Gateway for the DHCP server and LAN IP address are in the same
segmengt as the router. Otherwises, the extender cannot access the
Internet.
1) Launch a web browser and type in http://tplinkrepeater.net, then go to
Settings->Network webpage.
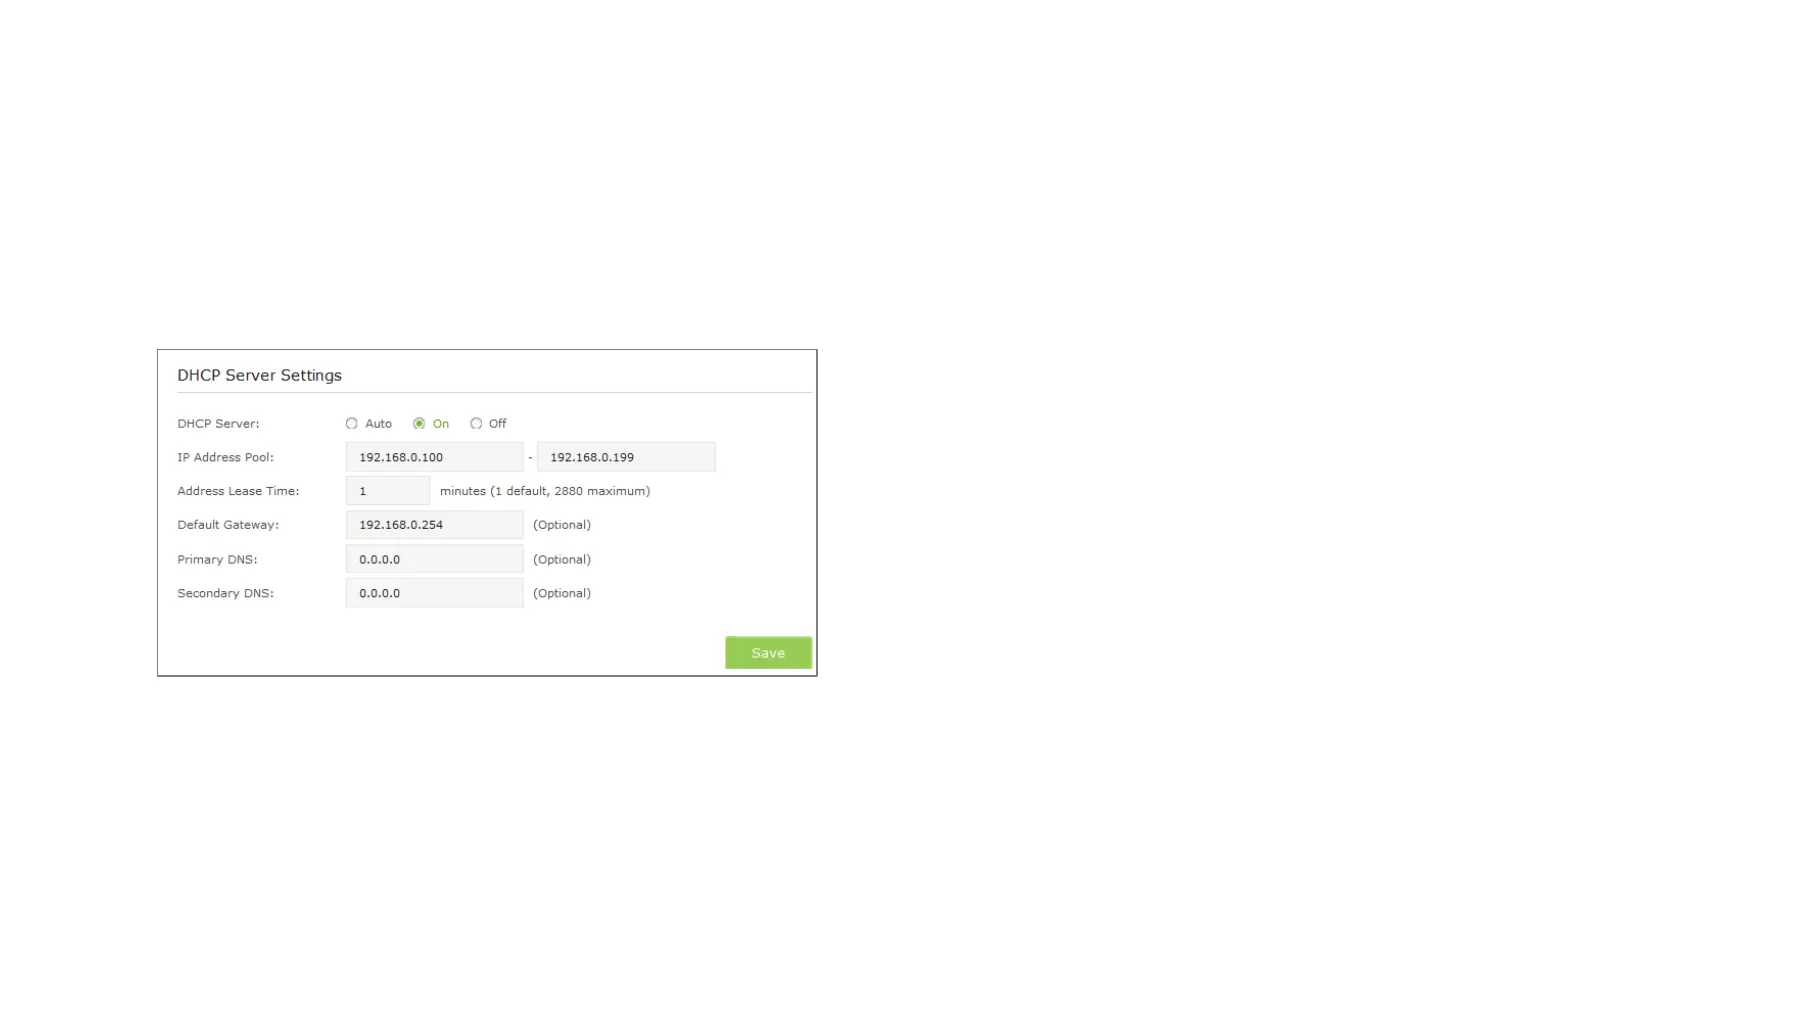
2) If the DHCP Server is On, please configure it as shown in the figure
bleow.
IP Address Pool
Enter a range of IP address that can be leased to
the clients. By default, the starting IP address is 192.168.0.100 and
the ending IP address is 192.168.0.199.
Address Lease Time
Enter the time duration that an IP address is
leased to the client, between 1 and 2880 minutes. The default is 1
minute.
Default Gateway (Optional): Enter the LAN IP address of your host
network.
Primary DNS (Optional): Enter the DNS IP address provided by
your ISP.
Secondary DNS (Optional): Enter the second DNS IP address
provided by your ISP.
3) Click Save to save your changes.
● Disable DHCP Server
If the DHCP server of the extender is Off, please make sure the DHCP
server of your router is on. Otherwise, you have to configure the IP
address for each client manually.
1) Launch a web browser and type in http://tplinkrepeater.net, then go to
Settings->Network webpage.
2) Select Off, then click Save to save the settings.
View the DHCP Client List
The DHCP Client List displays the Client Name, MAC Address, Assigned IP
and Lease Time for each DHCP Client attached to the device.
1) Launch a web browser and type in http://tplinkrepeater.net, then log in
to Settings->Network webpage.
2) You can view the information of the DHCP clients connected to the
extender in the DHCP Client List.
Manage the Extender 20
 Loading...