13
Chapter 3
Conguring via Web Management Interface
3. Connect your phone to the wireless network of the extender. Then launch the app
and you can see the extender you added on Device list.
4. Create a password to log in.
3. 2. Manage Powerline Network
A powerline network is formed of powerline devices, including adapters and extenders.
Powerline devices in the same powerline network share the same powerline network
name.
3. 2. 1. Add a New Device to the Powerline Network
1. Connect to the powerline extender wirelessly. Visit http://tplinkplc.net, and log in with
the password you set for the extender.
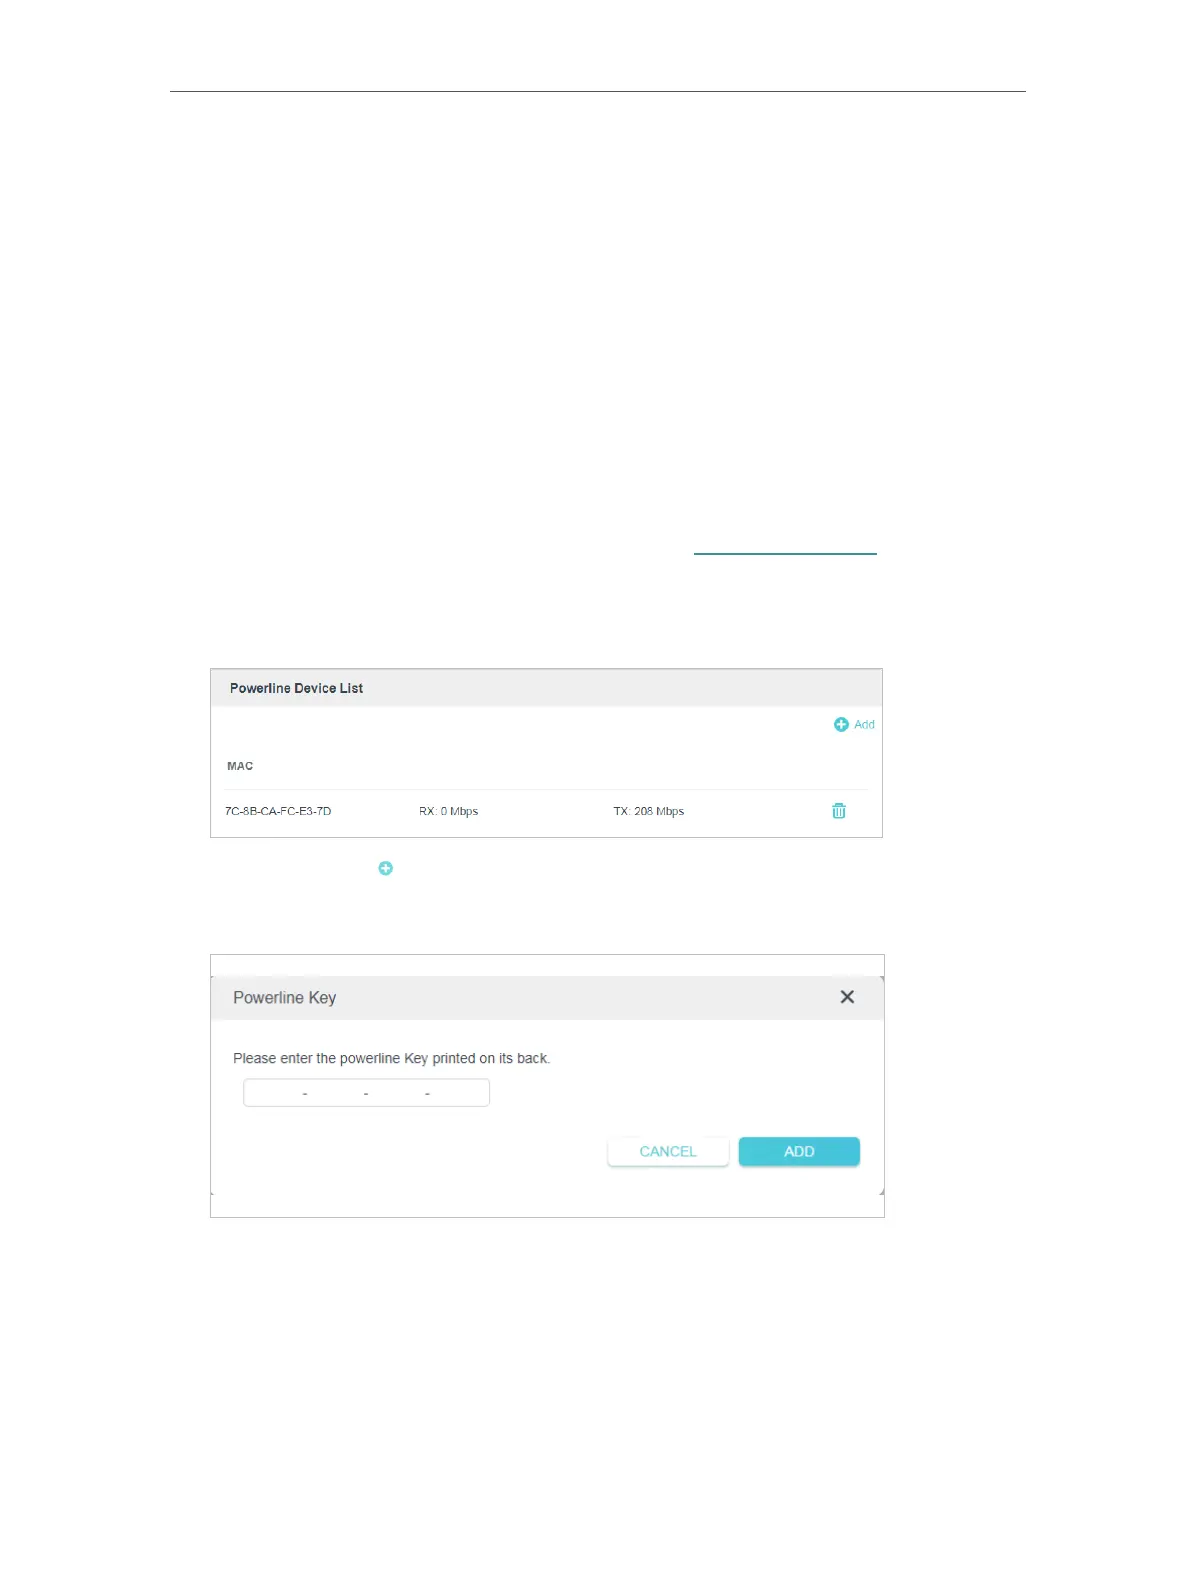
2. Go to the Status page and click the Powerline Network icon to open the Powerline
Device List.
3. Click the add icon and enter the Powerline Key of the device you want to add. The
Powerline Key contains 16 capital letters, formed like XXXX-XXXX-XXXX-XXXX. It is
printed on the back of the powerline device.
4. Click ADD to add the device.
3. 2. 2. Change Powerline Network Name
You can change the extender’s powerline network name to add it to or remove it from a
powerline network.
Follow the steps below to change the name.
 Loading...