B
22
Repair and Service Manual
WHEELS AND TIRES
Read all of SAFETY and this section before attempting any procedure. Pay particular attention to Notices, Cautions, Warnings and Dangers.
699322
To decrease the risk of component
damage, do not tighten the lug nuts
to more than the torque specified
below.
Check the lug nuts for tightness at the intervals indicated
in the See the SCHEDULED MAINTENANCE CHART on
page 141.
Wheel Removal
1. Lift the vehicle. See LIFTING THE VEHICLE on
page 11.
2. Remove the lug nuts.
3. Remove the tire from the vehicle.
Wheel Installation
NOTICE: To decrease the
risk of component dam-
age, do not tighten the lug
nuts to more than the
specified torque.
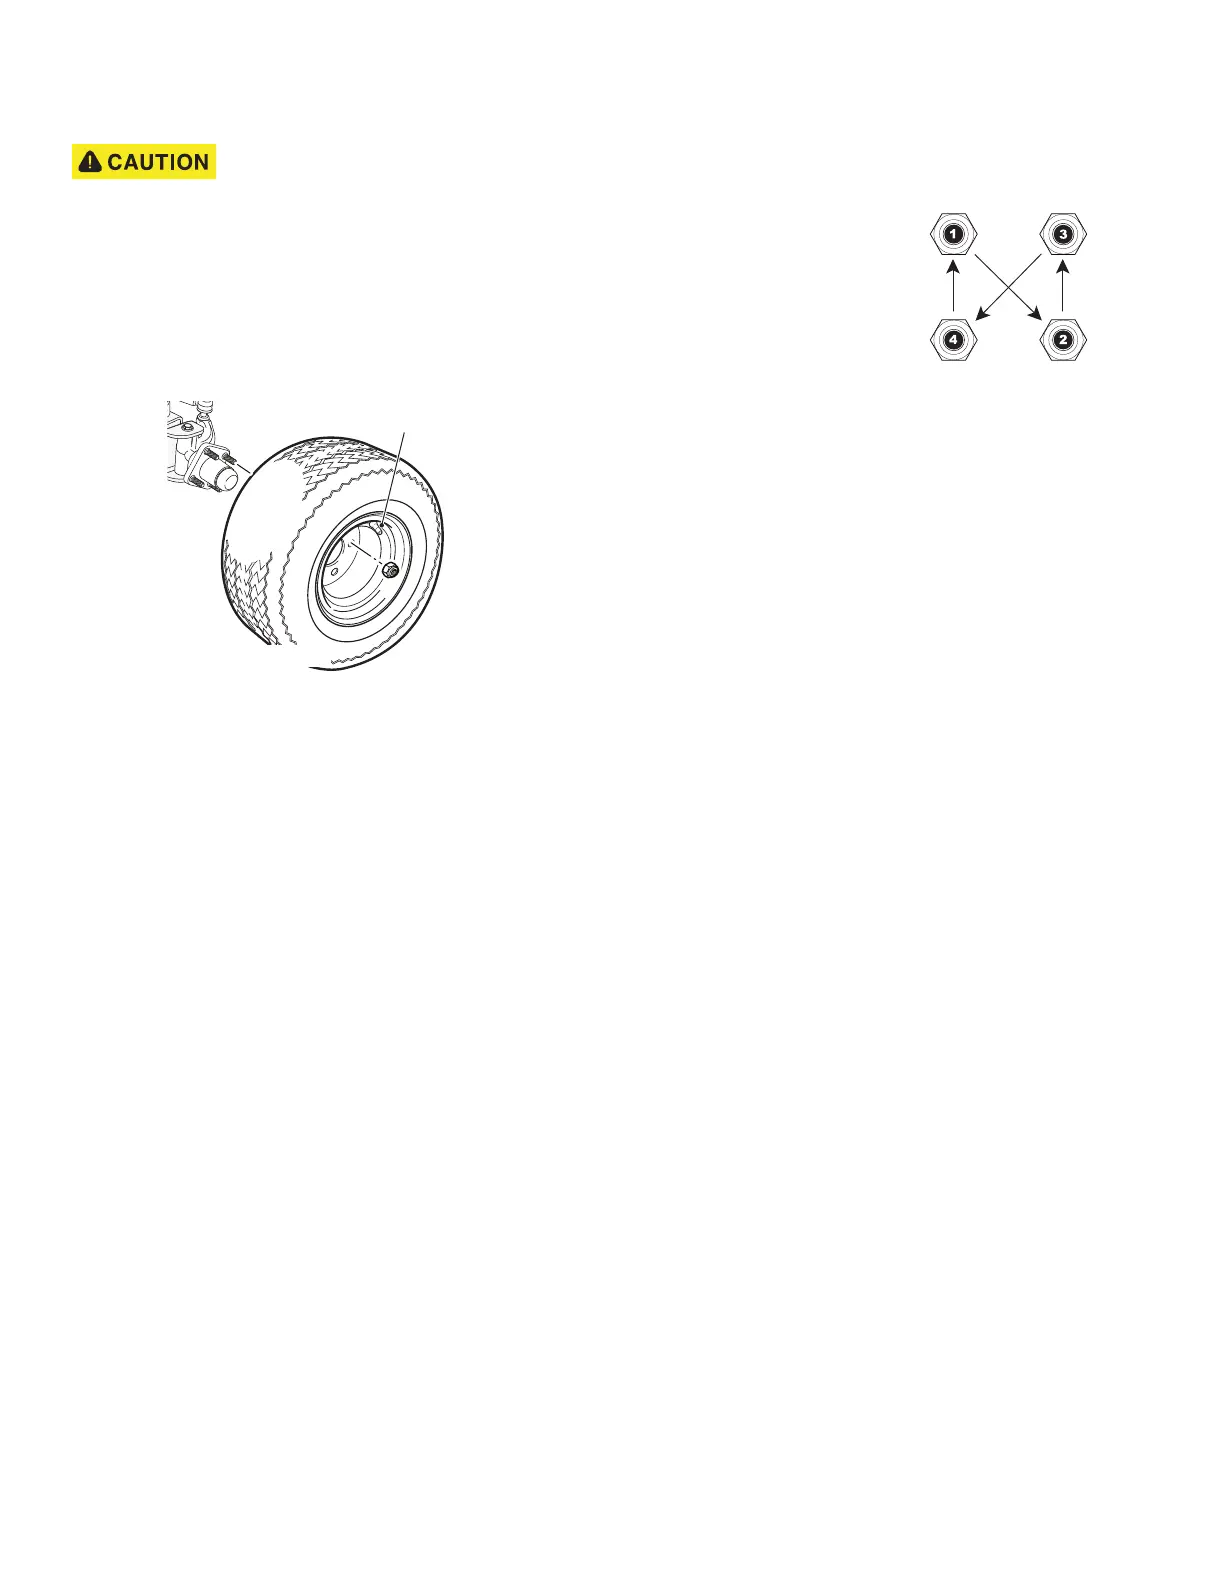
NOTICE: Always install
lug nuts using a cross
sequence pattern to
ensure the even seating
of the wheel against the
hub.
1. Install the wheel on the hub with lug nuts. Make sure
the valve stem is to the outside.
2. Finger tighten the lug nuts.
3. Using the cross tightening pattern shown to the right,
tighten the lug nuts to 65 - 85 ft. lbs. (88 - 115 Nm).
Tighten in increments of 20 ft. lbs. (27 Nm).
Valve Stem Cap
Tire style may vary.
Lug Nut Tightening Pattern