T10 Installation Notes v1.7
Generic T10 Installation Notes v1.7.doc 12.08.2015
Page 10
5.2 SIM Card
The SIM card fitting process is identical for the entire family range of products.
5.2.1 Before fitting the SIM card
1. If you have not already registered your SIM card with the mobile network, you should do this
before proceeding. Please refer to the appropriate mobile network operator instructions on
how you do this.
2. Make a note of the number on the SIM card (ESN) as well as a note of your Voice & Data
telephone numbers. There is a convenient space in Appendix B – T10 where you can
record this information.
3. Ensure that a PIN number does not protect the SIM card. If this is the case, it must be
removed before inserting it into the T10 platform – this can be done by inserting the SIM
into a suitable mobile telephone and then following your mobile telephone instruction
booklet.
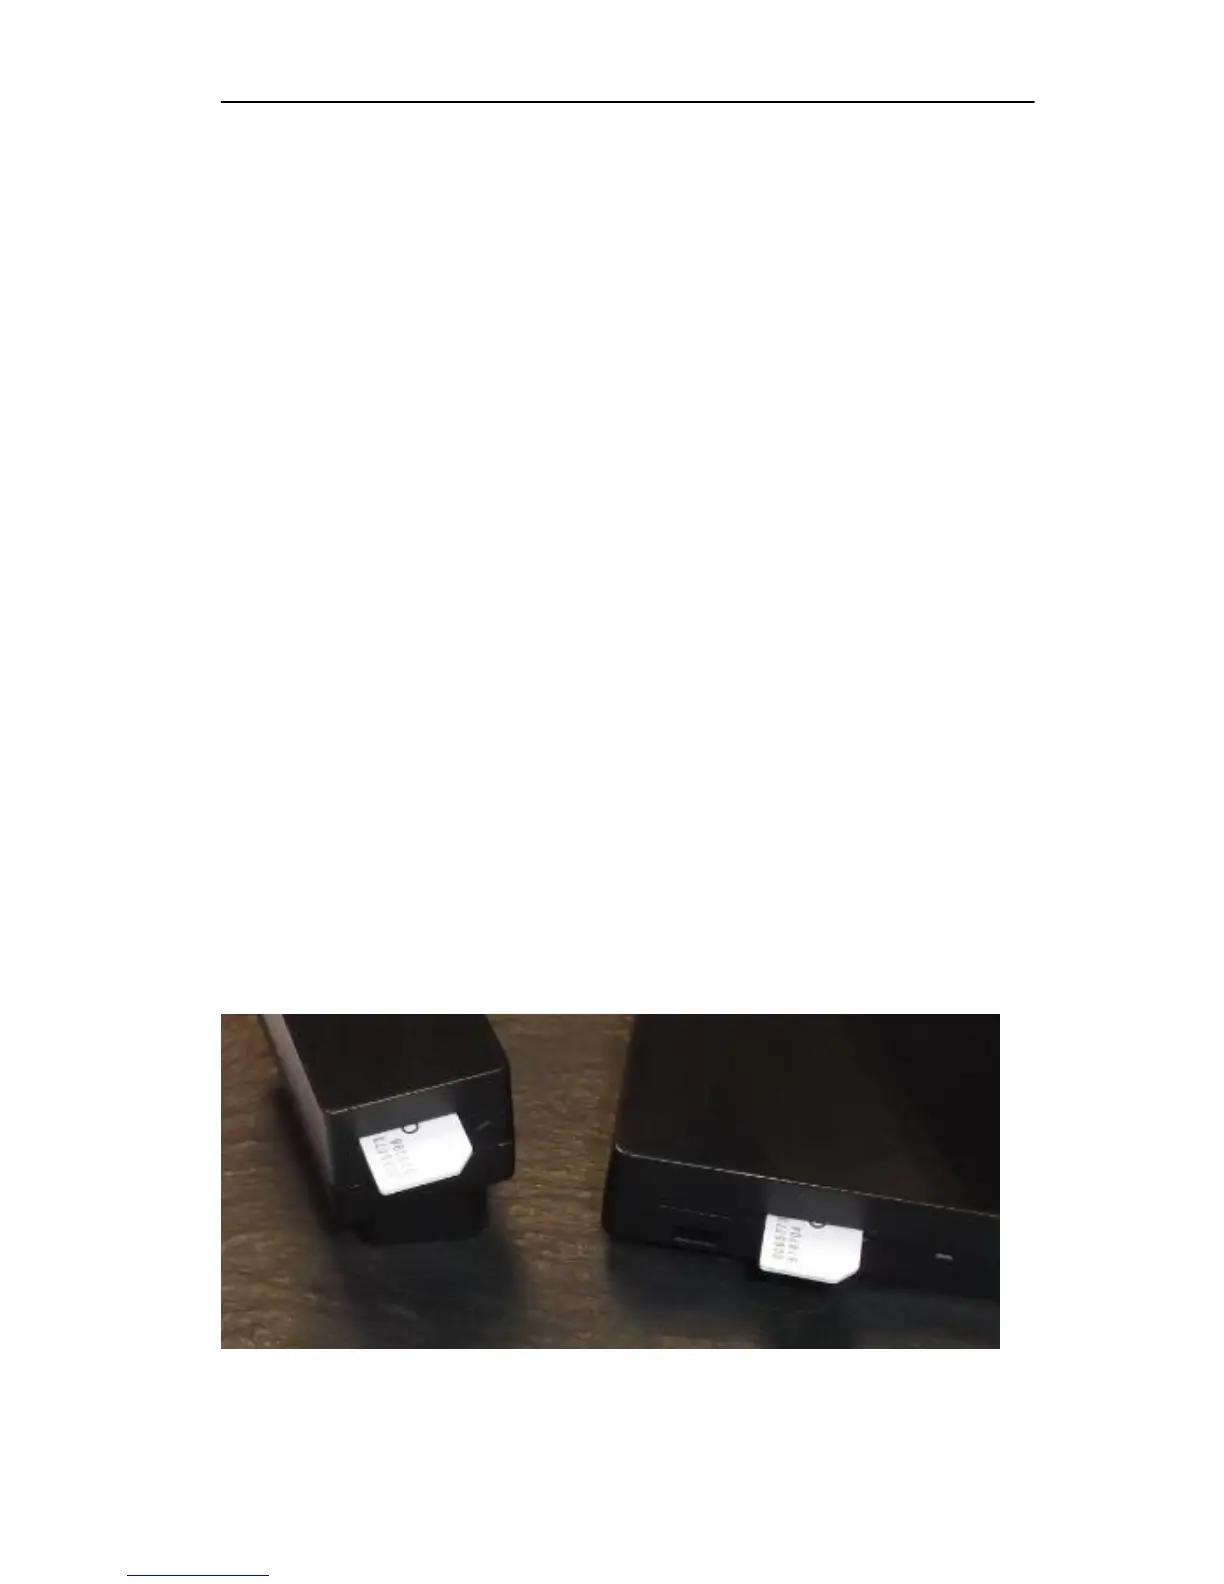
5.2.2 Fitting the SIM card
Important Note!
The T10 range of products has been designed with SIM security in mind and as such
incorporates measures to prevent the SIM from being easily removed from the unit. It is
therefore important to ensure the appropriate SIM card is fitted the correct way because once
fitted it is extremely difficult to remove the covers of the enclosure to rectify this. The SIM cradle
used in the T10 is of the micro design (small footprint) and therefore requires the use of a micro
SIM card. Most SIM providers are providing SIM cards of this new design and they are usually
supplied within a carrier card incorporating both styles.
You simply snap out the appropriate size of your choice.
1. The SIM card is inserted into the product with the gold contacts facing downwards and the
chamfered corner facing outermost as shown below. Ensure the SIM card is pushed home
fully within its holder until it drops slightly into its resting place slightly below the slot line.