Configuring the BCI-R
16 RF-SVN03F-EN
Configuring the BCI-R
The BCI-R can be configured with either the Tracer BACnet
Setup Tool or the Tracer TU service tool.
Note: The BCI-R controller is
fully configured from the
factory for use with Tracer SC based systems.
Additional configuration, or the use of Tracer TU,
may be necessary. Additionally, the BCI-R self-
configures itself to match the unit type upon initial
power-up. However, you may want to change the
controller default name to one that is more
meaningful.
Using the BACnet Setup Tool
This section describes how to configure the BCI-R
controller using the Tracer BACnet Setup Tool. For
assistance with using the setup tool, click the help
icon located in upper right portion of the screen.
10. Open the Tracer BACnet Setup Tool.
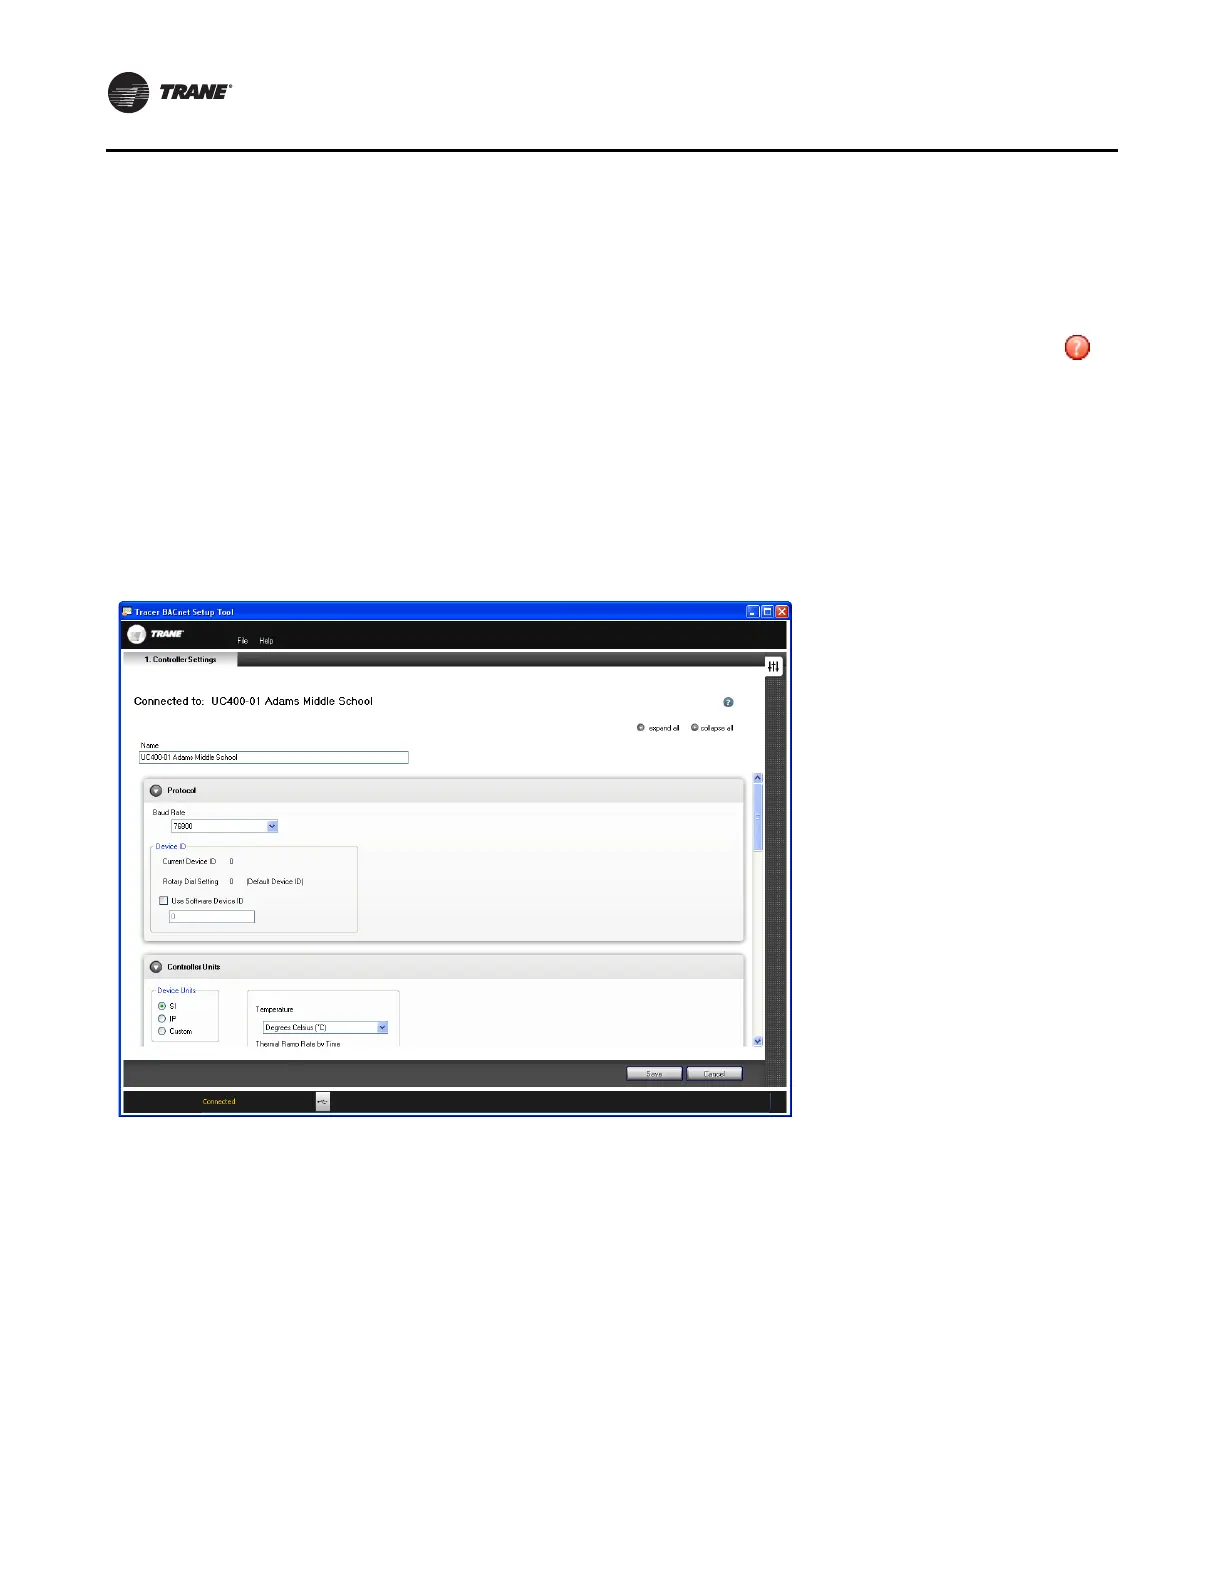
The Controller Settings screen appears (Figure 13).
11. In the Protocol and Controller Units sections, change or
keep
the default settings for the baud rate, software
device ID, and the device units.
12. Click save.
Figure 13. BACnet Setup Tool Controller Settings screen (connected to a UC400 as an example)
Using Tracer TU
This section describes how to first connect to the Tracer TU
software and then configure the
BCI-R controller. If Tracer TU is not installed, refer to the
“Tracer TU Service Tool
Getting Started Guide” (TTU-
SVN02). Tracer TU software, Version 7.0 or higher, is
required.
To connect to Tracer TU:
1. Connect the USB cable directly from the laptop to the
BCI-R,
or to an
equipment control panel USB port
connected to the controller.
Important: If using a PC
with multiple USB ports,
connect by using the same process outlined
below for the same piece of equipment.
This is normal operation. Observe existing
USB standards for cable length. (For more
information go to informational Web sites,
such as http://www.USB.org.)
2. Click either the Tracer
TU desktop icon or the Tracer TU
program item in the Tracer TU group on the Start
menu.