Mounting and Installing the Controller
8 RF-SVN03F-EN
Mounting and Installing the Controller
Important: Read the following safety warnings prior to
installation. Procedures presented in this
guide should be performed only by
qualified HVAC technicians.
WARNING
Live Electrical Components!
During installation, testing, servicing and
troubleshooting of this product, it may be necessary to
work with live electrical components. Have a qualified
licensed electrician or other individual who has been
properly trained in handling live electrical components
perform these tasks. Failure to follow all electrical
safety precautions when exposed to live electrical
components could result in death or serious injury.
WARNING
Hazardous Voltage!
Disconnect all electric power, including remote
disconnects before servicing. Follow proper lockout/
tagout procedures to ensure the power can not be
inadvertently energized. Failure to disconnect power
before servicing could result in death or serious injury.
Notes: In
addition to these
instructions, refer to the
specific rooftop unit literature when installing
the controller.
To install the BCI-R controller:
1. Disconnect all power from the rooftop unit.
2. Mount the BCI-R controller using the supplied screws.
The
following figures depict
mounting positions for
various rooftop units.
3. Route and connect the wiring harness as described in
“Connecting the Factory Wiring Harness,” p. 13.
4. Set the rotary switches as described in “Setting
Addresses Using Rotary Switches,” p. 12.
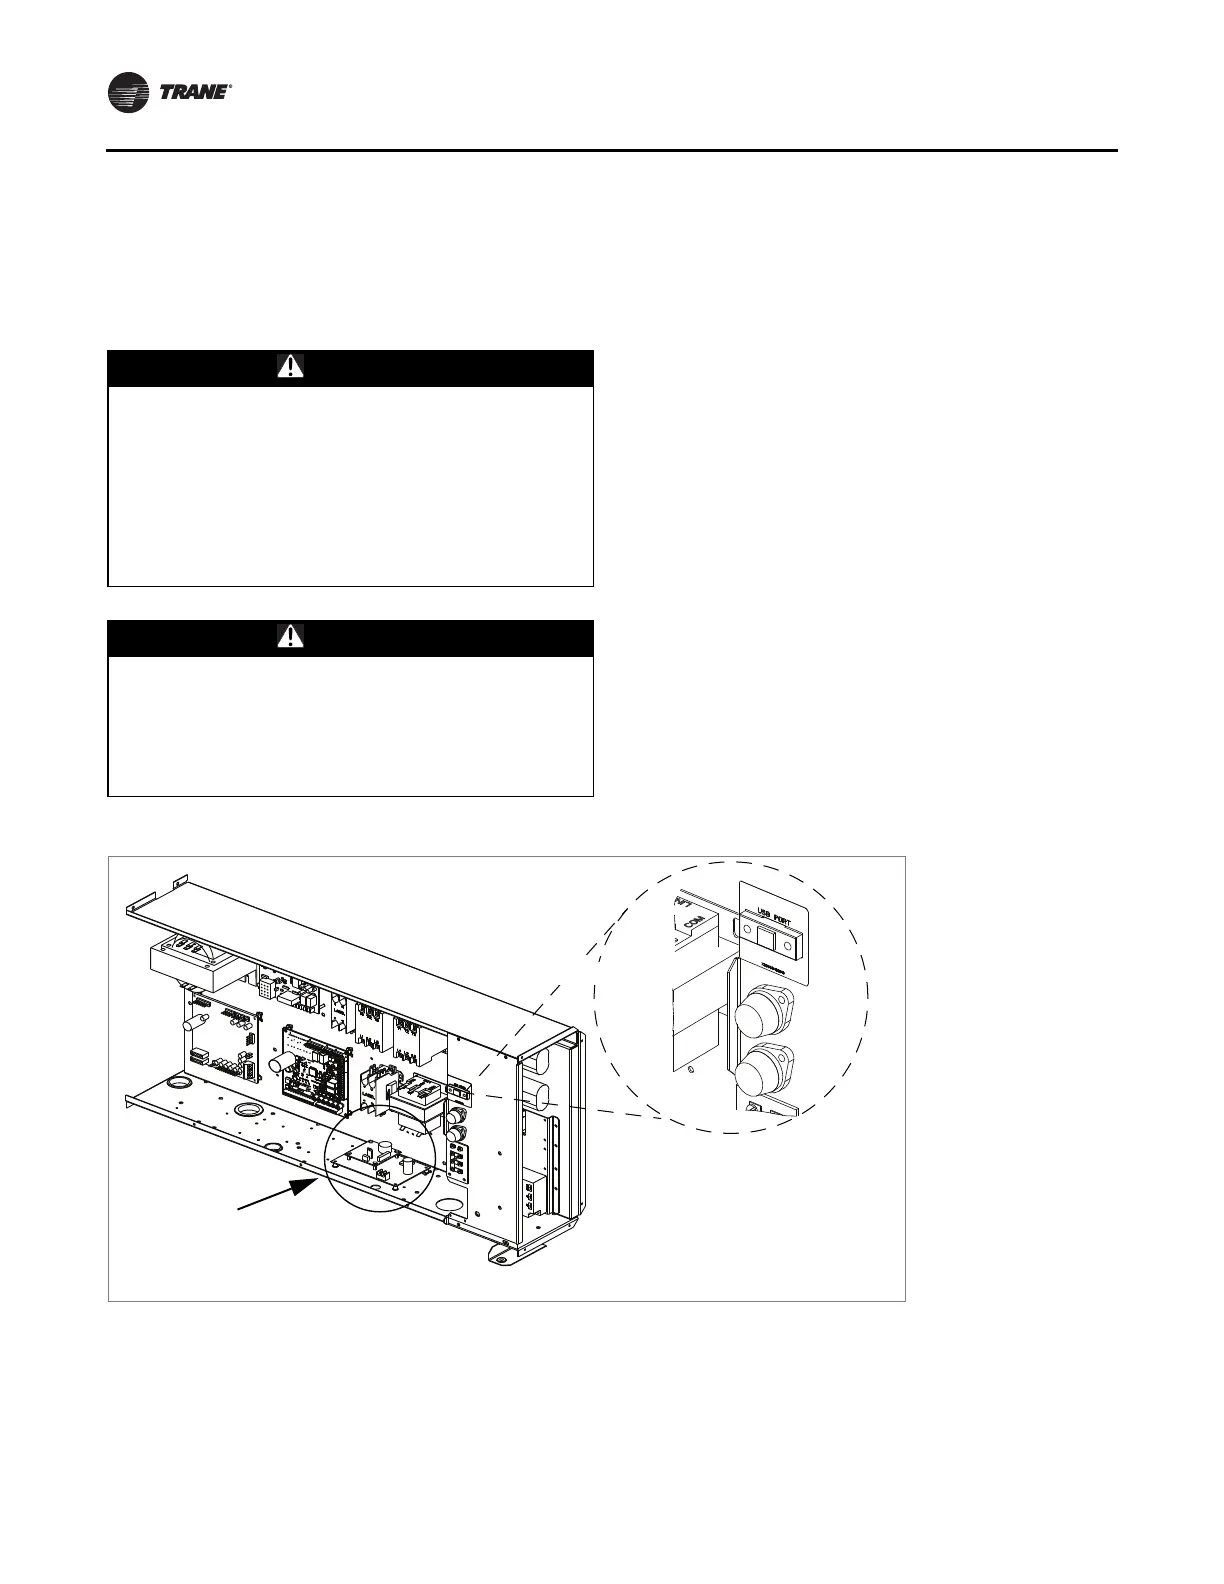
5. Install the USB bulkhead port in the designated area of
the rooftop unit, by
using the supplied screws.
Note: The USB bulkhead port
is a remote extension of
the USB port located on the BCI-R module. Each
rooftop unit will have a designated port
location. As an example, Figure 1, p. 8, shows
where
the port is
located on Voyager II rooftop
units.
6. Complete wiring procedures as described in “Field
Wiring Procedures,” p. 13.
Figure 1. Voyager II (all units)
USB bulkhead port
BCI-R