Do you have a question about the Trane 4DCZ6036 and is the answer not in the manual?
Check unit for damage, verify nameplate, and confirm refrigerant charge retention after unloading.
Guidelines for unit placement, serviceability, and clearances for horizontal airflow units.
Guidelines for unit placement, serviceability, and clearances for down airflow units.
Attaching the flue hood to the unit using provided mounting screws.
Steps for mounting the unit at ground level, including pad placement and clearance checks.
Procedure to modify the unit's airflow configuration from horizontal to downflow.
Guidance on verifying and installing the appropriate roof mounting curb for the unit.
Guidelines for safely lifting and rigging the unit, emphasizing test lifts and proper equipment.
Instructions for positioning the unit onto the roof curb, ensuring proper contact and alignment.
Procedure for installing the unit on a rooftop using a field-fabricated frame.
Procedure for installing the unit on a flat roof using sleeper rails, without a curb or frame.
Connecting ductwork to roof curbs using provided flanges for easy installation.
Guidelines for constructing downflow ductwork, including canvas connectors and elbow placement.
Connecting horizontal ductwork, emphasizing insulation and flexible connections.
Details on connecting the condensate drain, including trap requirements and pitching.
Procedure for calculating and selecting the correct pipe size for natural gas supply.
Critical precautions for line pressure testing and isolating the furnace during tests.
Guidelines for managing gas supply line pressure, including regulator installation and checks.
Checking the manifold pressure at the unit gas valve against nameplate recommendations.
Procedure for checking and adjusting the gas input rate, including meter clocking and manifold pressure.
A comprehensive checklist to ensure all installation steps are completed before unit startup.
Procedure for initiating the unit's cooling operation via thermostat control.
Monitoring and verifying operating pressures and line voltage during cooling operation.
Steps to start the unit in heat pump heating mode using thermostat settings.
Procedure for initiating the gas furnace heating cycle, including gas valve and burner checks.
Procedure for starting the unit in gas heating mode, including purging and thermostat settings.
Checking and adjusting manifold pressure for optimal gas heating performance.
Steps to properly shut down the unit's heating operation.
Details on operational differences between CONT402 and CONT802/CONT803 thermostats.
Explanation of how the demand defrost control operates to clear frost from the outdoor coil.
Periodic maintenance tasks that the unit owner can perform, such as filter checks and cleaning.
Recommended service checks for cooling and heating seasons by qualified technicians.
Instructions for cleaning the unit's flue system before the heating season.
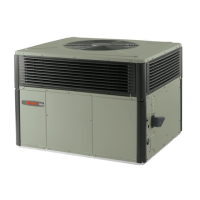
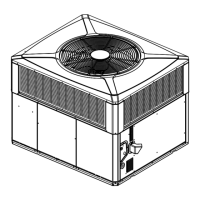
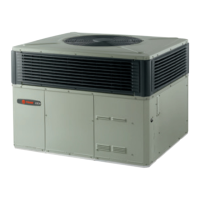
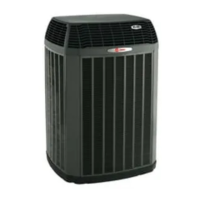
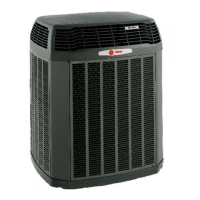
This document serves as an installer's guide for a single packaged dual fuel 16 SEER convertible unit, ranging from 3 to 5 tons and 60 to 115 KBTU, using R-410A refrigerant. It emphasizes compliance with national, state, and local codes for all installation phases and instructs the installer to return the guide to the service information pack and provide it to the homeowner upon completion.
The guide begins with critical safety considerations, highlighting potential hazards such as electrical components, fast-moving fans, and combustible gas. It warns against personal injury, property damage, and death if proper procedures are not followed during installation and service. Specific warnings include disconnecting electrical supply and turning off the main gas valve before servicing, and recognizing hazards if operating checks require the unit to be running. It also stresses not operating the unit without evaporator fan or coil access panels in place.
The document also addresses the presence of fiberglass wool insulation, noting that fiberglass dust and ceramic fibers are believed to cause cancer through inhalation, and may also cause respiratory, skin, or eye irritation. Precautionary measures include avoiding breathing fiberglass dust, using a NIOSH-approved respirator, wearing protective clothing, gloves, and eye protection, and washing clothes separately. First aid measures for eye and skin contact are provided.
A warning regarding hazardous chemicals, including lead, known to cause cancer and birth defects, is included, directing users to www.P65Warnings.ca.gov for more information. For installations in Massachusetts, it specifies that the product must be gas piped by a Licensed Plumber or Gas Fitter.
The guide outlines a structured installation process, starting with inspecting the shipment for damage and verifying the unit nameplate against the intended application. It advises checking for refrigerant charge retention and, if hoisting, recommends using spreader bars to prevent damage. For curb installations, it emphasizes verifying the correct curb model.
The installation process details both ground-level and rooftop mounting. For ground-level installations, the unit should be placed on a level pad for proper water drainage, with vibration support. Rooftop installations involve converting the unit from horizontal to down airflow by repositioning covers and installing a full perimeter roof mounting curb. The guide provides detailed instructions for securing the curb to structural members and ensuring proper drainage.
Ductwork installation guidelines are provided for both downflow and horizontal configurations, emphasizing the use of canvas connectors to minimize noise and vibration, insulating outdoor ductwork, and sealing all holes. Condensate drain piping instructions include using 3/4-inch pipe, pitching it downward, trapping it, and ensuring it's not connected to a closed drain system without proper venting.
Gas piping installation is covered with strict safety warnings against using open flames for leak detection and emphasizing the use of soap solution. It provides a pipe delivery schedule for natural gas, including calculations for cubic feet per hour (CFH) based on specific gravity and pipe length. Precautions for gas pressure setup are detailed, including disconnecting the furnace from the gas supply piping during pressure tests exceeding 1/2 PSIG. Manifold pressure adjustment procedures are also included, with instructions for using a manometer and adjusting the gas valve.
High altitude installation information is provided, with a derate chart for various altitudes and input values, noting that orifice changes may be required for specific LP installations. Air filter installation specifies the need for an air filter, either using factory-offered accessories or a field-supplied filter rack in the return ductwork.
Electrical wiring instructions emphasize compliance with local codes and the National Electrical Code ANSI/NFPA 70. It details power wiring, including wire sizing, weather-tight conduit, strain relief, and connecting high voltage wires to contactor lug terminals. Grounding requirements are explicitly stated, noting that the gas pipe is not an adequate ground. Control wiring (Class II) instructions cover low voltage wiring, thermostat cable routing, and recommended wire sizes and lengths to prevent voltage drop.
The guide describes two modes of operation: restricted and non-restricted. In restricted mode, an outdoor temperature sensor dictates whether the unit operates in heat pump or gas heating mode, with gas heat assisting during defrost cycles. Non-restricted mode allows the heat pump to operate in stages, with gas heat engaging only if the heat pump capacity is insufficient.
The startup procedure includes a pre-start quick checklist covering unit location, ductwork, gas piping, condensate line, filter, wiring, grounding, thermostat, and air conditioning system checks. Detailed steps for starting the unit in cooling mode, heat pump heating mode, and gas furnace heating cycle are provided, including operating pressure checks and voltage checks.
Maintenance sections cover both owner and service maintenance. Owner maintenance includes inspecting and replacing/cleaning air filters and keeping the condenser coil area clear. Service maintenance, to be performed by qualified technicians, involves checking filters, motors, economizer gaskets, safety controls, electrical components, condensate drain, duct connections, mounting support, and overall unit condition during cooling and heating seasons. Flue cleaning instructions are also provided, emphasizing safety precautions and the use of qualified personnel.
Finally, the guide explains ECM fan motor adjustments, detailing how to change blower motor speeds using dip switches on the ECM Fan Control board. It also includes IGN board diagnostic codes via status LEDs for troubleshooting.
| SEER | 16 |
|---|---|
| HSPF | 9.5 |
| Refrigerant Type | R-410A |
| Voltage | 208/230V |
| Phase | 1 |
| Compressor Type | Scroll |
| Sound Level (Outdoor Unit) | 76 dB |
| Cooling Capacity | 36000 BTU/h |