25
24
Maintenance
Maintenance
Direct expansion coils
Never use hot water or steam to clean
these coils. During normal opeartion,
the fin block must not ice up. If this
occurs, check the refrigeration system.
Refrigerant coils should be kept clean
to maintain maximum performance. If
fins become dirty, clean with cold water
and detergent or one of the
commercially available chemicals coil
cleaners. Rinse coils thoroughly after
cleaning.
WARNING
Never use steam or hot water to
clean a refrigerant coil. Dangerous
pressures may be built up by
improper application of heat
resulting in equipment damage oe
personal injury.
7. Coil Winterization
Provisions must be made to drain those
coils that are not in use when subjected
to freezing temperature.
CAUTION
Failure to properly drain and vent
coils when not in use during freezing
temperatures may result in coil
freeze-up damage. Drain and vent
hardware provided by installing
contractor.
To drain these coils, blow out the coils
with compressed air, fill and drain the
tubes with full-strength ethylene glycol
several times, and then drain the coil
as completely as possible.
8. Pulley and Belt
Proper installation techniques will
assure that you get full service life and
minimum down time from your belt
drives.
1. Turn machine OFF and lock out
power source.
2. Remove belt guard, loosen motor
mounts and shorten center distance
between pulleys. Remove old belts.
3. lnspect. Repair or replace drives
components.
Clean oil, grease and debris from
pulleys, remove rust with wire
brush.
lnspect and replace damage
pulleys. Get your moneys worth
from a new set of belts by checking
and replacing worn or damaged
Pulleys. ln the long run,
replacement pulley cost will more than
be recovered in increased belt life,
reduced downtime, and lower
maintenance expenses.
Check following:
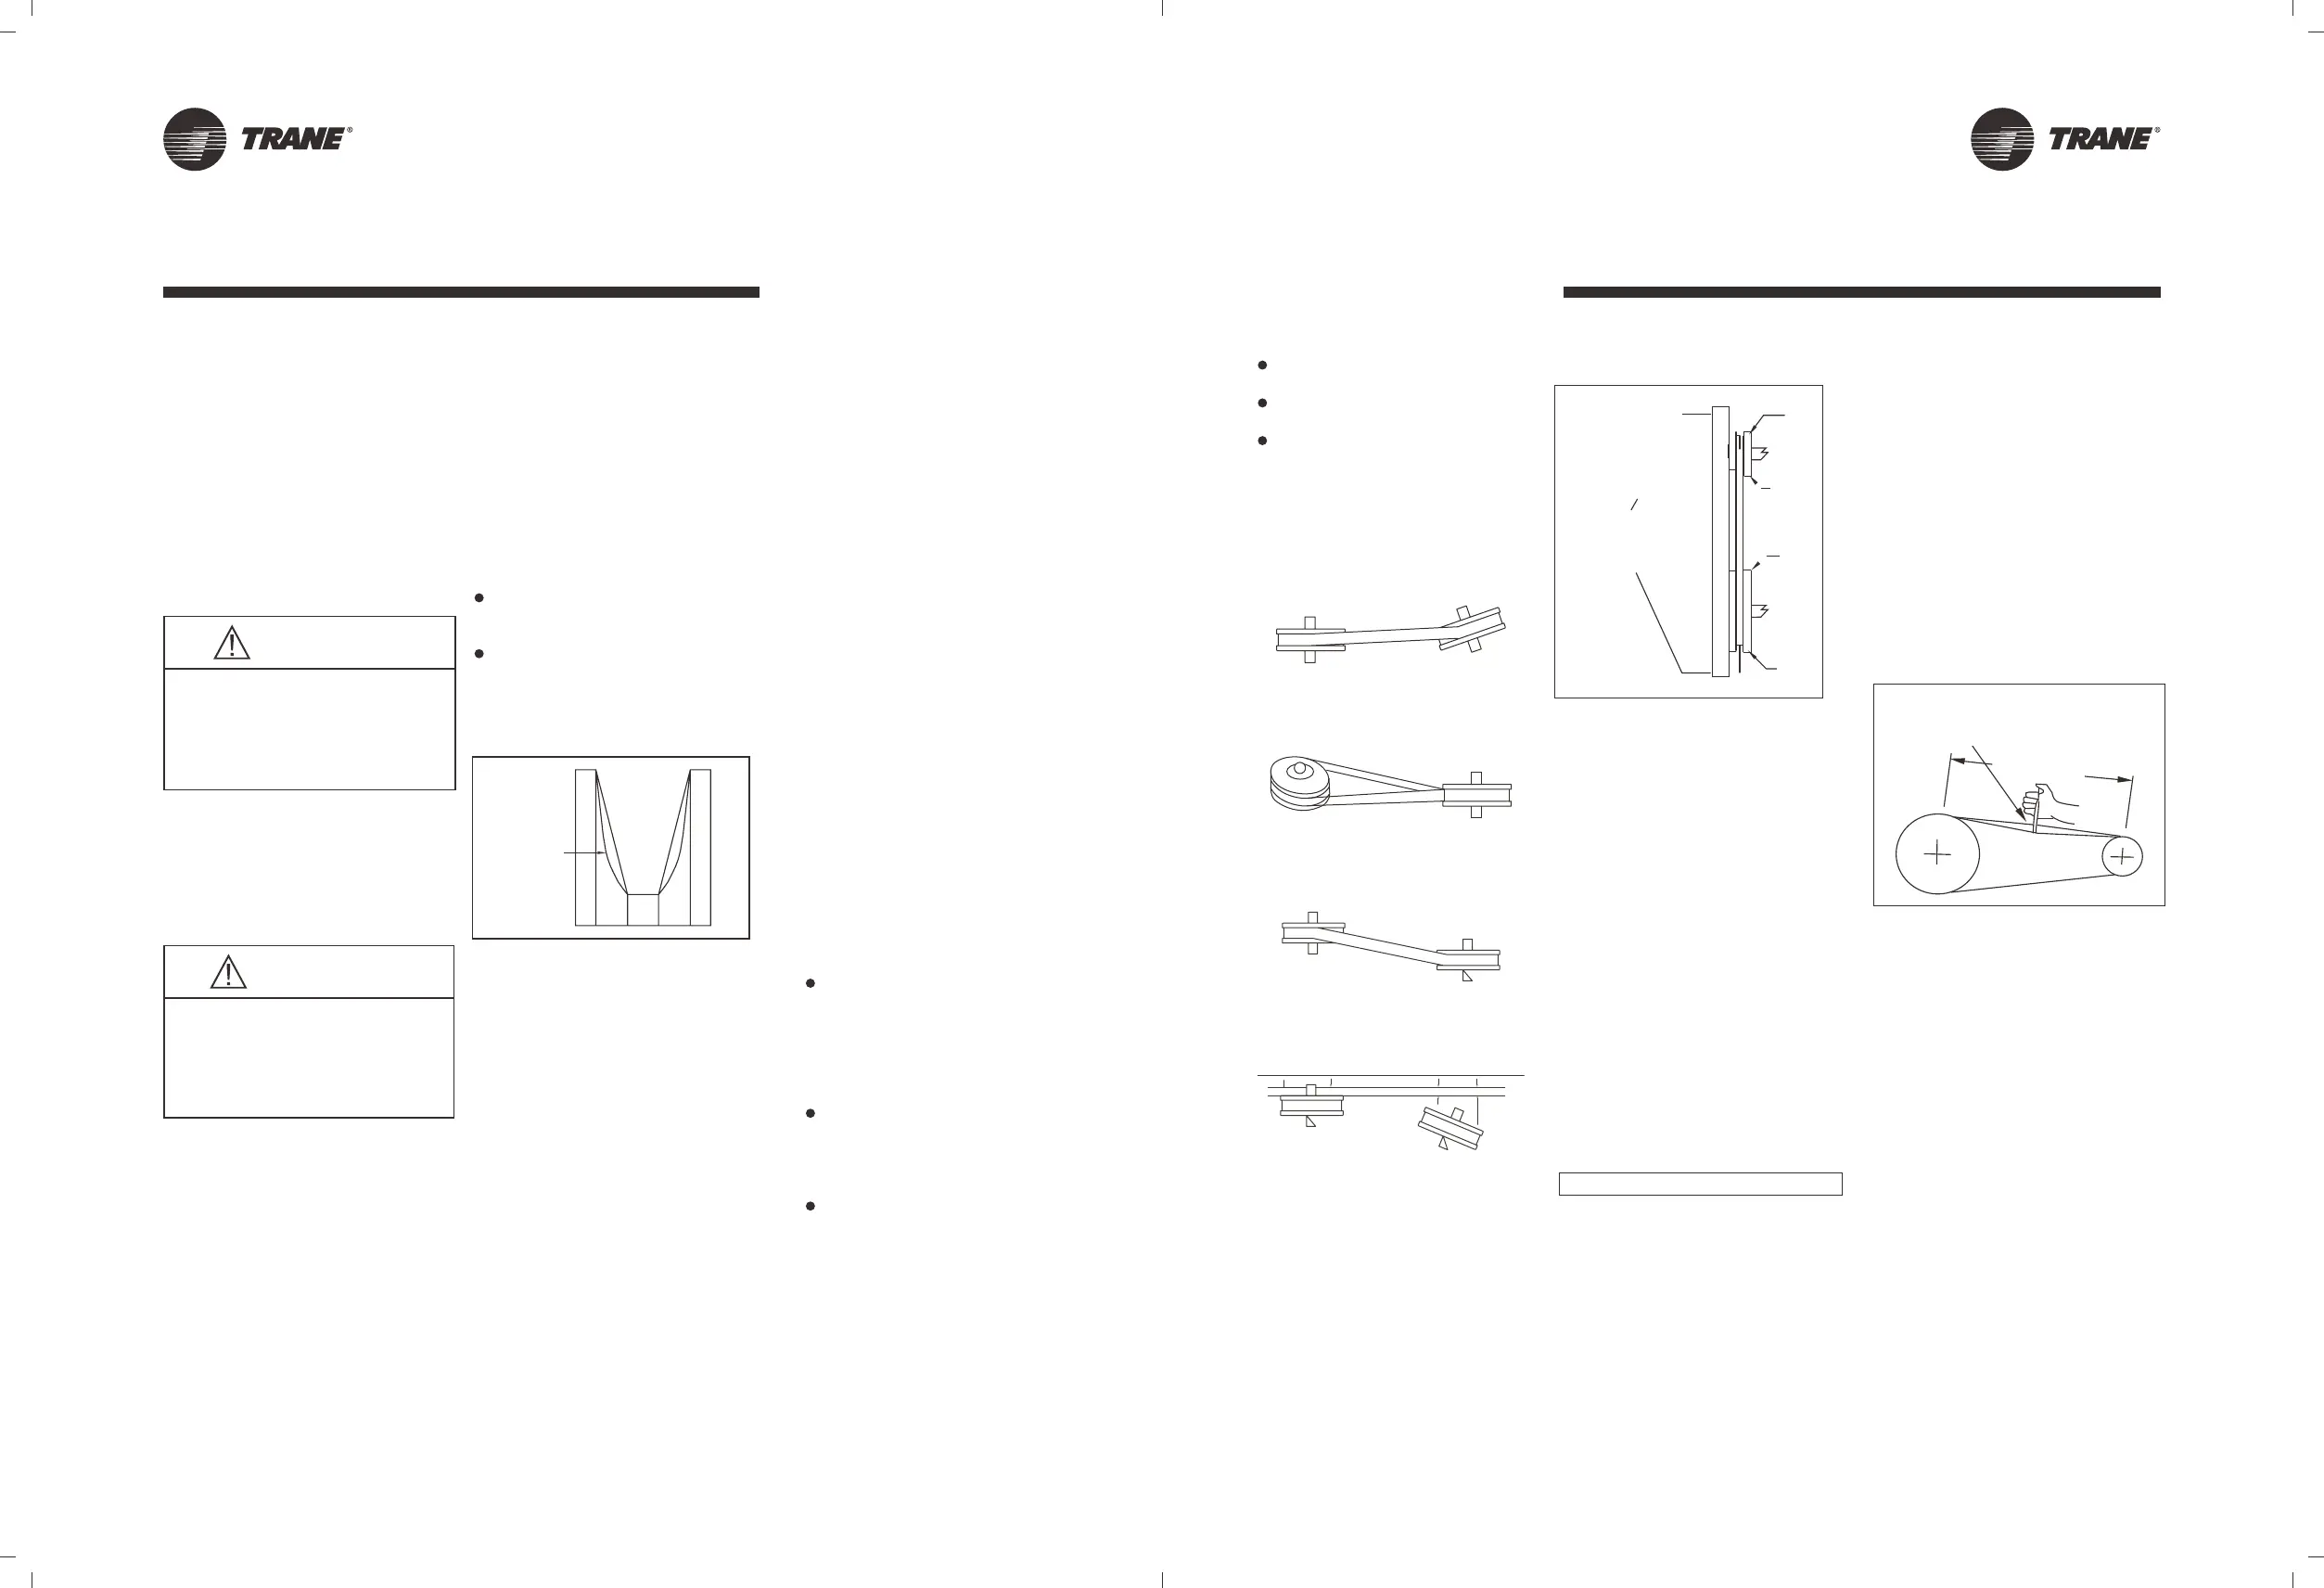
a) Worn groove sidewalls, "Dishing"
should not exceed 1/32"(0.8mm) for
individual belts. With a banded belt,
dishing should not exceed
1/64"(0.4mm). When a banded belt
rides too low in worn pulley
grooves the tie band can be cut
bythe flanges between the grooves.
b) Shiny pulley groove bottoms. This
is a sure sign that the belt has
Bottomed out. The resulting
slippage shortens belt life.
c) Wobbling and/or damaged pulleys.
Generally caused by improper
pulley or bushing installation,
wobbling and/or damaged pulleys
can unbalance a drive, wear out
belt rapidly, and damage bearings
and bend shafts.
Check and repair worn bearings and
bent shafts.
4. Select replacement belts.
Replace all belts on a drive with a new
matched set.
a) Do not mix old and new belts on a
drive. A new belt will ride higher in
the pulley groove and operate at a
higher tension than an old belt.
Running them together will
damaged the new belt as it cannot
carry its share of the load.
b) Do not mix belt from different make,
because dimensions and
constructions will vary running such
"Mis-Matched" belts will not give full
service life.
c) Replace with correct type and cross
section belt. Matched SPA section
belt with SPA section pulleys. Do not
put a SPA belt section on a SPB
section pulley. Also dimensionally
similar belts can have very different
horsepower rating.
5.lnstall new belts
Loosen the drive take up and place
the new belts on the pulley. Press
the belts with your hand to position
the slack of each belt on the same
side of the drive. lf the slack is on
different sides. start up loads can
break belt tensile cords.
Do not pry or force belts onto the
pulleys. This can break the load
Carrying tensile cords of the belt
and the belts will break or turn
Overs hortly after installation.
Take Up sleck until belts fit snugly.
6. Check pulley alignment.
Place a straight edge across
pulleys faces to correct alignment.
Check parallel position of shafts
And correct alignment or grooves.
Note: Mount pulleys as close to
Bearing as possible.
Note: Store belts in a cool, dry place
out of direct sunlight.
Types of sheave and shaft misalignment
Horizonal Angular
Vertical Angular
Parrallel
Align with straightedge along sheave faces
Figure 16
Sheave Alignment
Fan Belt Tension
Note: Fan belt tension should be
checked at least twice during the first
day of operation, since there is a rapid
decrease in tension until belts are run
in.
Proper belt tensioning is required to
ensure maximum bearing and drive
component life and is based on fan
brake horsepower requirement.
Belt Tension Measurement
Check the belt tension as follows:
Measure the span length mm of the
drive. With a belt tensioner at the
center of the span. apply a force K
(perpendicular to the span) large
enough to deflect the belt 15mm per 1
meter of span. Refer to figure 17.
DEFLECTION = SPAN mm X 15/1000mm
The deflection force for the belt should
be within the minimum and maximum
force shown in the Table 3. When the
tension drops to the minimum
value,readjust to the maximum value.
To measure belt tension, use a belt
tensioner as shownin Figure 18.
Determine actual deflection by
depressing one belt with th belt
tensioner and measuring the
deflection relative to the other belts or
to belt line. Adjust the belt tension to
the correct force (Newton) and tighten
all setscrews to the proper torques.
Figure 17
Belt Tension Measurement
Dishing
Driver
Equal distance,top and
bottom, from belt center
line to straight edae.
Driver
A
B
C
D
Deflection=SPANmm×15/1000mm
Bell Span