Figure 28. Harness routing
Actuator Controls Harness and
Differential Controls Harness
Pop-in TIes for Wire Routing
Installation - FIAECON203*
ACC-SVN264B-EN 17
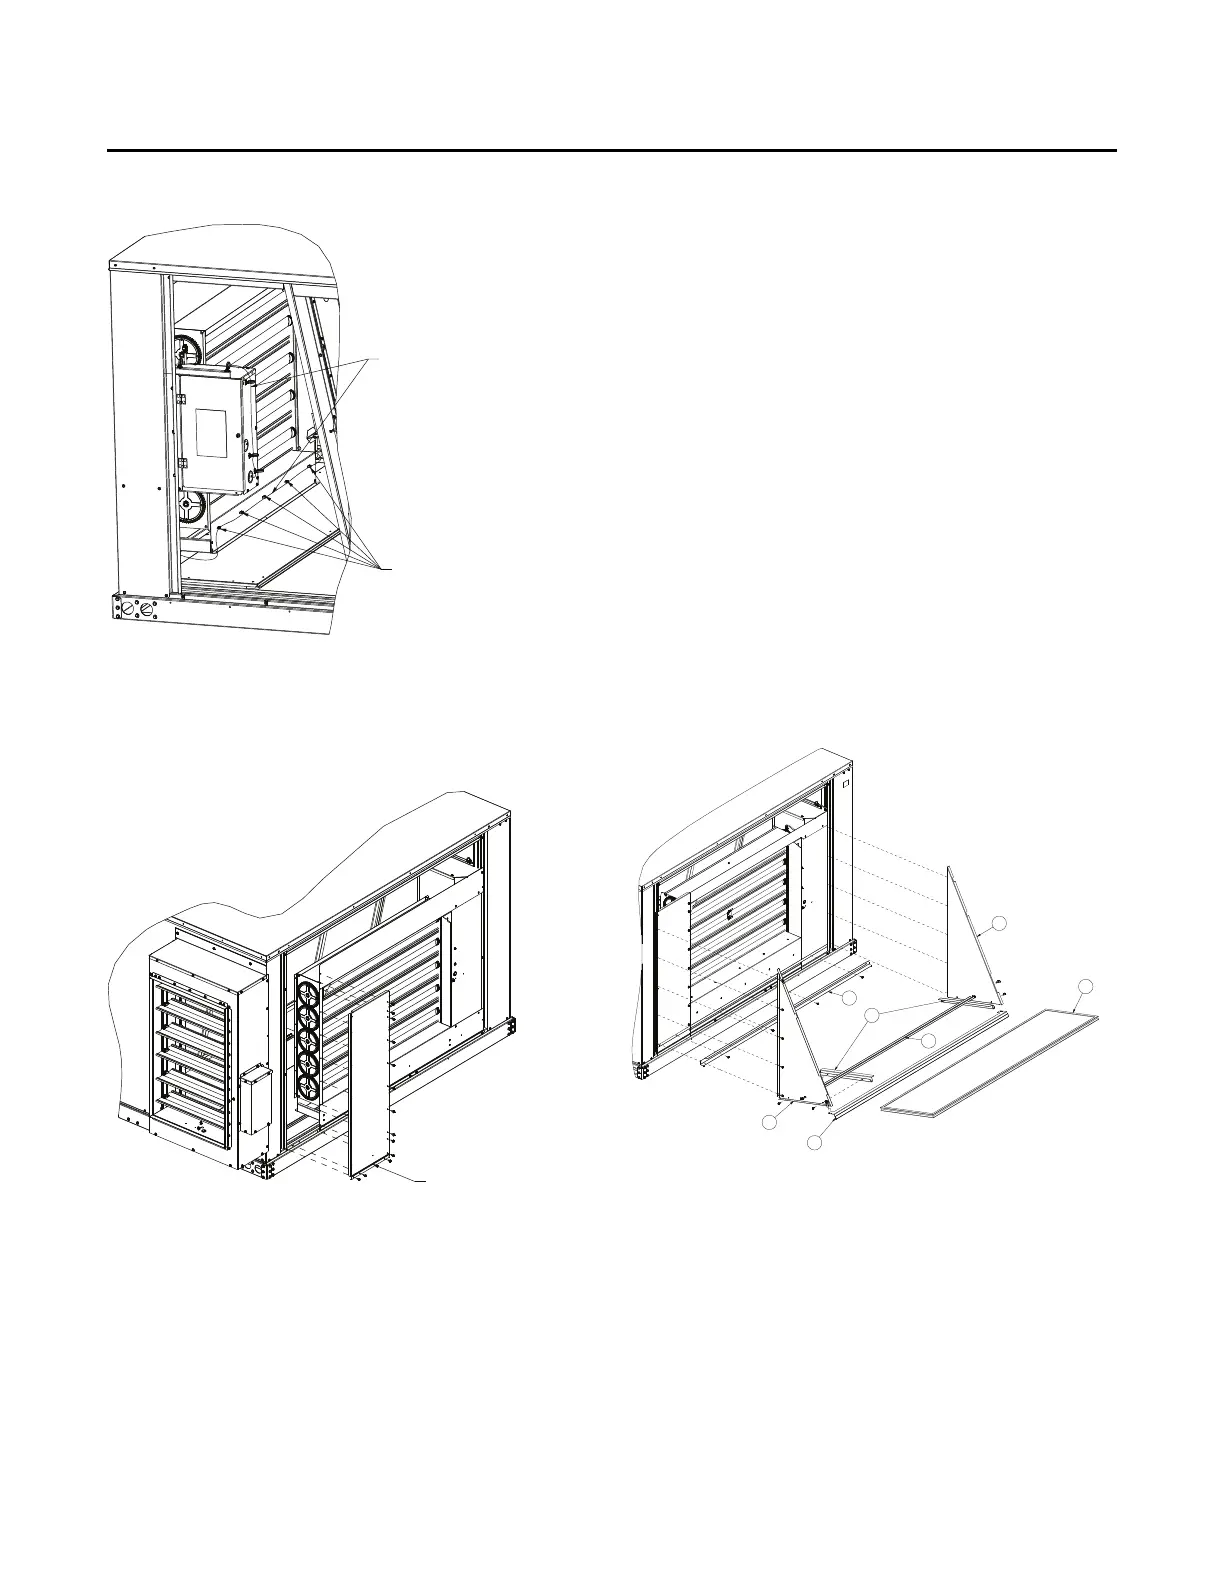
7. Install the outside air block-off panel on the left side of the
outdoor air damper assembly as shown in Figure 30. If
dif
ferential dry bulb kit is installed, install the thermistor
sensor in the hood prior to this step.
Figure 29. Outside air bl
ock-off installation
Refer to Figure 30 for hood assembly
8. Attach the rear filter angle bracket to the unit with four
screws al
ong the bottom of the damper assembly. The
surface between the two parts has gasket pre-installed on
the bracket.
9. Attach the filter side angle brackets to both triangle hood
p
anels using two screws each. The brackets should be
installed on the flat side of the hood panel with the flanges
facing away from the panel.
10. Attach the triangle hood panels on the left and right side of
the
damper assembly. Use five screws for each hood
panel. The hood panels have pre-installed gasket between
the hood panels and the damper assembly. The flanges of
the panels are to the outside of the unit.
11. Install the hood front support bracket with two screws on
e
ach side onto the triangle hood panels. The hood front
support bracket has pre-installed gasket that will face away
from the unit.
12. Attach the filter top support bracket in the middle of the
b
ottom of each triangle hood panels with two screws on
each side panel so the flat surface is facing down.
13. Slide the filter into the filter frame that was ju
st created in
Step 8 - Step 12.
Figure 30. Hood assembly
8
5
3
6
4
1
2
14. On the back panel removed and set aside in
Step 1, attach the economizer diverter panel to the bottom
o
f the back panel with four screws. The diverter panel will
be on the outside surface with gasket pre-installed along
the interface surface with the back panel.
 Loading...