PKG-SVP01B-EN 9
General
InformationProgramming
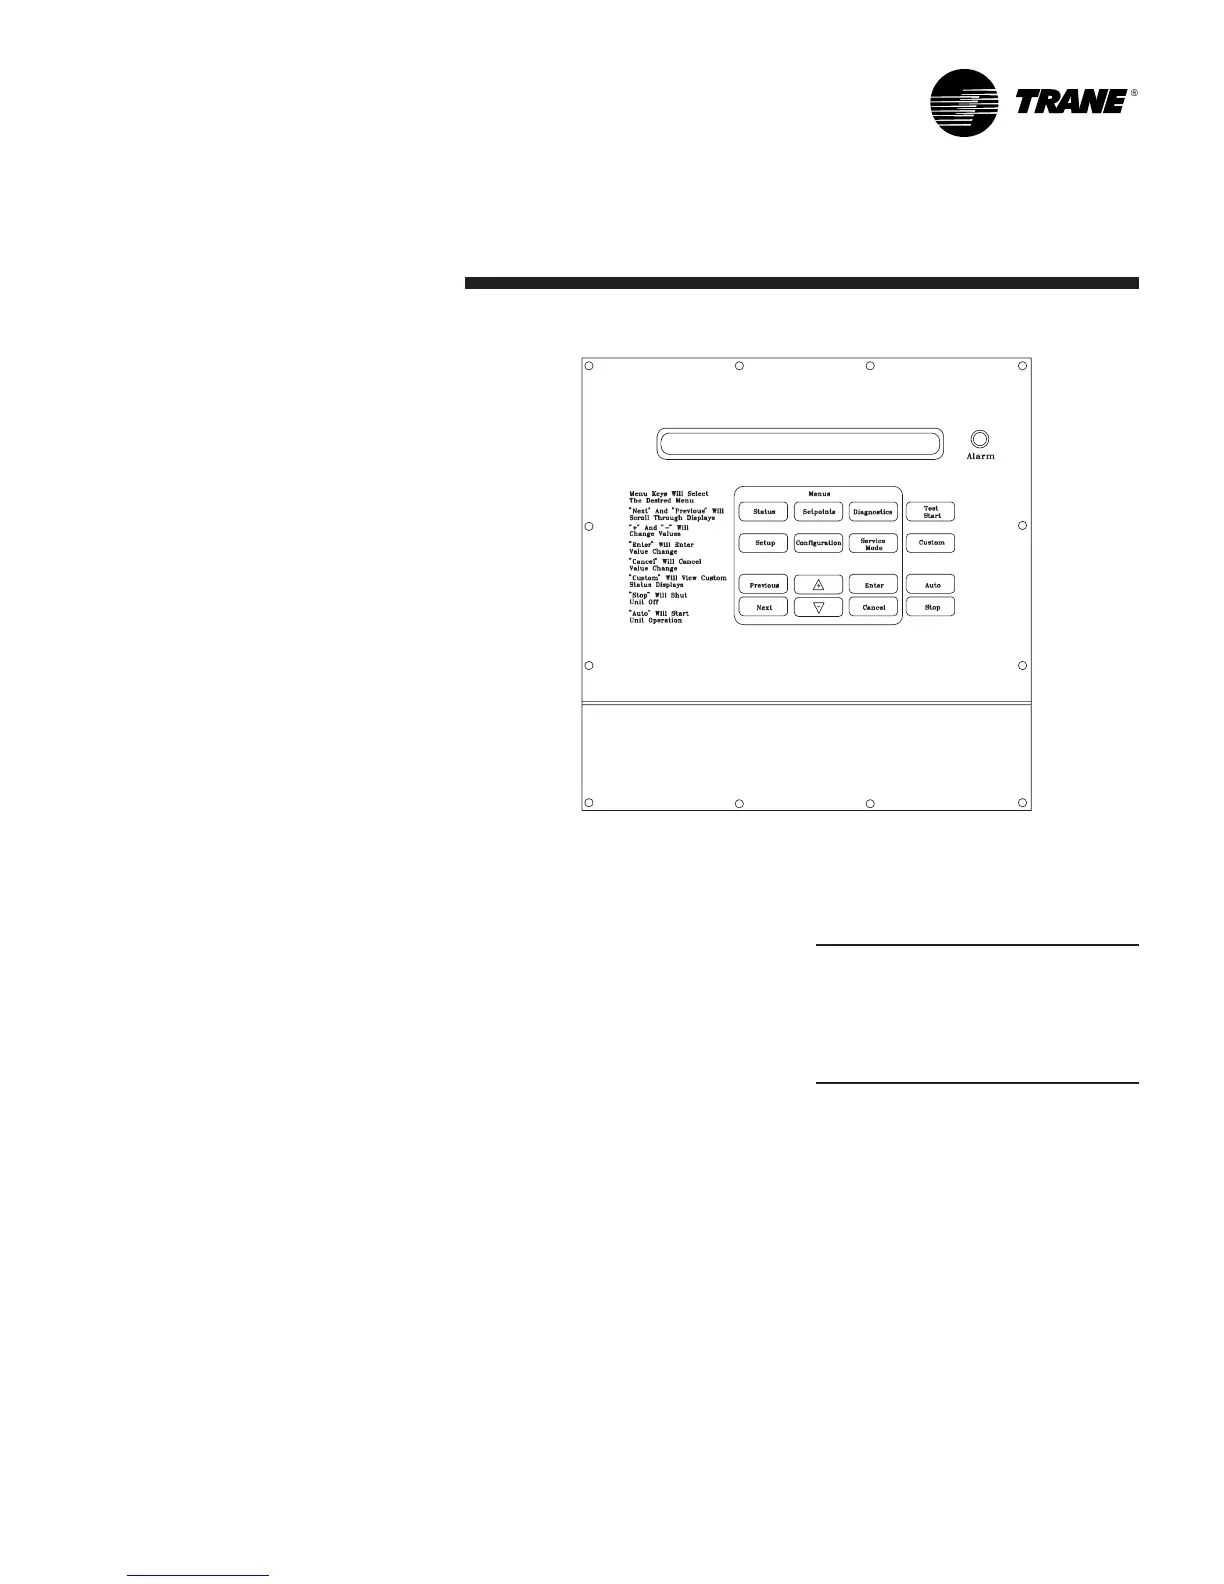
Figure P-GI-1. Human interface module.
Programming the Unit
The UCM must be programmed with
“job-specific”setup information for the
unit to operate and function properly. The
data necessary for unit operation will
vary depending on factors such as unit
size, type, and options.
This manual provides step by step
instructions for programming setup
information using the HI or RHI. It also
includes instructions for checking unit
operating status, accessing and clearing
diagnostics, and performing service tests.
Some of the displays in this manual may
not appear on the HI or RHI screen during
programming. Only applicable screens
for specific unit options and operating
parameters will display.
Any steps that do not apply to all unit
types are marked accordingly. Ignore any
steps that do not apply to your unit and/or
application. Continue this process until all
applicable screens are programmed with
the required information.
Menu Keys
Any references in this section to the HI
applies to both the HI and RHI, with the
exception of the SERVICE MODE key.
Reference Figure P-GI-2 for an illustration
of the six menu keys. The menu keys are:
STATUS, SETPOINTS, SETUP, CONFIGU-
RATION, DIAGNOSTICS, and SERVICE
MODE. These keys allow access to
various interactive menus so the user
can input and access unit operating data.
Pressing these keys will display the initial
menu screen designated by the key’s
name. The following information de-
scribes each key and its function.
If no key is pressed for 30 minutes while
the HI is displaying a menu screen, it will
revert back to the unit operating status
screen.
STATUS Key
Pressing the status key displays the
operating status screen: On, Unit Stop,
External Stop, Emergency Stop, or
Service Mode. Pressing the NEXT key
allows the operator to scroll to screens
that provide information such as air and
refrigerant temperatures, humidity
levels, fan operation, compressor
operation, heater operation, economizer
positioning, exhaust operation, and
heating, cooling, and compressor lockout
setpoints. Pressing the STATUS key while
viewing any of the data screens will
cause the HI to go back to the operating
status screen.
SETPOINTS Key
Pressing the SETPOINTS key displays the
first of the setpoint screens, allowing the
user to designate default temperatures
and pressure setpoints. While scrolling
through the setpoint screens, pressing
this key again will cause the LCD to
display the first setpoint screen.
DIAGNOSTICS Key
Pressing the DIAGNOSTICS key at any
time will allow the user to view any unit
function failures. The LCD screen will
display one of the diagnostic screens
(depending on which diagnostic, if any, is
present). If no key is pressed for 30
minutes while the screen is displaying
diagnostic information, it will revert back
to the operating status display.
CONFIGURATION Key
Pressing the CONFIGURATION key
displays the first of the configuration
screens. This allows the user to view or
designate unit configuration data such as
unit type, capacity, system control, etc
Pressing the configuration key at any
level in the configuration menu will
display the first configuration screen.
Note: Unit configuration information is
factory-programmed. Use this key only to
view current configuration data, or to
designate new data if the unit’s configura-
tion data is lost or if new options are added
in the field.
SETUP Key
Pressing the SETUP key displays screens
that designate various operating param-
eters such as temperature and pressure
ranges, limits, percentages, setpoint
source selections, and sensor input
definitions for the control of the unit’s
various operating modes. Pressing the
SETUP key at any level in the SETUP
menu will display the first SETUP screen.
SERVICE MODE Key
Pressing the SERVICE MODE key displays
the first of the service test mode screens
that allow the user to turn on or off
various unit components for a particular
test being performed. After designating
on/off status, a screen will display
requesting the user to designate the
TEST START time delay for each test.

 Loading...


