6 ACC-SVN231C-EN
Installation – FIADMPR101*/102*
Carefully review installation instructions for field-installed
motorized damper.
• FIADMPR101* for A cabinet (Digit 39 = A)
• FIADMPR102* for B and C cabinet (Digit 39 = B, C)
Unpack Damper
See Figure 1.
1. Uncrate the damper and locate all parts. Each damper
ship
s with items damper bottom block-off (A), damper side
bracket (B), and adapter backing plate (C) attached.
2. Remove screws completely from i
tems (A) and (B). Retain
them for reassembly.
3. Remove item (C) by loosening the three screws but do not
remove them.
Figure 1. Unpacking the damper
Assembling End Panel
See Figure 2.
1. Remove unit end damper panel (D), retain the screws
remo
ved from the top and the bottom of panel for later use.
2. Align three slots in (D) with three tabs on damper side panel
(E).
3. Pivot (D) into place.
4. Align three tabs on (B) with three slots in (D).
5. Pivot (B) into place.
6. Secure (B) with three screws to the damper side panel (F).
Figure 2. Assembling the end panel
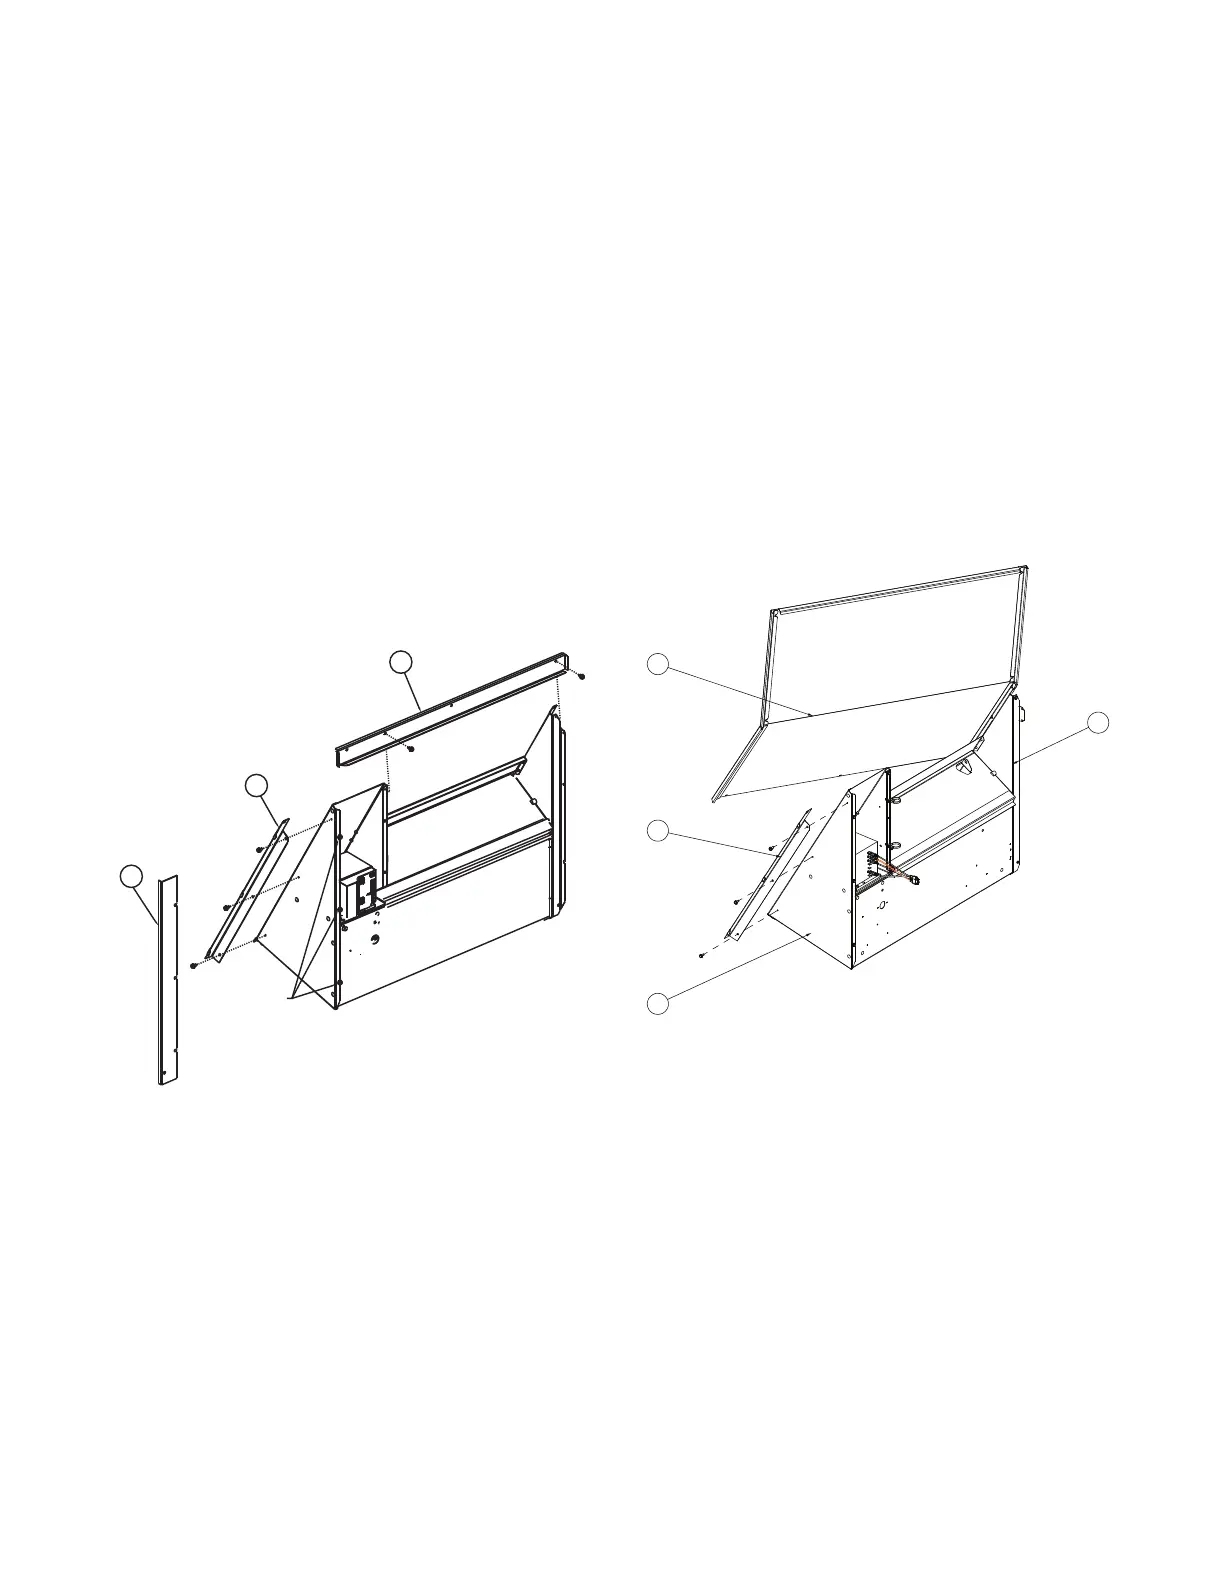
Install Damper into Rooftop Unit
See Figure 3 and Figure 4.
1. Lift the assembled damper into position.
2. Fit the upper left-hand corner around the channel in the
ca
binet post.
3. Pivot the damper into the opening in the cabinet.
4. Once the damper is in place, lift the damper and panel
a
ssembly to align the upper screw holes.
5. Secure the top left and top right with screws (G) and (H)
respectively
.
A
B
C
Do not
remove screws