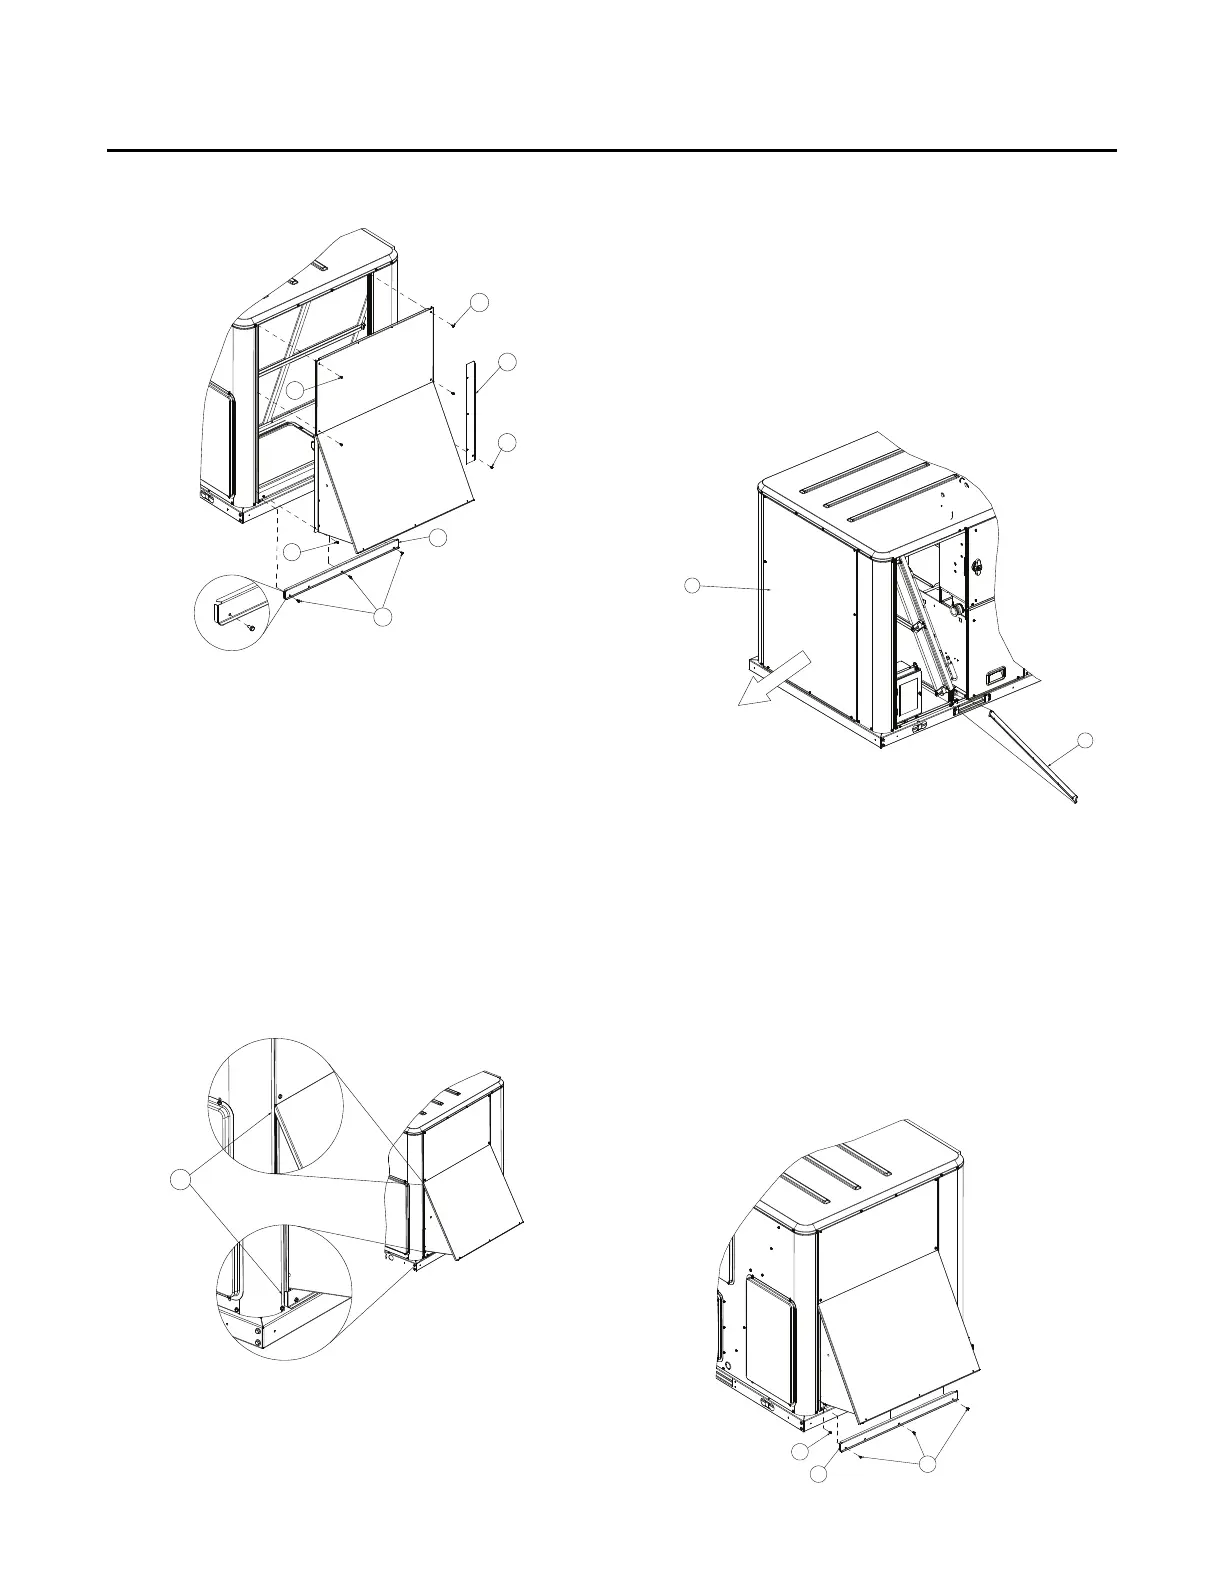
Figure 3. Installation of damper assembly
Installation – FIADMPR101*/102*
ACC-SVN231C-EN 7
6. Pull out the bottom of the damper and secure bottom left
with screw (I).
7. Remove the filter access panel.
8. Position (C) inside the filter section
. Adapter backing plate
(C) will slip over the three screws that were loosened in
Figure 1.
9. Align the engagement screw hole in (C), with the screw
clea
rance hole at the bottom of the right corner post.
10. Secure the bottom right side of the damper with a screw (J).
11. Install (A) and secure it with three screws
(K).
12. Using field supplied silicone, apply sealant around damper
hoo
d (L).
Figure 4. Sealing and seams
Factory Installed Damper Setup
This section covers setup of factory installed motorized
damper in the rooftop unit.
See Figure 4, Figure 5, and Figure 6.
1. Remove filter access panel.
2. Remove the screw that holds bottom block-off (A) in place
a
nd remove bottom block-off (A), from its shipping location.
Figure 5. Remove bottom block-off
3. Remove the bottom three screws (K) from the damper
panel (D).
4. Pull the damper assembly out into operating position.
5. Secure the damper assembly with two screws (I) and (J) at
the
bottom of the corner posts.
6. Install bottom block-off (A) and secure with three screws
(K).
7. Using field supplied silicone,
apply sealant around damper
hood (L).
Figure 6. Fastening the damper and bottom block-off
A
D
Pull the damper assembly
out into operating position
(screw J is
not visible)
K
A
I