45
PTEC-M-1A
Disassembly
Procedures
WARNING!
To avoid possible electrical shock,
personal injury or death, disconnect
the power before servicing.
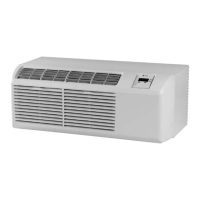
Condenser
1. Remove the chassis from the wall
sleeve.
2. After capturing the refrigerant
from the system, debraze the inlet
and discharge tubing from the
outdoor coil.
3. Remove all screws from the sides
of the outdoor coil securing the
shroud to the coil.
4. Pressing the tabs on the right side
of the shroud separate the shroud
from the outdoor coil.
5. Remove the two screws securing
the outdoor coil to the base pan.
6. Carefully lift the outdoor coil over
the basepan lip.
Compressor
1. Remove the chassis from the wall
sleeve.
2. Remove the compressor terminal
cap and disconnect all compressor
wiring.
3. After capturing the refrigerant
from the system, debraze the inlet
and discharge tubing from the
compressor.
4. Remove the three foot mounting
bolts and remove the compressor.
10. Disconnect the blower motor
wiring as follows:
• White from capacitor C terminal
• Red from control board FAN LOW
terminal
• Brown from capacitor FAN
terminal
• Black from control board FAN
HIGH terminal
• Gently pull the wire through the
center partition.
11. Remove the two screws securing
the side center partition side
brace to the top brace. Remove
the brace.
12. Remove the two screws securing
the condenser air baffle to the
center partition. Remove the
brace.
13. Remove all screws from the sides
of the out door coil securing the
shroud to the coil.
14. Pressing the tabs on the right
side of the shroud separate the
shroud from the outdoor coil.
15. Remove the two screw securing
the outdoor coil to the base pan.
16. Carefully lift the outdoor coil over
the basepan lip away from the
fan wheel.
17. Push the shroud back toward the
center partition panel.
18. Loosen the allen screw securing
the fan wheel clamp to the motor
shaft. Remove the fan blade. The
fan blade must be 1 inch away
from the outdoor coil when
reinstalled.
19. Remove the three mounting
bolts securing the fan motor to
the center partition. Remove the
motor.