Do you have a question about the Trane XT300C and is the answer not in the manual?
Notice regarding recycling and proper disposal of mercury-containing thermostats.
Instructions for installing the thermostat, including wallplate and location.
Safety warning about electric shock and equipment damage during wiring.
Notes on operating the thermostat in cooling-only systems.
Steps for attaching the thermostat unit to the installed wallplate.
How to configure system (Heat/Cool/Auto) and fan (On/Auto) settings.
Details on default program temperature settings for different periods.
Step-by-step guide to configuring thermostat settings for specific systems.
Warning about potential equipment damage with electric heat systems.
Configure programming type, adaptive recovery, and system changeover.
Set display units (°F/°C) and clock format (12/24 hour).
Adjust fan operation timing, heating/cooling cycle rates.
Configure minimum equipment off time and temperature range stops.
Adjust how the thermostat displays room temperature relative to actual.
Set minimum off time for equipment during heating and cooling cycles.
Configure cooling droop and programming type (7-day or 24-hour).
Steps to set the current day and time on the thermostat.
Procedure to set Daylight Savings Time if applicable.
Warning about potential equipment damage from rapid compressor cycling.
Detailed steps for performing heating, cooling, fan, and Comfort-R self-tests.
Testing individual keys and their corresponding test numbers.
Accessing thermostat information like software revision and model ID.
Steps to view software revision, production date, and model identification.
Notes on using and reading the optional outdoor temperature sensor.
Troubleshooting steps for display not showing, incorrect display, or no power.
Resolving problems with temperature limits and setpoint range configuration.
Diagnosing problems with heating/cooling not coming on, cycling, or system indicators.
Troubleshooting outdoor temperature display and filter expiration warnings.
Resolving issues with system indicators and time display errors (EEE).
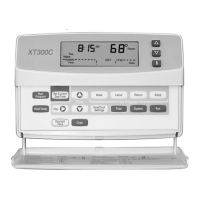
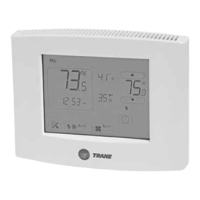
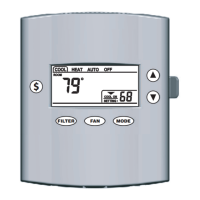
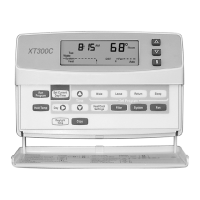
The Trane XT300C Deluxe Programmable Heat-Cool Thermostat is an electronic control device designed for 24 Vac single-stage heating and cooling systems. It is powered by the heating system and offers automatic system changeover (Heat-Off-Cool-Auto) and fan selection (On-Auto). System and fan selections are conveniently made via the keyboard.
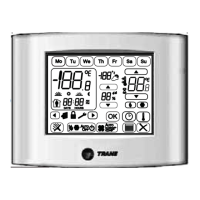
The thermostat provides precise electronic control over your heating and cooling system. It allows for programmable scheduling, enabling users to set specific temperatures and times for different periods of the day (Wake, Leave, Return, Sleep). The default program settings include a 7-day schedule with specific temperature setpoints for both heating and cooling, and an automatic fan setting.
Key functions include:
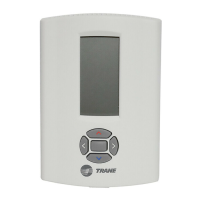
The XT300C thermostat is designed for user-friendly interaction with a clear LCD display and a dedicated keypad. The keys are used for various functions:
The thermostat also features Adaptive Intelligent Recovery™ control, which starts heating or cooling early to ensure the setpoint is reached by the start of a program period. This feature can be configured during installer setup.
The XT300C thermostat incorporates features that aid in maintenance and troubleshooting:
The thermostat is designed to be installed in an area with good air circulation, away from drafts, direct sunlight, or heat sources, to ensure accurate temperature readings and optimal performance.
| Wi-Fi Enabled | No |
|---|---|
| Stages | 1 Heat/1 Cool |
| Display | LCD |
| Power Source | 24V AC |
| Hold Feature | Yes |
| Temperature Range | 45°F to 90°F (7°C to 32°C) |