8
CODE/NAME
DESCRIPTION
SELECTION L
IST
A12
Print Header
Tells MP-20 printer to print the header information. Valid only when
A6
is set to “1”.
"0" = Do NOT Print Header "1" = Print Header
0
1
A1
3
Auto Power Off
Period
Selects the auto off time period in minutes:
“Off” = Dis
abled (Always ON)
Off
3 5
10 20
30
USER MENU PROCEDURES
This section provides instructions for all of the User Menu procedures.
I
D Number Entry (A
8)
1.
While in the User Menu mode, scroll to "A
8
", then scroll down once using the ZERO
key to enter
the ID Number menu.
2.
The display will momentarily show "
ID NO
", followed by a value with one flashing digit. This value
will be the current ID number value.
3.
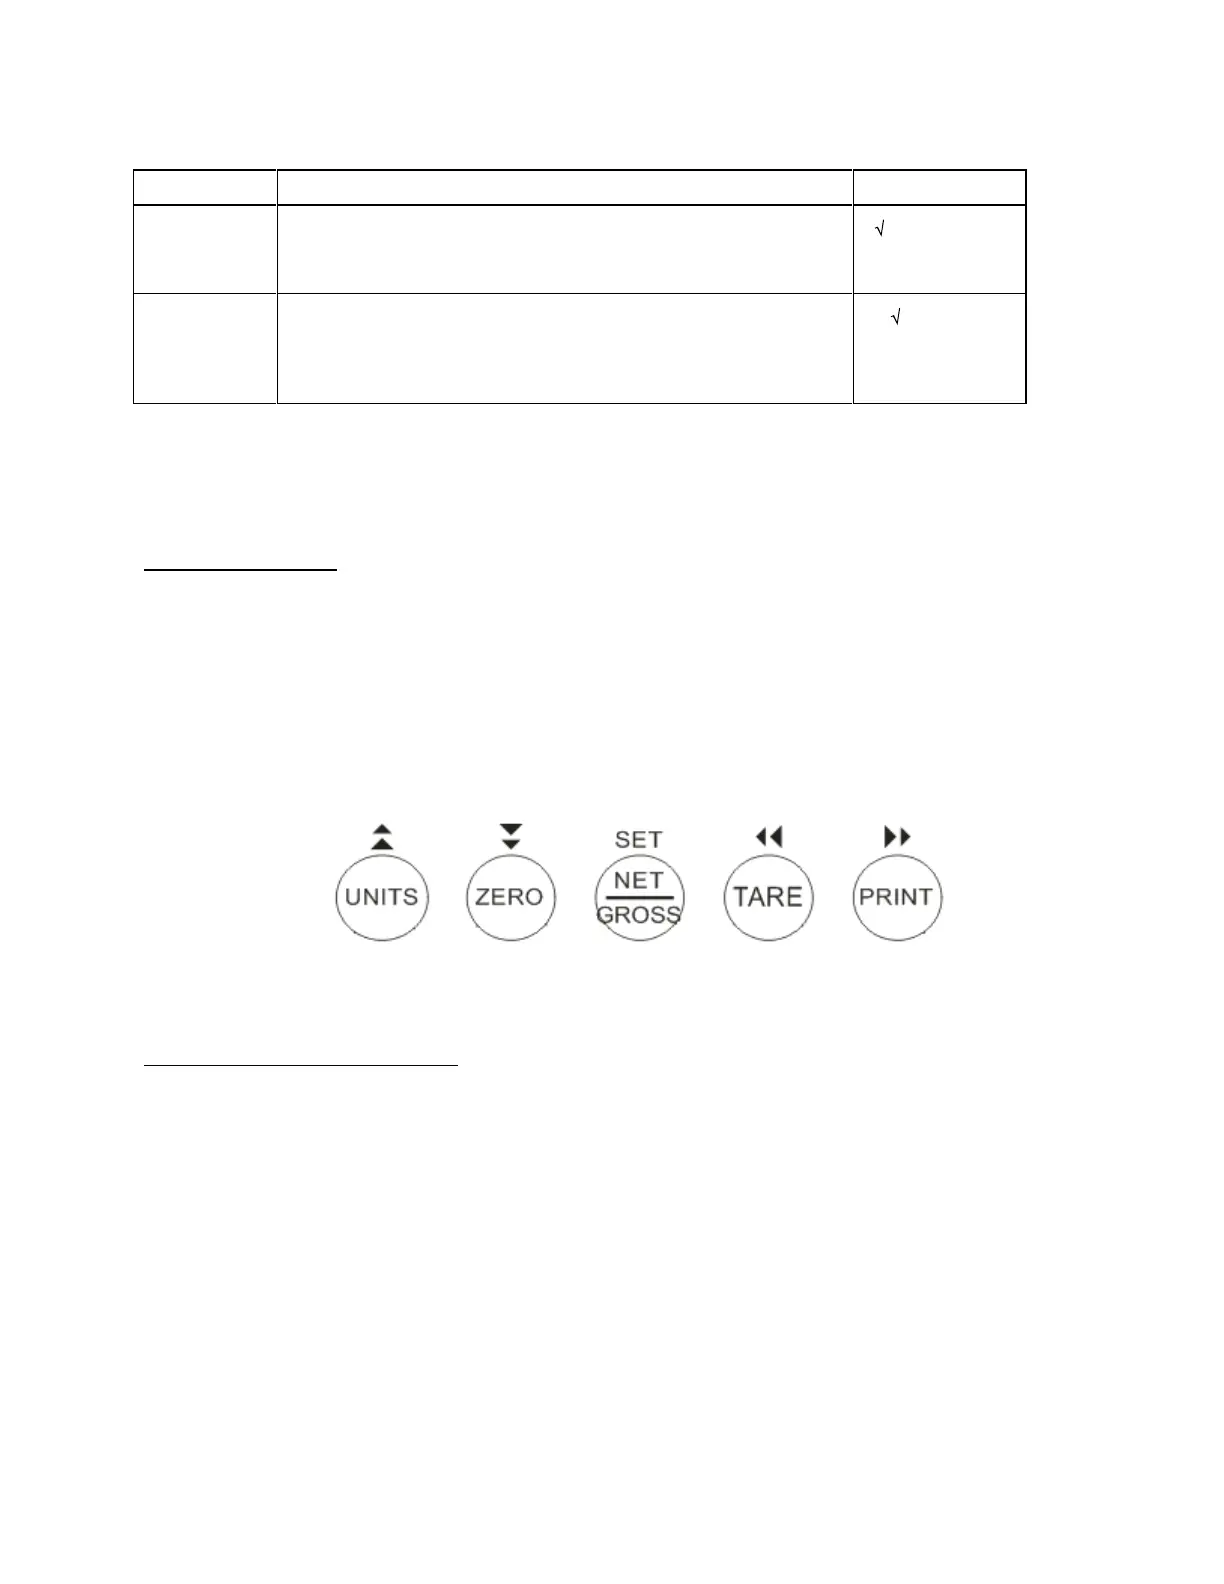
Use the four directional keys (shown below) to adjust the displayed value to the actual
ID Number
value. Increase the flashing digit by pressing the UNITS key. Decrease the flashing digit by
pressing the ZERO key. Pressing the PRINT key or the TARE key will change the position of the
flashing digit.
4.
After setting the exact value, press the NET/GROSS key to save the ID Number value. The
display will show "
SET
" momentarily,
and then
revert back up to A
8
.
L
F (Line Feeds) Number Entry (A9)
1.
While in the User Menu mode, scroll to "A 9
",
and then scroll down once using the ZERO key to
enter
the Line Feeds menu.
2.
The display will momentarily show "
LF
", followed by the current line feeds value.
3.
Use the four directional keys shown in Figure 11 to adjust the displayed value to the actual line
feeds value. Increase the flashing digit by pressing the UNITS key. Decrease the flashing digit by
pressing the ZERO key. Pressing the PRINT key or the TARE key will change the position of the
flashing digit.
4.
After setting the exact value, press the NET/GROSS key to save the line feeds value. The
display will
show "
SET
" momentarily,
and then
revert back up to A9.
EXITING THE MENUS
Exit any configuration menu by
simply switching off the indicator or pressing the ZERO key while in F25.
 Loading...