9
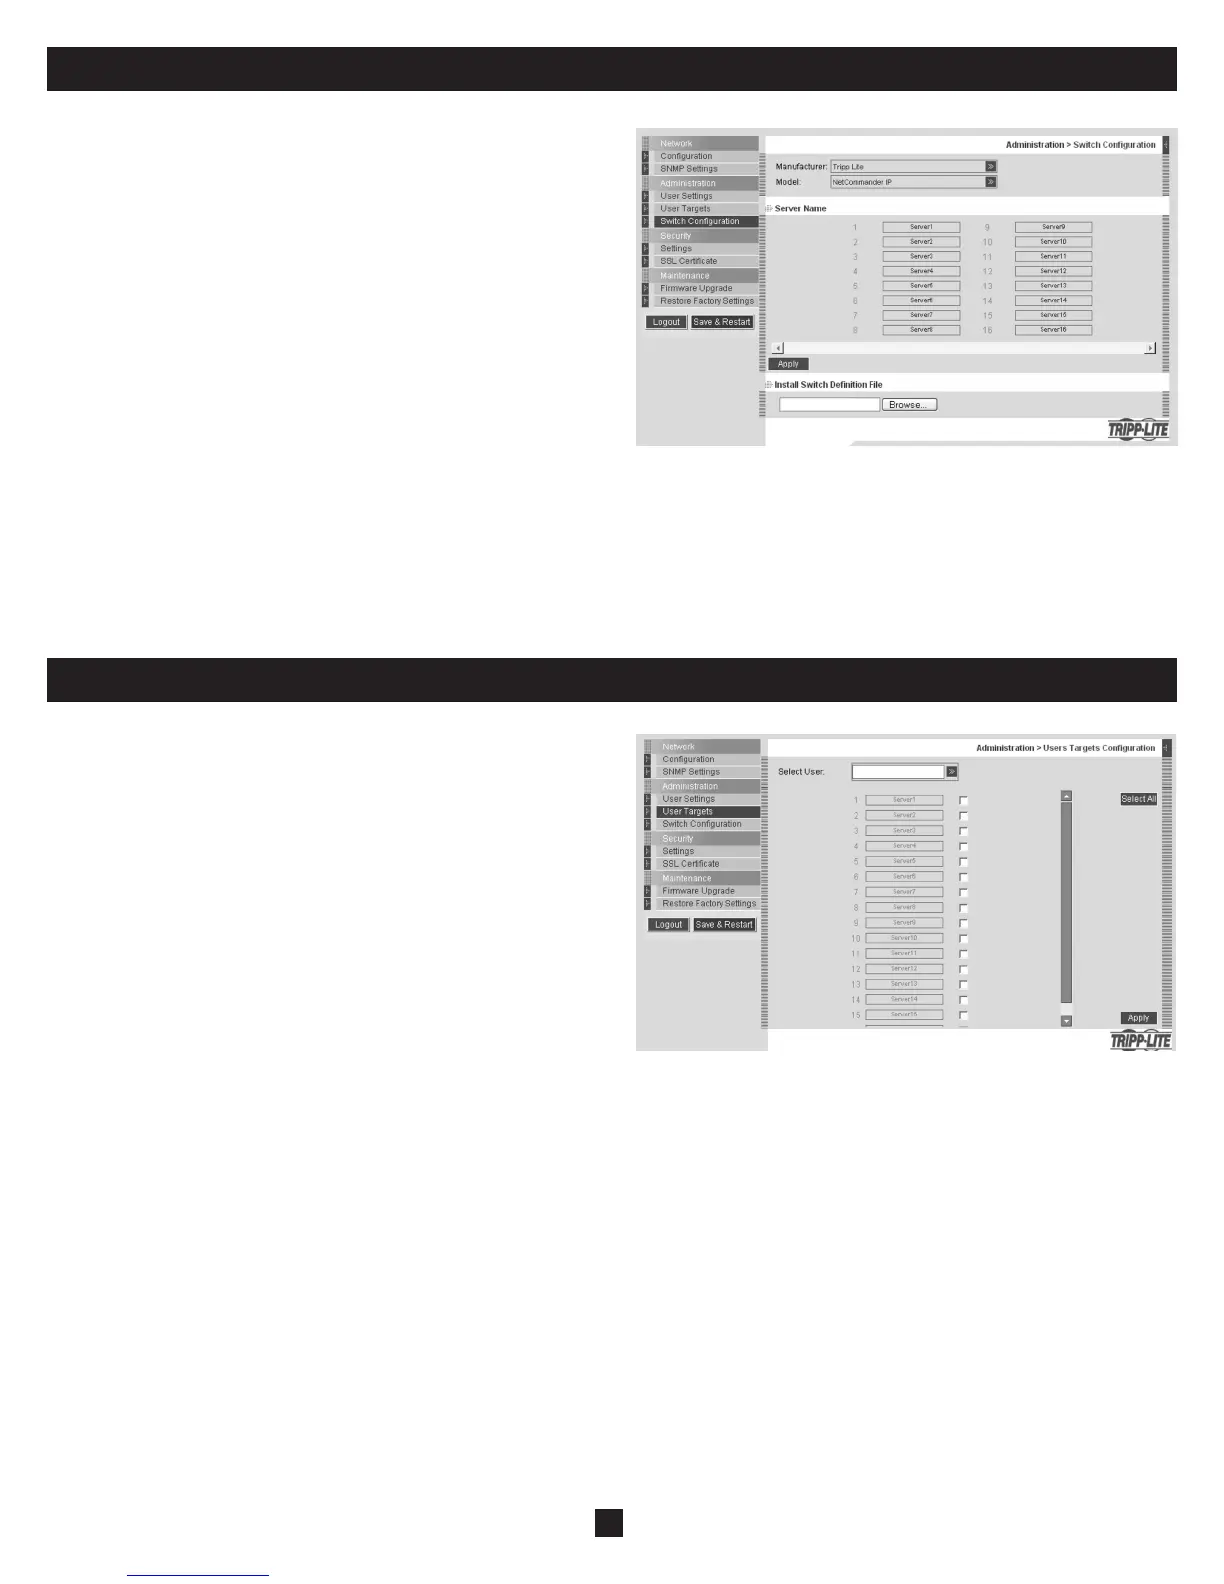
15. Administration (Switch Confi guration)
The Switch Confi guration Screen allows the Administrator to give each
computer/server a unique name, making it easier to differentiate between
them. By default, computers/servers are titled Server 1, Server 2, Server 3,
etc. Follow the steps below to update the computer/server name.
1. From the menu click Switch Confi guration. The Switch Confi guration
window appears, see the fi gure below.
2. In the Server Name section, change the name of the connected computers/
servers by selecting the desired name and typing a new name. Click Apply
to save changes.
Install Switch Defi nition File
Also included in the Switch Confi guration Screen is a section to install a
new switch defi nition fi le. In the event that Tripp Lite updates the Switch
Defi nition fi le, the fi le will be available in the Support section of our website
- www.tripplite.com.
1. Click the Browse button next to the Install Switch Defi nition File box
and select the new fi le.
2. A download button will appear next to the selected fi le. Click on the
button to download the new Switch Defi nition File.
3. Click the Apply button.
16. Administration (User Targets)
By default, access is denied to all servers for all user types except
Administrators. An Administrator must defi ne the access rights of each
user separately. Follow the instructions below to customize individual user
access.
Note: When cascading a NetCommander KVM Switch off of the
NetCommander IP, any user that has access to the cascaded port will
have access to all computers/servers connected to that port. Any security
restrictions must be done using the cascaded KVMs OSD.
1. From the menu click User Target. The User Targets Confi guration
window appears, see the fi gure below.
2. Select a user from the User drop-down menu.
3. Check the Target servers you want the selected user to have access to. To
select all Target servers, press Select All.
4. Click Apply, saving the selection(s).
5. Repeat the above steps for each user.

 Loading...