2928
Replacing Rotor Blades
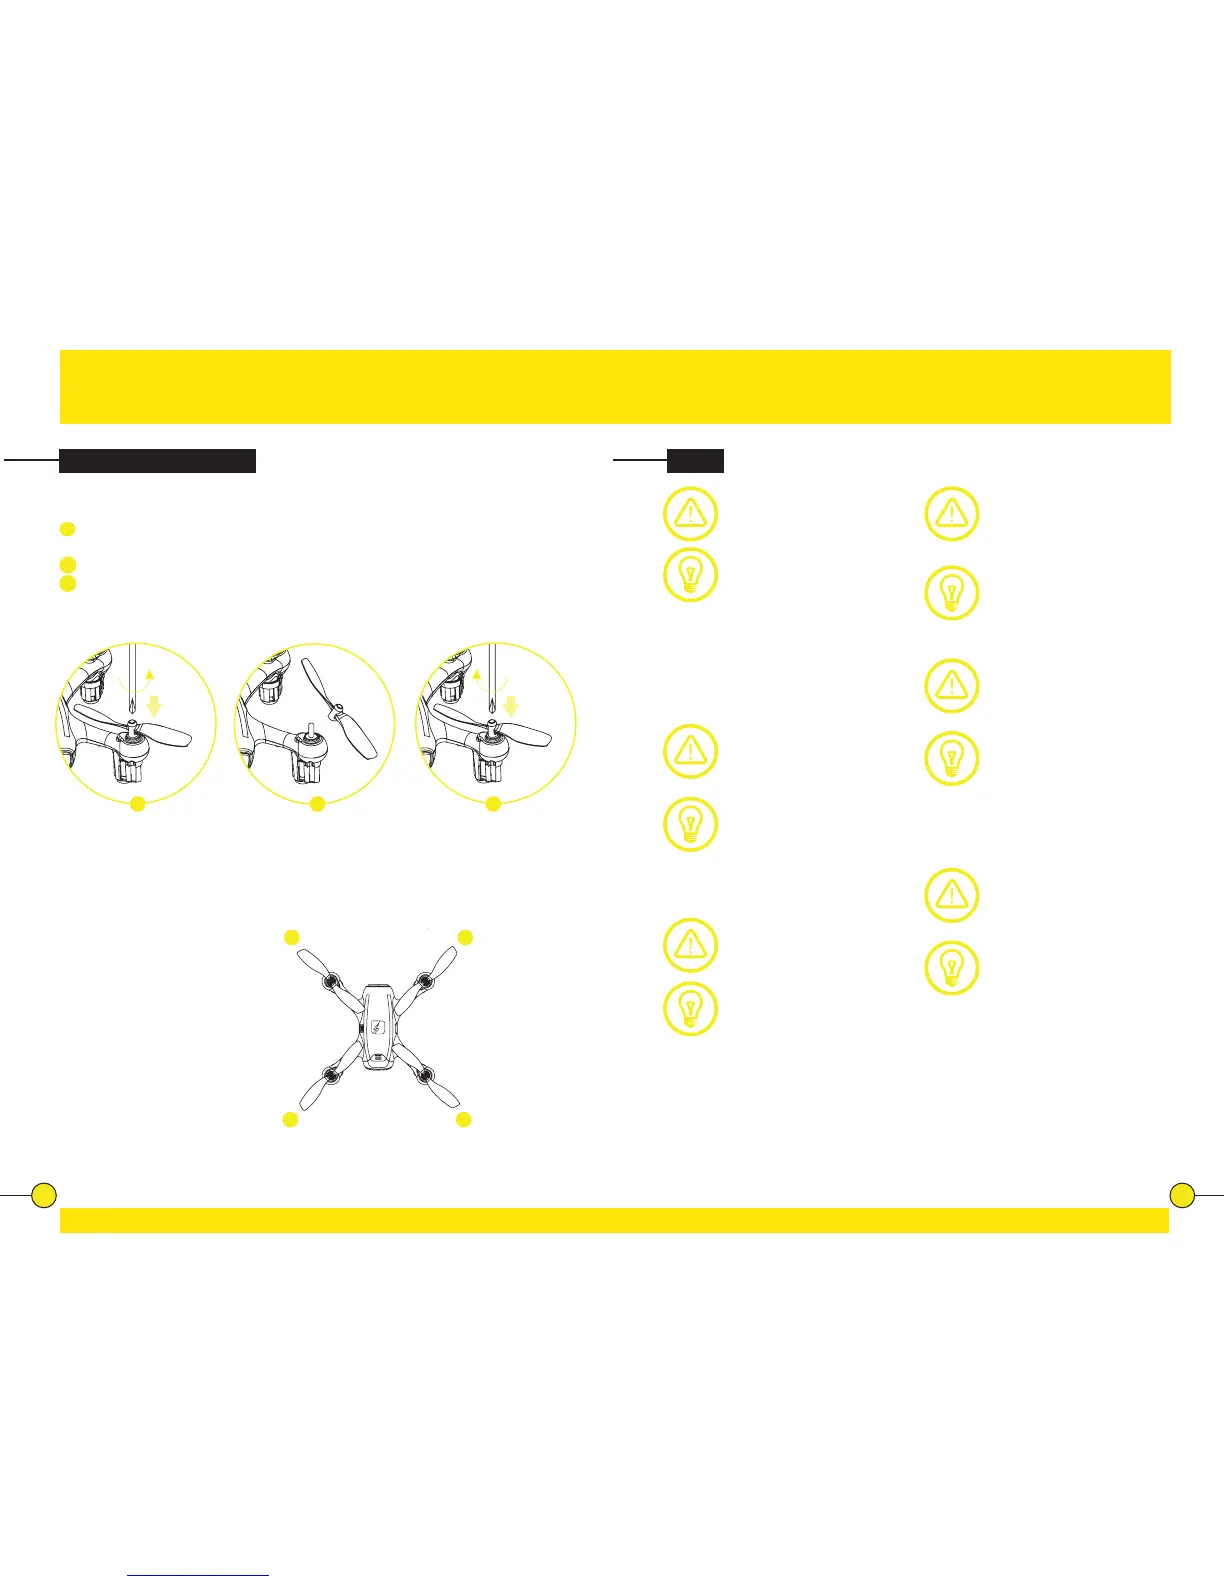
To replace a rotor blade, follow the steps below:
1
Put the Screwdriver onto the screw in the top of the rotor blade. Gently
turn the Screw Driver counter clockwise.
2
Remove the Rotor Blade from the drone.
3
Press the new rotor blade onto the motor axis and fasten it using the
screwdriver.
Each rotor blade is marked with a “A” or “B”. Be sure to note the marking and
the lt angle of the rotor blades. When replacing the rotor blades, please install
the right type of blade on the correct posion on the drone.
Front le: marking “A”
Front right: marking “B”
Rear le: marking “B”
Rear right: marking “A”
FAQ
Problem: Controller does
not work.
Cause: The baeries have
been incorrectly inserted.
Soluon: Check if the
baeries have been correctly
inserted.
Cause: The baeries do not
have enough power.
Soluon: Insert new
baeries.
Problem: The drone cannot
be controlled with the
controller.
Cause: The controller is
possibly not correctly paired
with the drone.
Soluon: Carry out the
pairing procedure as
described in “Pairing”
(page 10).
Problem: The Drone does
not li.
Cause: The baery power is
not sucient.
Soluon: Charge the baery
as described in “Charging
FADER” (page 8).
Problem: During ight, the
Drone loses speed and height
without any obvious reason.
Cause: The baery is too
weak.
Soluon: Charge the baery
as described in “Charging
FADER” (page 8).
Problem: The drone only ies
in a circle or ips over before
taking o.
Cause: Rotor blades
incorrectly mounted or
damaged.
Soluon: Fit rotor blades/
replace rotor blades as
described in “Replacing
Rotor Blades” (page 27).
Problem: Unable to nd
photos and videos in App
Gallery.
Soluon: Photos and videos
taken with the App are stored
on the mobile device and on
the SD card of the drone.
Photos and videos taken with
the controller are stored on
the SD card of the drone
only.
B A
A B
1 3 2