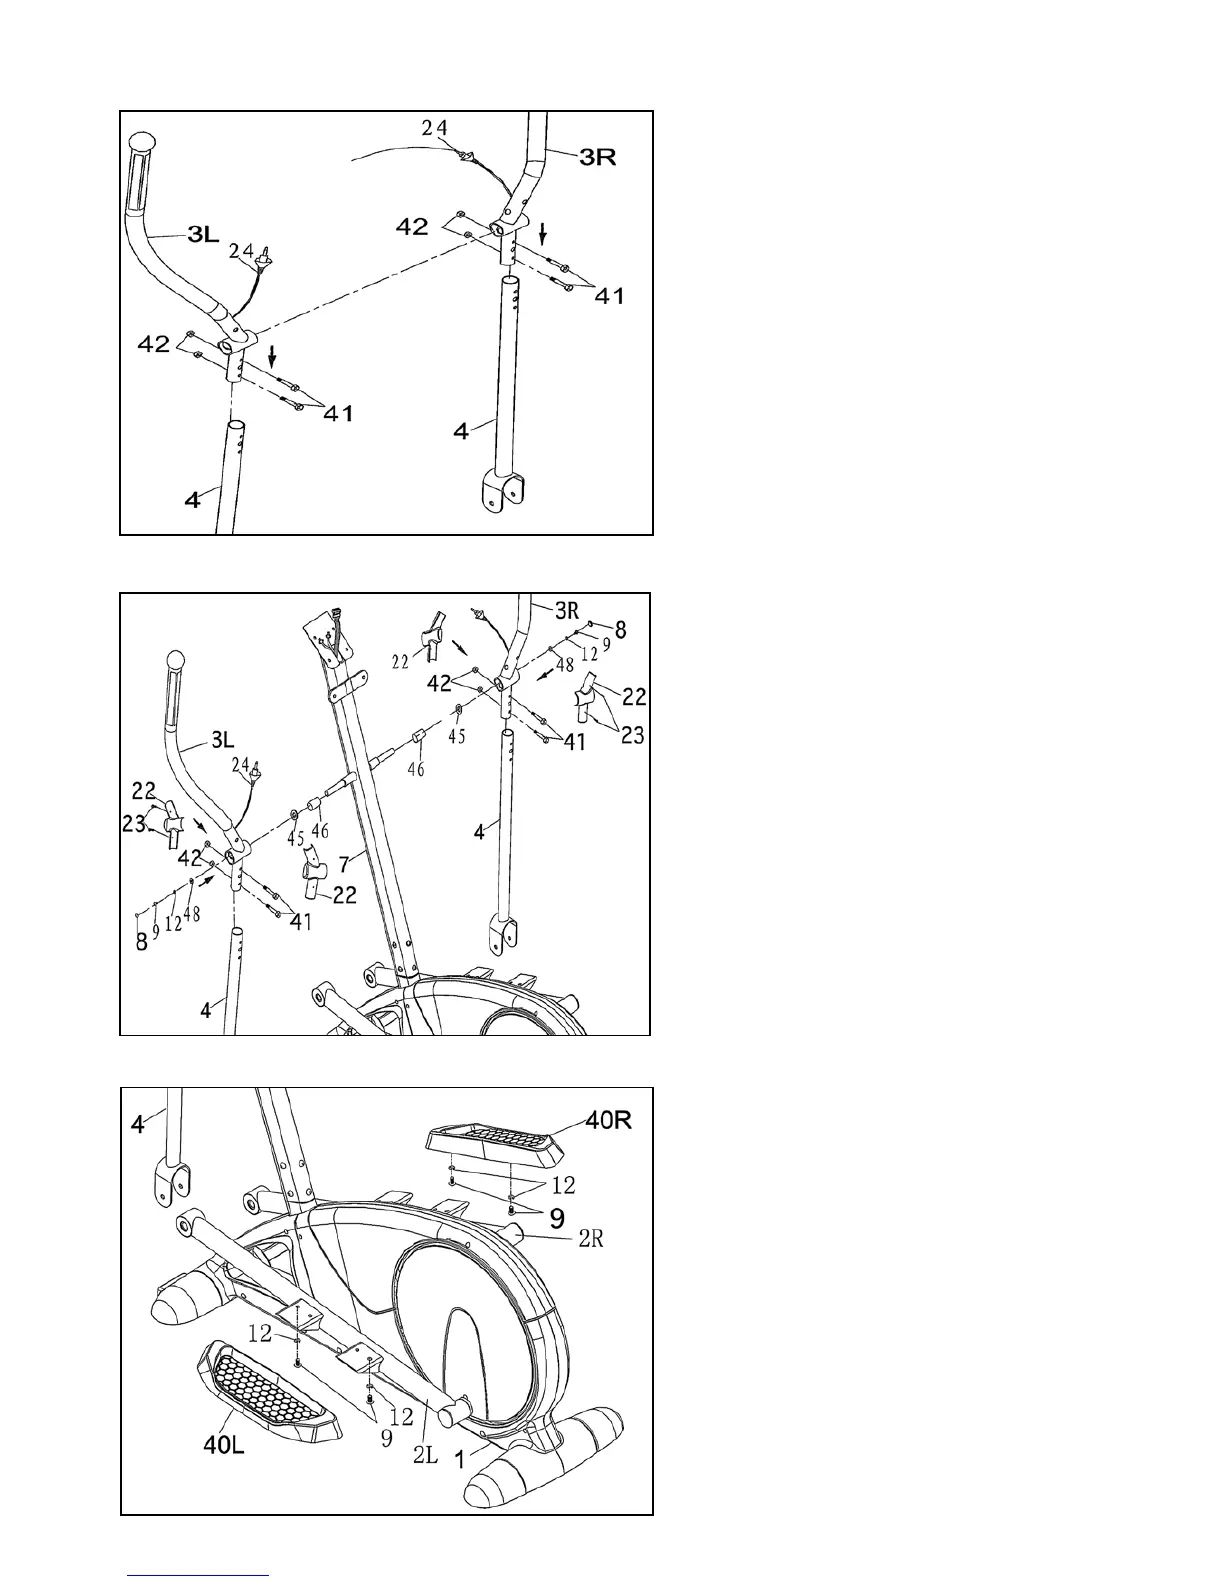
ASSEMBLY STEPS
STEP 3
• AttachtheLeftUpperSwingBar(3L)totheLeftLower
Handlebar(4)andsecurewith2Nuts(42),and2Hex
Head Bolts (41).
• RepeatthesameprocedureforRightSwingBar(3R)
and the Right Lower Handlebar (4) connection.
STEP 4
• Removethepre-assembledAllenHeadBolt(9),Spring
Washer (12) and Flat Washer (48) from the left side
AxleofFrontPost(7).
• SlidethePlasticSleeve(46)andWasher(45)ontothe
leftsideofAxleofFrontPost(7).
• AttachtheLeftSwingBar(3L)totheleftsideofAxle
(7) and secure with Allen Head Bolt (9), Spring Washer
(12) and Flat Washer (48).
• PleasetightentheRoundHeadBolts(9)wellafterall
parts are assembled.
• DothesameprocedureforRightSwingBar(3R)and
AxleofFrontPost(7)connection.
• PlacePivotCover(8)ontheendofbothRoundHead
Bolts (9).
• AttachtheHandleBarDecoration(22)toLeftand
Right Swing Bar, securing with 2 Round Head Screws
(23) on each side.
STEP 5
• AttachLeftPedal(40L)totheLeftPedalArm(2L)with
2 Bolts (9) and 2 Spring Washers (12).
• RepeatthesameprocedureforRightPedal(40R),Right
Pedal Tube (2R)