4. ASSEMBLY STEPS
Instructions for assembly
• Unpackthecartonandusingthepartslistcheckthatallpartsareaccountedfor.
• Donotdisposeofthepackagingmaterialuntilassemblyiscompleted.
• AnAllenWrenchisprovidedforuseinassembly.
Caution: Ensure that cables are not damaged
during assembly or when tightening screws
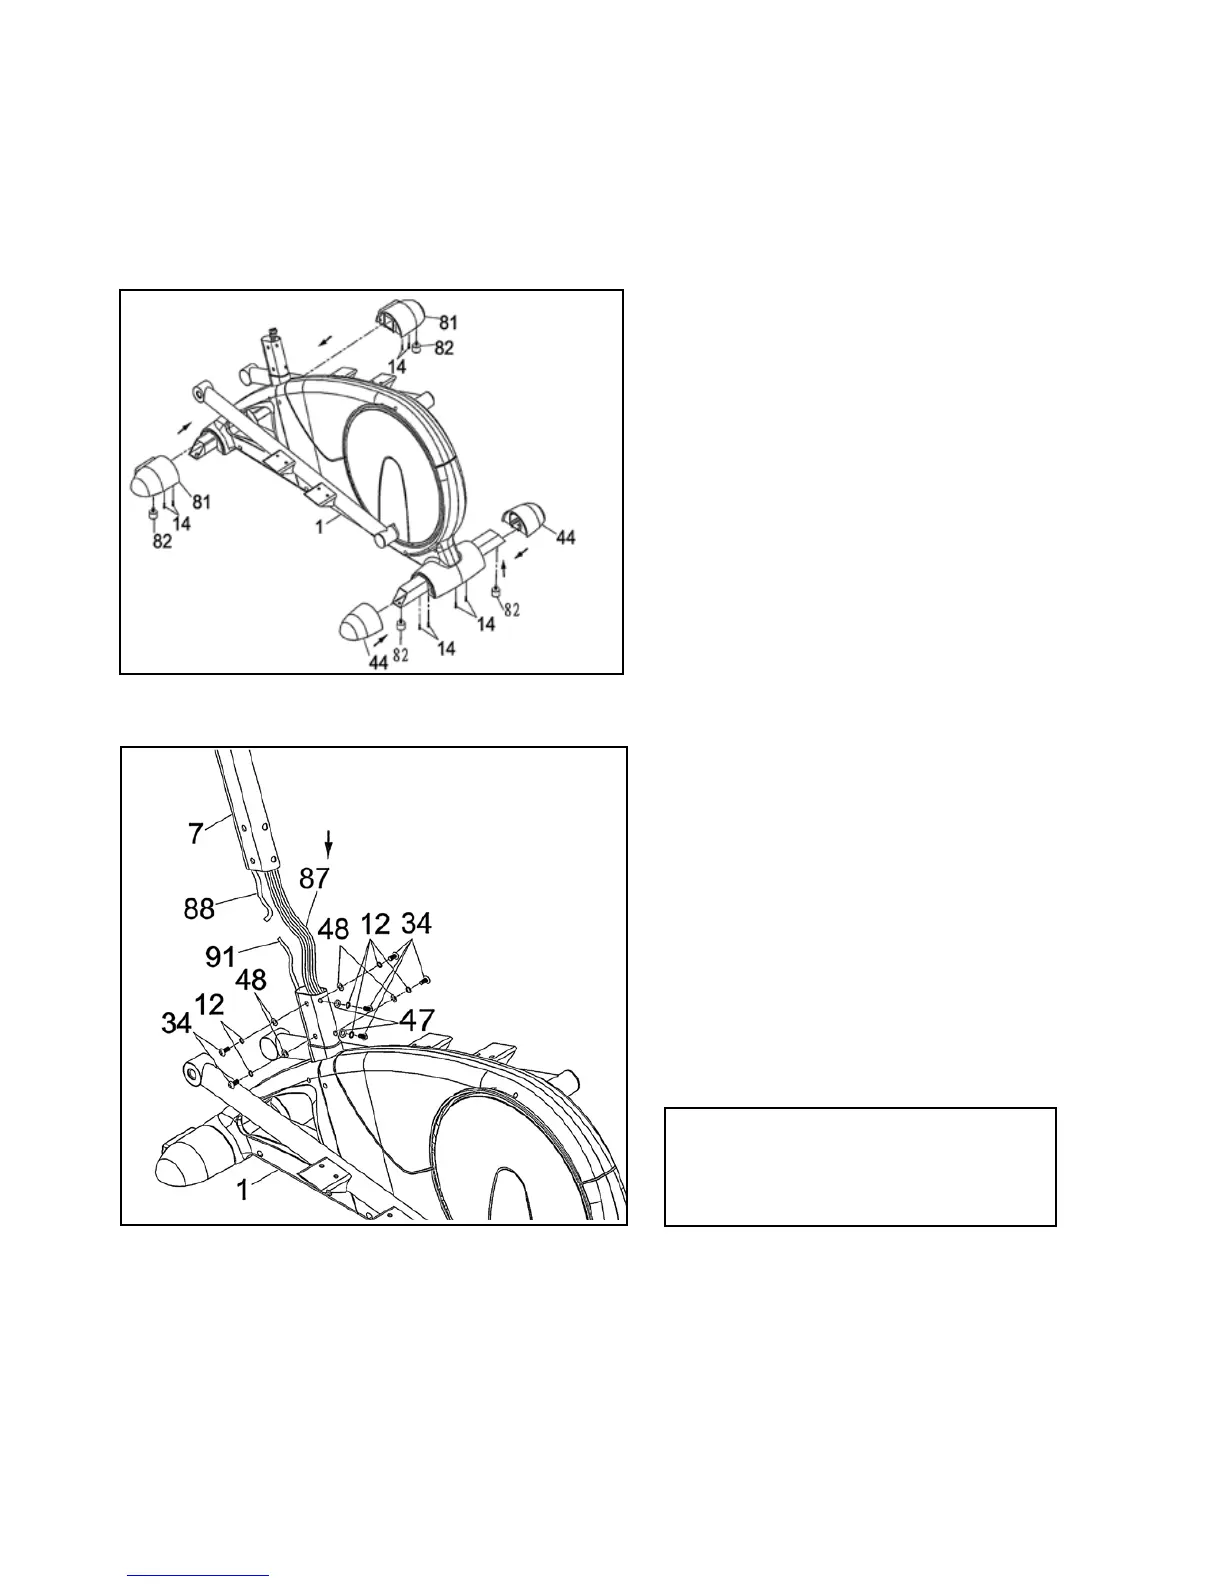
STEP 1
• Attach2TransportationWheels(81)totheFront
StabilizerofMainFrame(1)andsecurewith4Screws
(14) and 2 Adjustable Knobs (82) .
• Attach2EndCaps(44)totheRearStabilizerofMain
Frame (1) and secured with 4 Screws (14) and 2
Adjustable Knobs (82) .
Note: you can use the Adjustable Knobs (82) to level the
bike.
STEP 2
• Removethe6pre-assembledAllenHeadBolts(34),6
Spring Washers (12), 4 Flat Washers (48) and 2 Curved
Washers (47) from the Mounting Post Tube of Main
Frame (1).
• PullUpperCable(87)throughtheFrontPostusingLink
Wire(88)andjointoLowerCable(87).ThrowawayLink
Wire (91).
• PutFrontPost(7)intotheMountingPostofMain
Frame and secure with 6 Allen Head Bolts (34), 6 Spring
Washers (12), 4 Flat Washers (48) and 2 Curved Washers
(47).