30
73
55
84
84
79
16
89
58
55
16
73
55
55
58
79
84
84
89
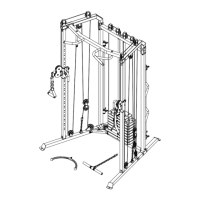
ASSEMBLY STEPS
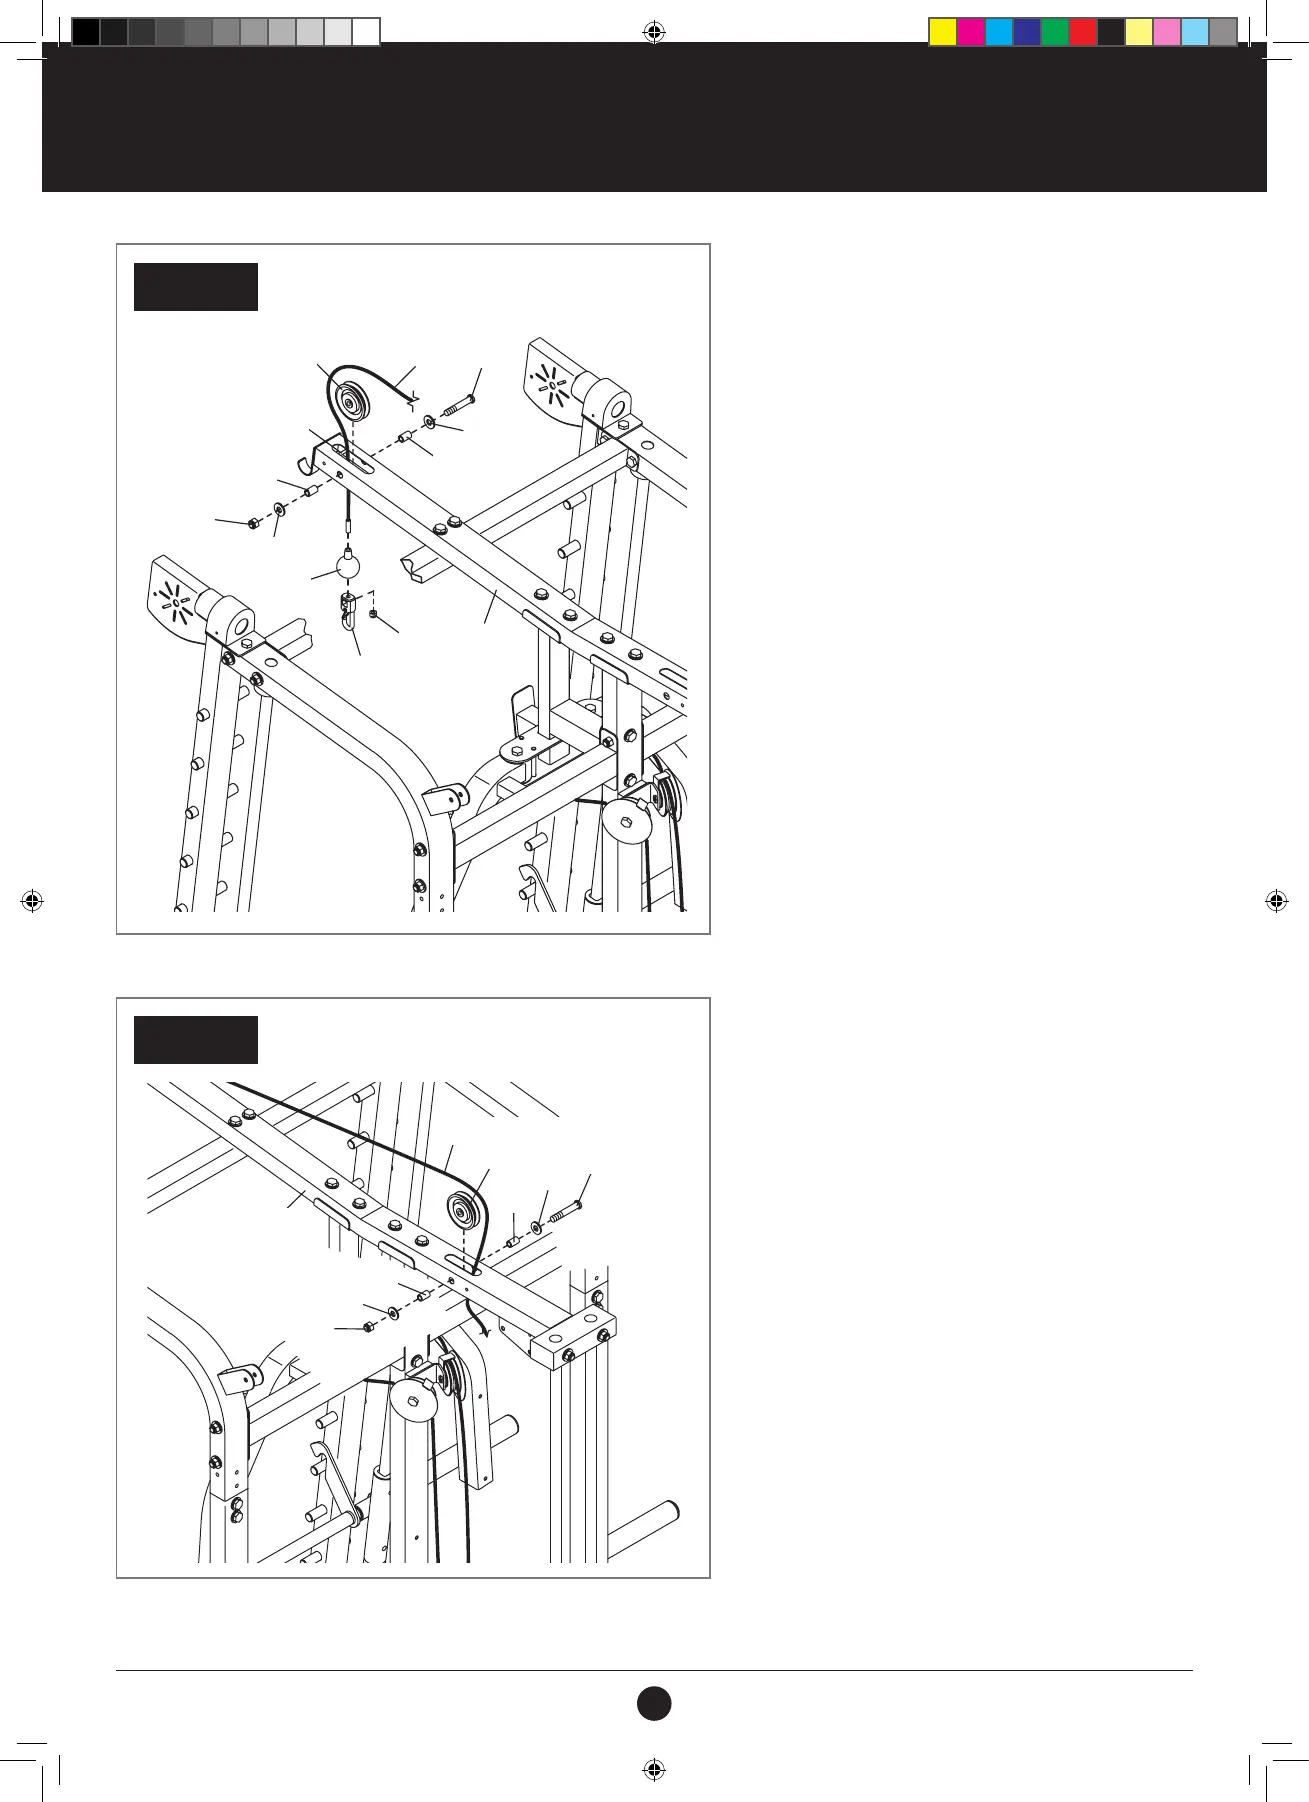
STEP 27:
IDENTIFY THE HIGH CABLE (73)
1. Slide a Cable Stop (52) onto the High Cable (73).
2. Hold an M6 Locknut (100) inside a Clip (53), and
insert the High Cable (73) into the Clip and the
Locknut.
3. Next, hold the crimp on the High Cable with
pliers, and insert a screwdriver between the Clip
and the Locknut.
4. Rotate the screwdriver, the Clip, and the Locknut
together until at least two threads of the High
Cable show past the Locknut.
5. Then, slide the Cable Stop (52) onto the Clip (53).
6. Next, route the High Cable (73) upward through
the Top Frame (16) and over a 90 mm Pulley
(58). Attach the 90 mm Pulley inside the Top
Frame with an M10 x 90 mm Bolt (89), two M10
Washers (84), two 25 mm Spacers (55), and an
M10 Locknut (79).
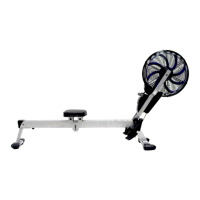
STEP 28:
1. Route the High Cable (73) over a 90 mm Pulley
(58) and downward through the Top Frame (16).
2. Attach the 90 mm Pulley inside the Top Frame
with an M10 x 90 mm Bolt (89), two M10
Washers (84), two 25 mm Spacers (55), and
an M10 Locknut (79).
STEP 28
REAR OF THE WEIGHT RACK
58
55
Rod
55
84
89
79
16
53
52
73
84
100
55
55
58
89
84
84
79
16
100
53
52
73
Rod
STEP 27
REAR OF THE WEIGHT RACK
#21M05T035 Multifunction Smith Machine UM A4.indd 30 2021/06/24 11:27 AM