Aluminium profile 1
Aluminium profile 2
Aluminium profile 3
Aluminium profile 1
Aluminium profile 1
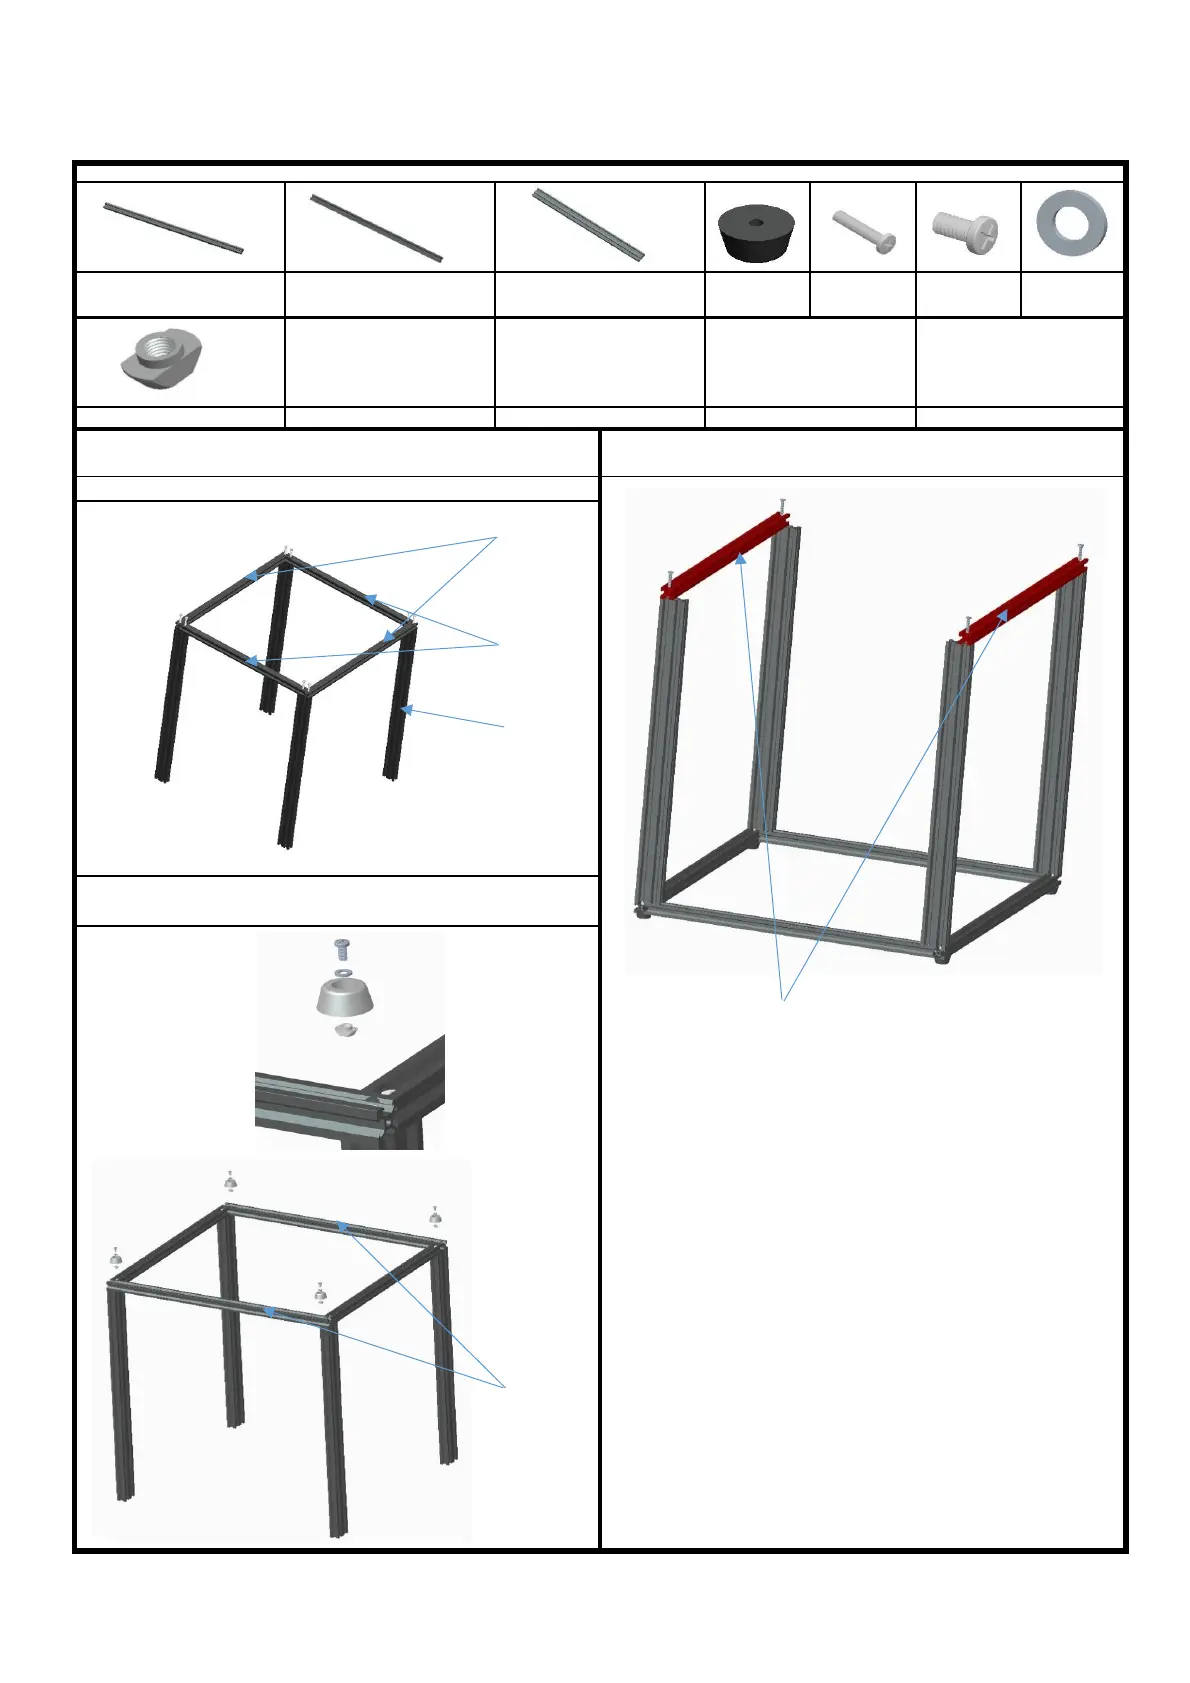
2.Assemble the pad, spacer, screw PM4*8, T nut M4 with the aluminium profile 1
together,distance from the end around 20mm, same as the illustration
Aluminium profile 1 20*20*530mm
4pcs
Aluminium profile 2 20*20*460mm
2pcs
Aluminium profile 3 20*40*530mm
4pcs
1.Lock the aluminium profile 1 2pcs, Aluminium profile 2 2pcs, aluminium 3 4pcs
together by 8pcs screw PM5*25, same as the illustration.
Note: Before locking the screws, make sure the aluminum profile are aligned and vertical
Step 1. Assemble base frame
Assemble parts specifications and quantity:
3.Lock the aluminium profile 1 2pcs with 4pcs screw PM5*25
Note: Do not tighten too much, enable they can be adjusted in further step.
 Loading...