Operation
7.8.3 Engraving process
1. Create a graphic with the help of the graphics software. Select the printer driver and rotary attachment,
and enter the diameter of the workpiece.
2. Perform the settings for size and orientation in the JobControl® menu "Plate" > "Setup Plate" and choose
- if necessary - the engraving material. You can determine the orientation of the graphic on the workpiece
with the option “Job Orientation”.
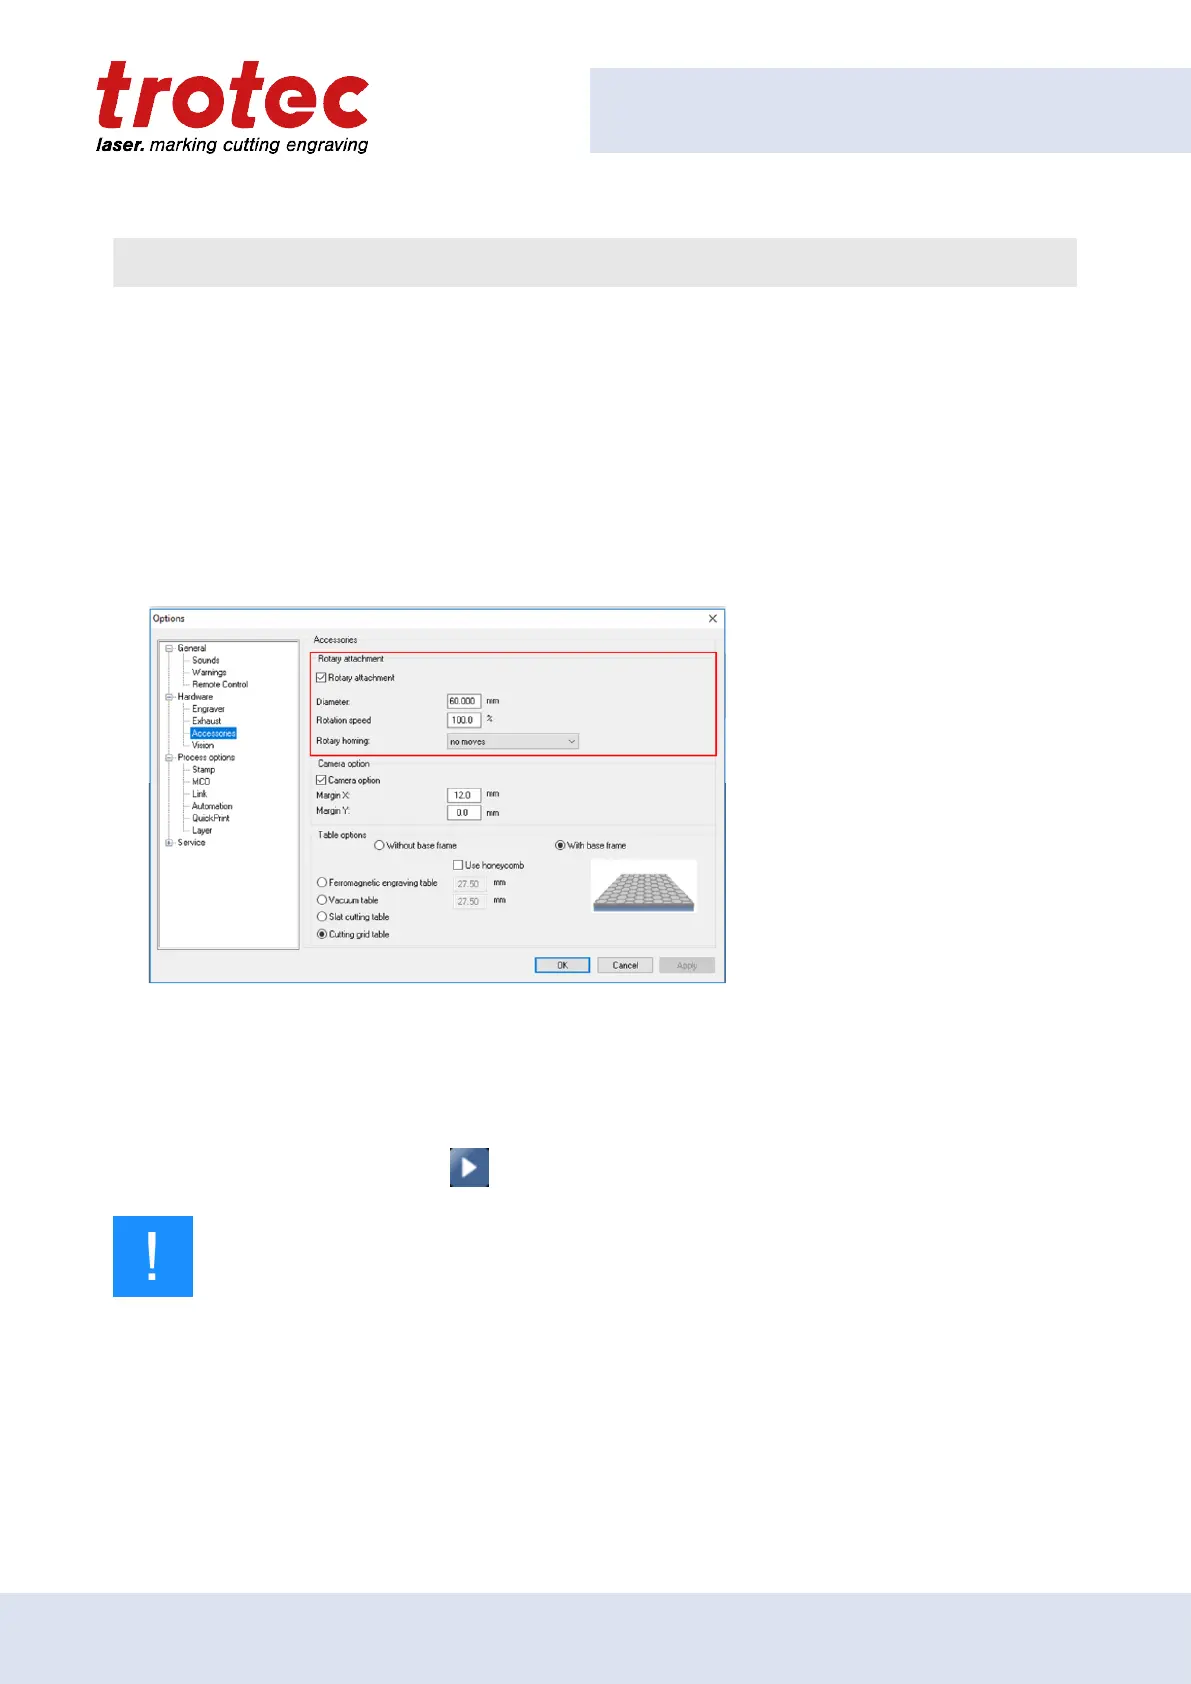
3. 3. In the menu "Settings" > "Options" > "Accessories", select the option "Rotary Engraving" and enter the
diameter of the object (see Fig. 6). If the diameter has already been entered in the printer driver, the size
is automatically transferred into JobControl .
Figure 5: Einstellungen "Rundgravieren"
4. Double-click on the job in the waiting list to place it on the plate.
5. Position the laser head over the workpiece.
6. Start the engraving process.
Notice
See the Software manual for additional functions.
When using the Rotary attachment, the autofocus is automatically deactivated.
77
 Loading...