FILLFUELTANK
(ALLMODELS)
DANGER
Gasoline is highlyflammable
and itsvaporsare explosive.
* Never fill the fuel tank
whenthe engine is runningor
when it is still hot from oper-
ation. Allow the engine to
cool at least two minutes be-
fore refueling.
• Do not allow open flames,
sparks, matches, or smoking
in the area.
• Fill the fuel tank outdoors
in a well-ventilated area.
• Wipe up any spills and
move the mower away from
gasoline fumes before start-
ingthe engine.
• Securely replace the caps
on the fuel tank and fuel
container.
• Use onlyan approvedfuel
container. Store it safely,
outof the reachof children.
• Store gasoline in a well-
ventilated area. Do notstore
it where vapors could reach
an open flame or spark, or
where ignition sources (such
as a hot water heaters or
space heaters, furnaces,
clothes dryers, stoves, elec-
tric motors,etc.) are present.
Failure to follow these
instructions could result in
personal injury or property
damage.
A. Unscrew the fuel tank cap.
B. Insert a clean funnel into the
fuel tank (or use a fuel container
with a flexible spout).
C. See the Engine Owner's
Manual for the correct gasoline
specifications for your mower's
engine. Slowly fill the fuel tank
leaving at least 1/2 inch of air
space at the top for fuel expansion.
D. Very securely replace the fuel
tank cap and the cap on the fuel
container. Promptly wipe up any
gasoline spills.
ADJUSTCUTTINGHEIGHT
(ALLMODELS)
CAUTION
Before adjusting the cutting
height, shut off the engine,
wait for all moving parts to
stop, allow the engine to
cool, disconnect the spark
plug wire and prevent it from
t_ouchingthe sparkplug.
Failure to dothis couldresult
in personal injury or property
damage.
Cutting Height Adjustment
The Cutting Height Adjustment
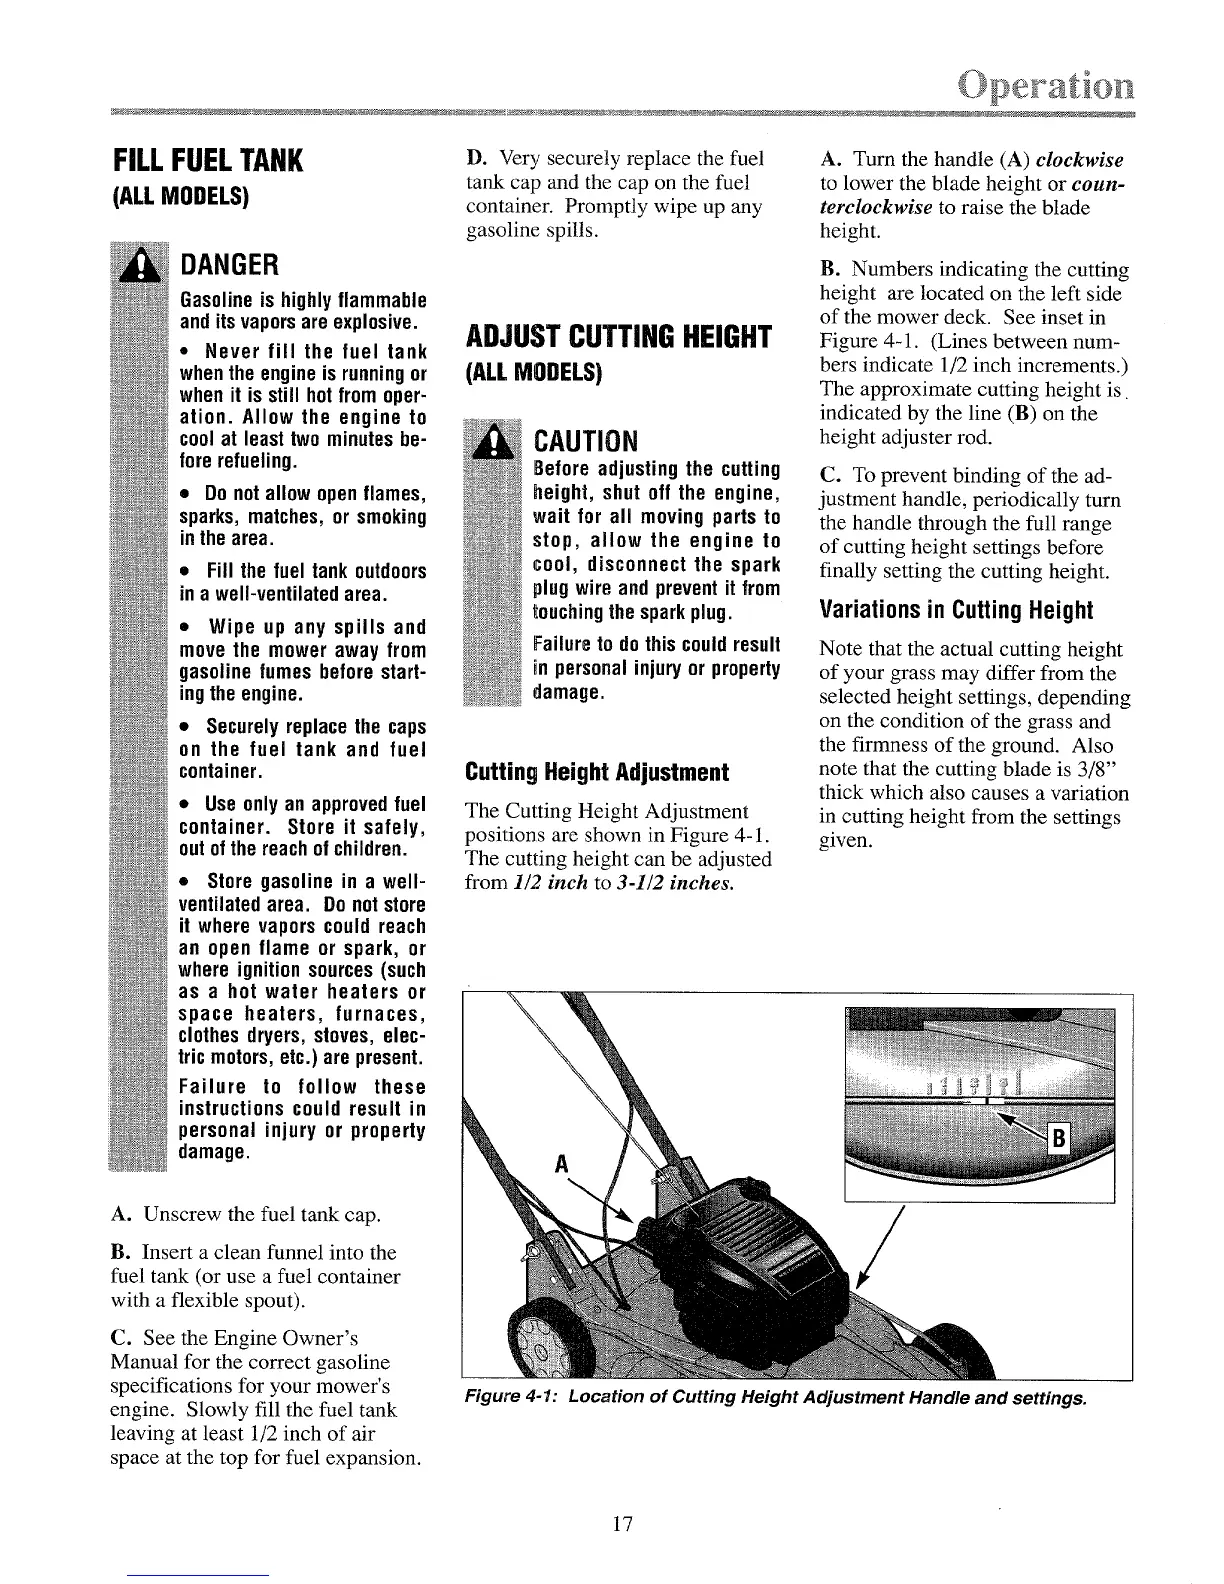
positions are shown in Figure 4-1.
The cutting height can be adjusted
from 1/2 inch to 3-I/2 inches.
A. Turn the handle (A) clockwise
to lower the blade height or coun-
terclockwise to raise the blade
height.
B. Numbers indicating the cutting
height are located on the left side
of the mower deck. See inset in
Figure 4-1. (Lines between num-
bers indicate 1/2 inch increments.)
The approximate cutting height is
indicated by the line (B) on the
height adjuster rod.
C. To prevent binding of the ad-
justment handle, periodically turn
the handle through the full range
of cutting height settings before
finally setting the cutting height.
Variations in Cutting Height
Note that the actual cutting height
of your grass may differ from the
selected height settings, depending
on the condition of the grass and
the firmness of the ground. Also
note that the cutting blade is 3/8"
thick which also causes a variation
in cutting height from the settings
given.
Figure 4-1: Location of Cutting Height Adjustment Handle and settings.
17




 To Next Page