ID5000, XR5000 Level 1 Service Manual
Issue 4, 8/2017 28
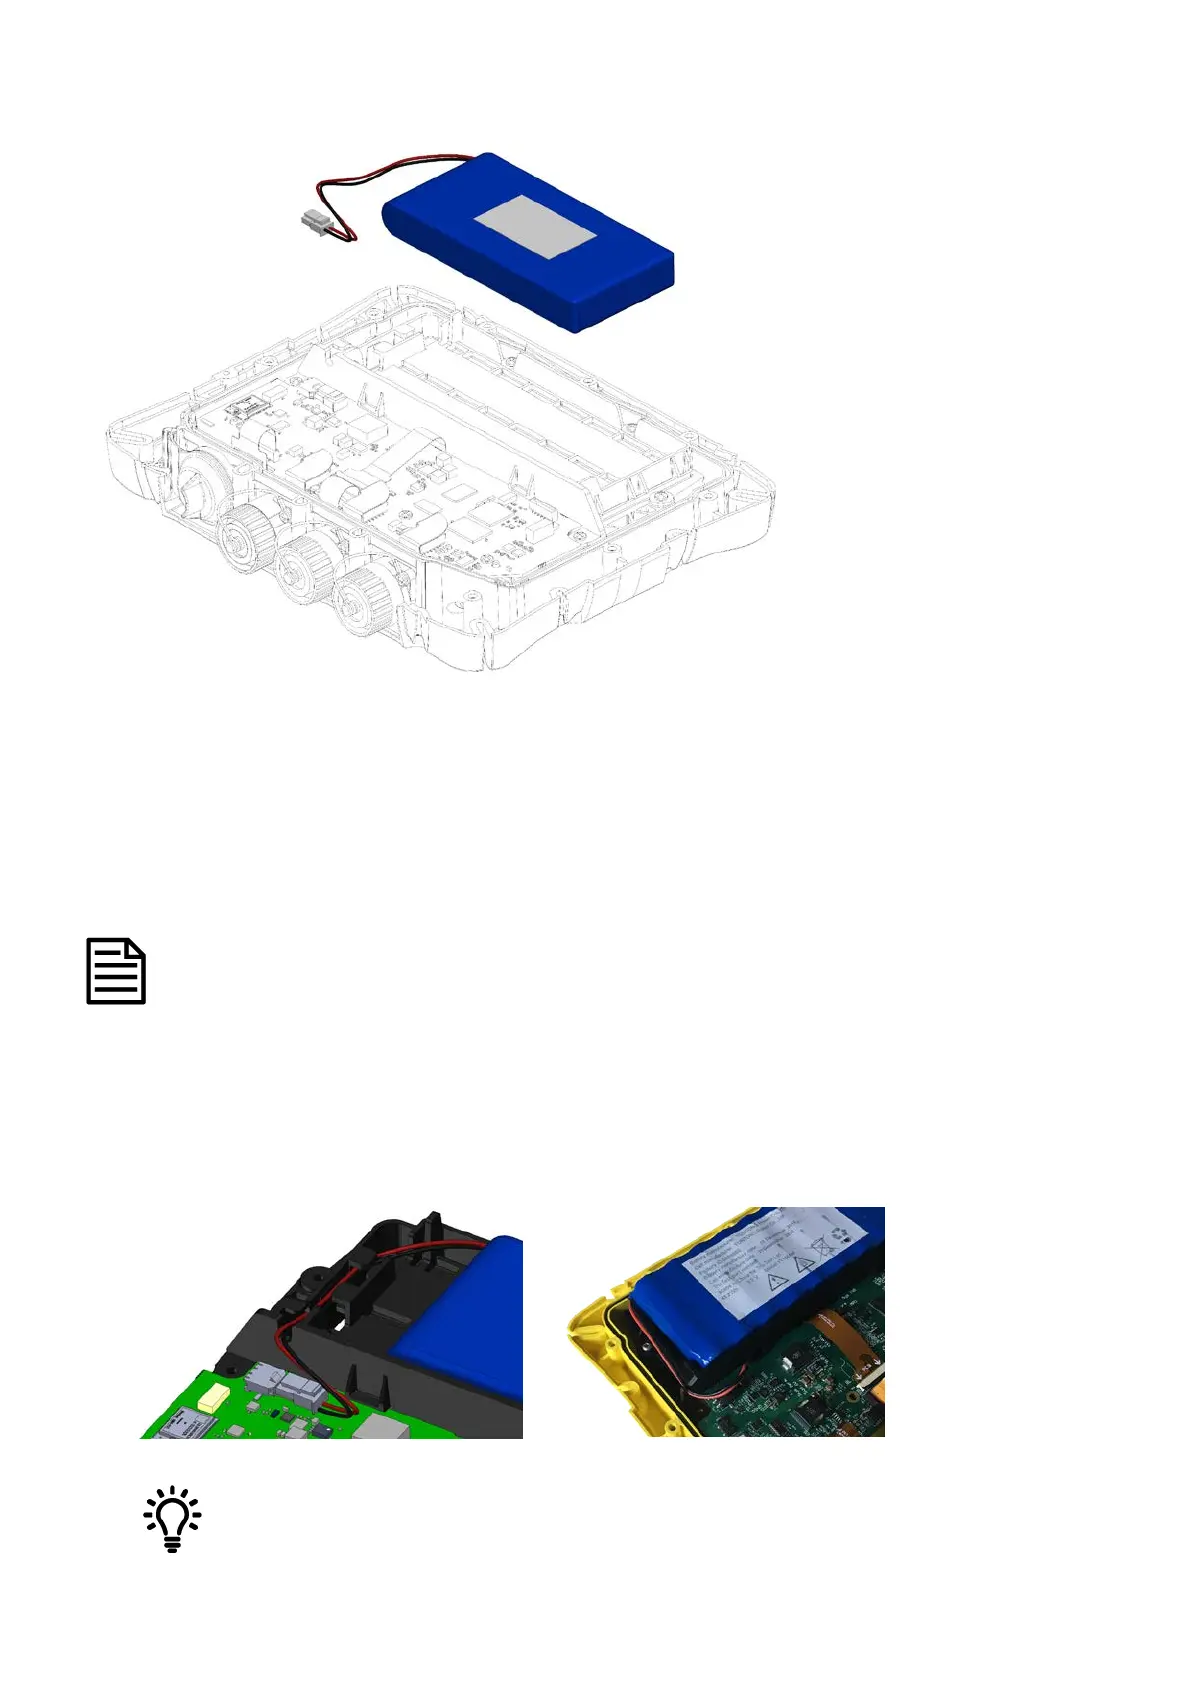
Figure 10: Battery location
1 Remove the rubber corner bumpers (see page 23).
2 Remove the indicator case
back (see page 25).
3 Unplug the battery from the PCA by pressing down carefully on the rear of the clip on top of the connector and sliding the
tab out at the same time.
4 Remove the old battery. The battery is secured to the cradle bottom using double sided adhesive tape, so you need to
carefully but firmly pry the battery from the cradle.
Faulty batteries need to be disposed of properly. Generally for lithium batteries this includes deep discharging the
battery with a resistor and then leaving the battery in a bucket of salty water for a week. However, you should seek
advice from local authorities.
1 Plug the battery into the PCA.
2 Remove the liner from the double sided tape and place the battery into the cradle pressed up against the right-hand side.
Press down firmly to ensure adhesion of the tape.
3 Push the battery cables into the cradle's cable retention feature and into the groove in the cradle rib.
retention feature
Models with serial number <510,000 Models with serial number >510,000
Write the installation date on the battery with a permanent marker.
4 Refit the case back (see page 25).
 Loading...