ID5000, XR5000 Level 1 Service Manual
Issue 4, 8/2017 27
Replacing the case o-ring
1 Remove the rubber corner bumpers (see page 23).
2 Remove the case back (see page 25).
3 Use a fine screwdriver to lever out the o-ring and remove it from the case. Be careful not to damage the mating surfaces of
the case.
4
Do not use a knife to remove the o-ring as it may damage the case; even a small cut can create sealing problems
.
5 Ensure that the seal groove is clean. Use cotton buds (q-tips) or tissues to remove any excess oily residue.
6 Replace the o-ring, taking care to get an even stretch along its length.
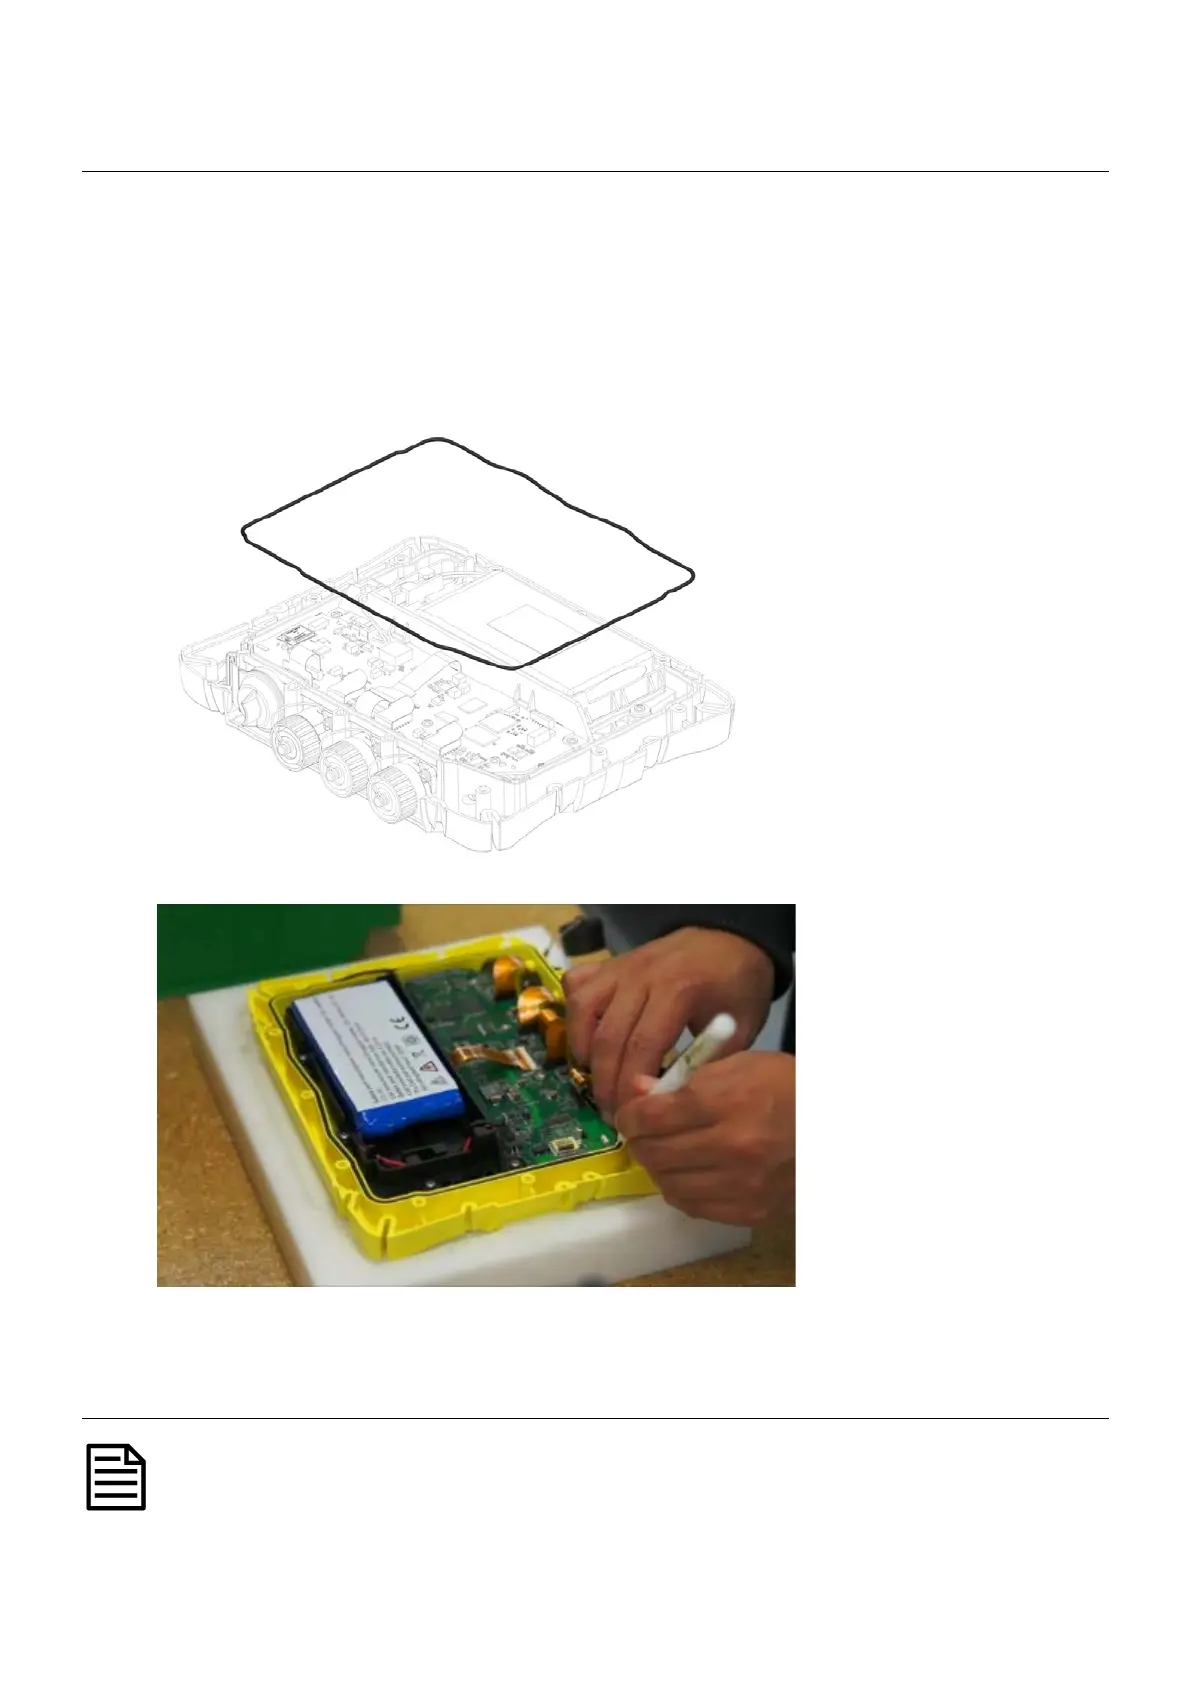
Figure 8: Case front assembly
indicating the location of the case
o-ring.
7 Use a plastic pen to ensure that the o-ring sits tightly in the corners.
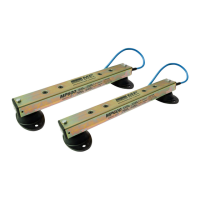
Figure 9: Using a plastic pen to
press the o-ring into the groove at
the corners.
8 Refit the case back (see page 25).
9 Refit the rubber corner bumpers
(see page 23).
Replacing the battery
The batteries are different, depending on the serial number the indicator has. See
Changes to product
on page 7.