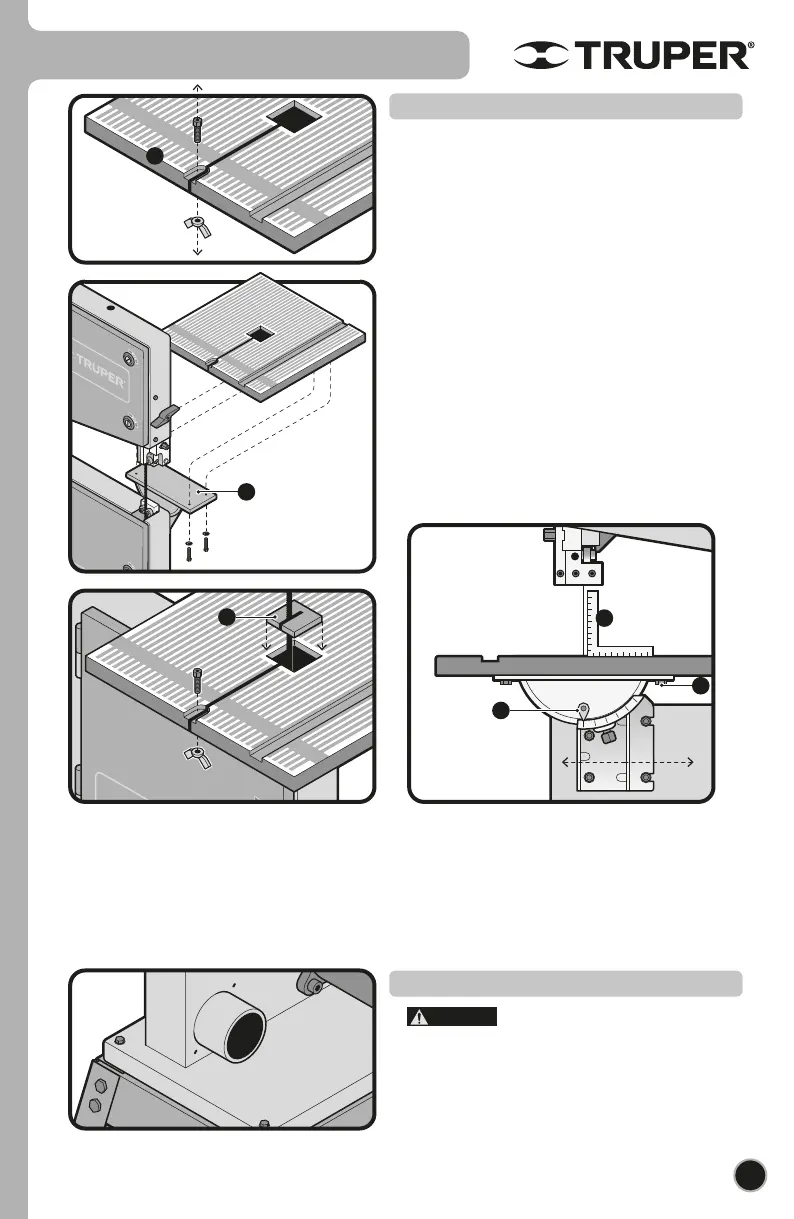
7
Assembly
• Remove the nut and the Allen hex screw from the work
table (A).
• Set the table onto the upper joint (B) passing the cutting
band through the table slot. Fix the table to the joint with 4 sets
of pressure toothed washers and M16x12 hex nuts. Double
check the cutting band and the edge of the slots are separated,
otherwise, make adjustments before tightening the screws.
• Set back the nut and the Allen hex nut onto the work table.
• Place the table insert (C) into the center orifice (the insert
with wide slot is only used for bevel cuts).
• Adjust the table in the event the cutting blade does not run in
the middle of the slot. To carry out this adjustment loosen the
4 screws fixing the lower joint (D) onto the lower cabinet.
Move the table until the cutting band passes in the middle of
the insert slot.
• Check that the angle indicated by the pointer (F) marks 0°,
otherwise loosen the pointer screw and adjust to 0°. Using a
square (E) verify that the work table is at at 90° with regards to
the cutting blade.
Work Table
• Working with the saw can generate
dangerous dusts aside from sawdust and splinters which
combined with an ignition source could catch fire or
generate explosions, injuries or allergies .
• It is recommended to connect the saw to a dust collector
with an air flow suitable for hazardous dust extraction. The
dust outlet has a 2 ¼” diameter.
Dust outlet
B
E
C
F
A
CAUTION
D
ENGLISH