E
1,75”
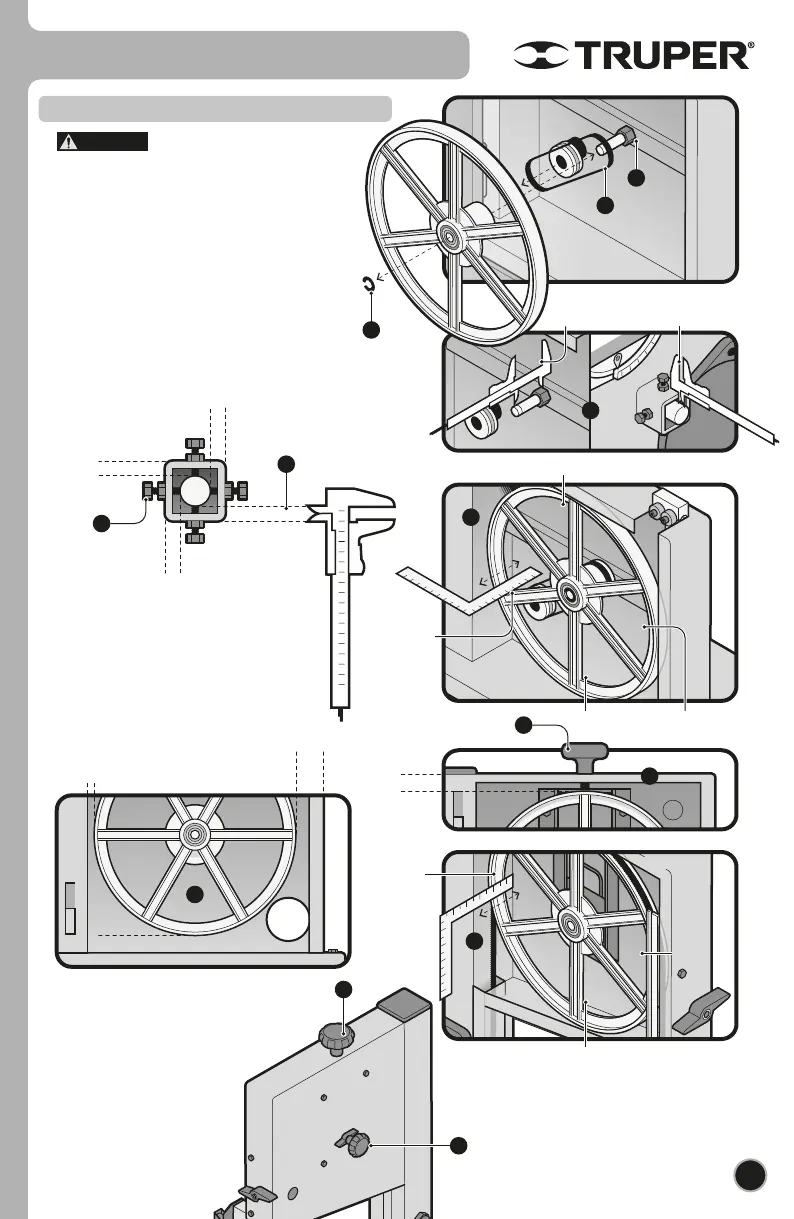
Lower Pulley
Upper Pulley
1,5”
0,9”
0,4”
0,38”
0,4”
0,38”
0,3”
0,3”
1,25”
1”
1,93”
1,97”
9
Adjustments
L
A
I
J
K
D
F
I
H
C
B
• Pulleys are factory-adjusted to
allow the blade to run correctly. Adjust only in the
event the blade run is deficient.
• Using pliers, remove the omega lock (A) to remove
the lower pulley.
• Remove the belt (B).
• Loosen nut (C) and four adjusting knobs from the
axis (D) in the rear to allow the axis to run freely.
• Move the axis so that the front part overhangs 1
3
/
4
”
and the rear overhangs 5/16” (E). Tighten nut (C).
• Tighten the four adjusting bolts to center the axis
with respect to the square and according to the
measures in the figure (F).
Pulleys
• Mount the band saw in both pulleys and
center it.
• Set the tightening knob ( I ) of the cutting band
in the cabinet upper orifice and turn
clockwise to tighten the band until the
pulley is adjusted to the
measurements in figure J.
CAUTION
• Set back the belt, the pulley and the omega
lock.
• Verify that the pulley’s depth is with regards
to the measurements indicated in the figure G
in its upper, lower, left and right sides.
• Verify that the distance between the pulley
regarding the distance of the inner walls in the
cabinet matches the measurements in figure H.
• To adjust the pulley to the
measurements indicated in figure K,
turn the knob found in the rear side of
the upper cabinet (L).
Lower Pulley
1,9”
1,97” 1,97”
G
1,97”
ENGLISH