EasyManuals Logo

TSC MB240 Series User Manual

TSC MB240 Series
69 pages
To Next Page IconTo Next Page
To Previous Page IconTo Previous Page
Page #29 background imageLoading...
Page #29 background image
- 20 -
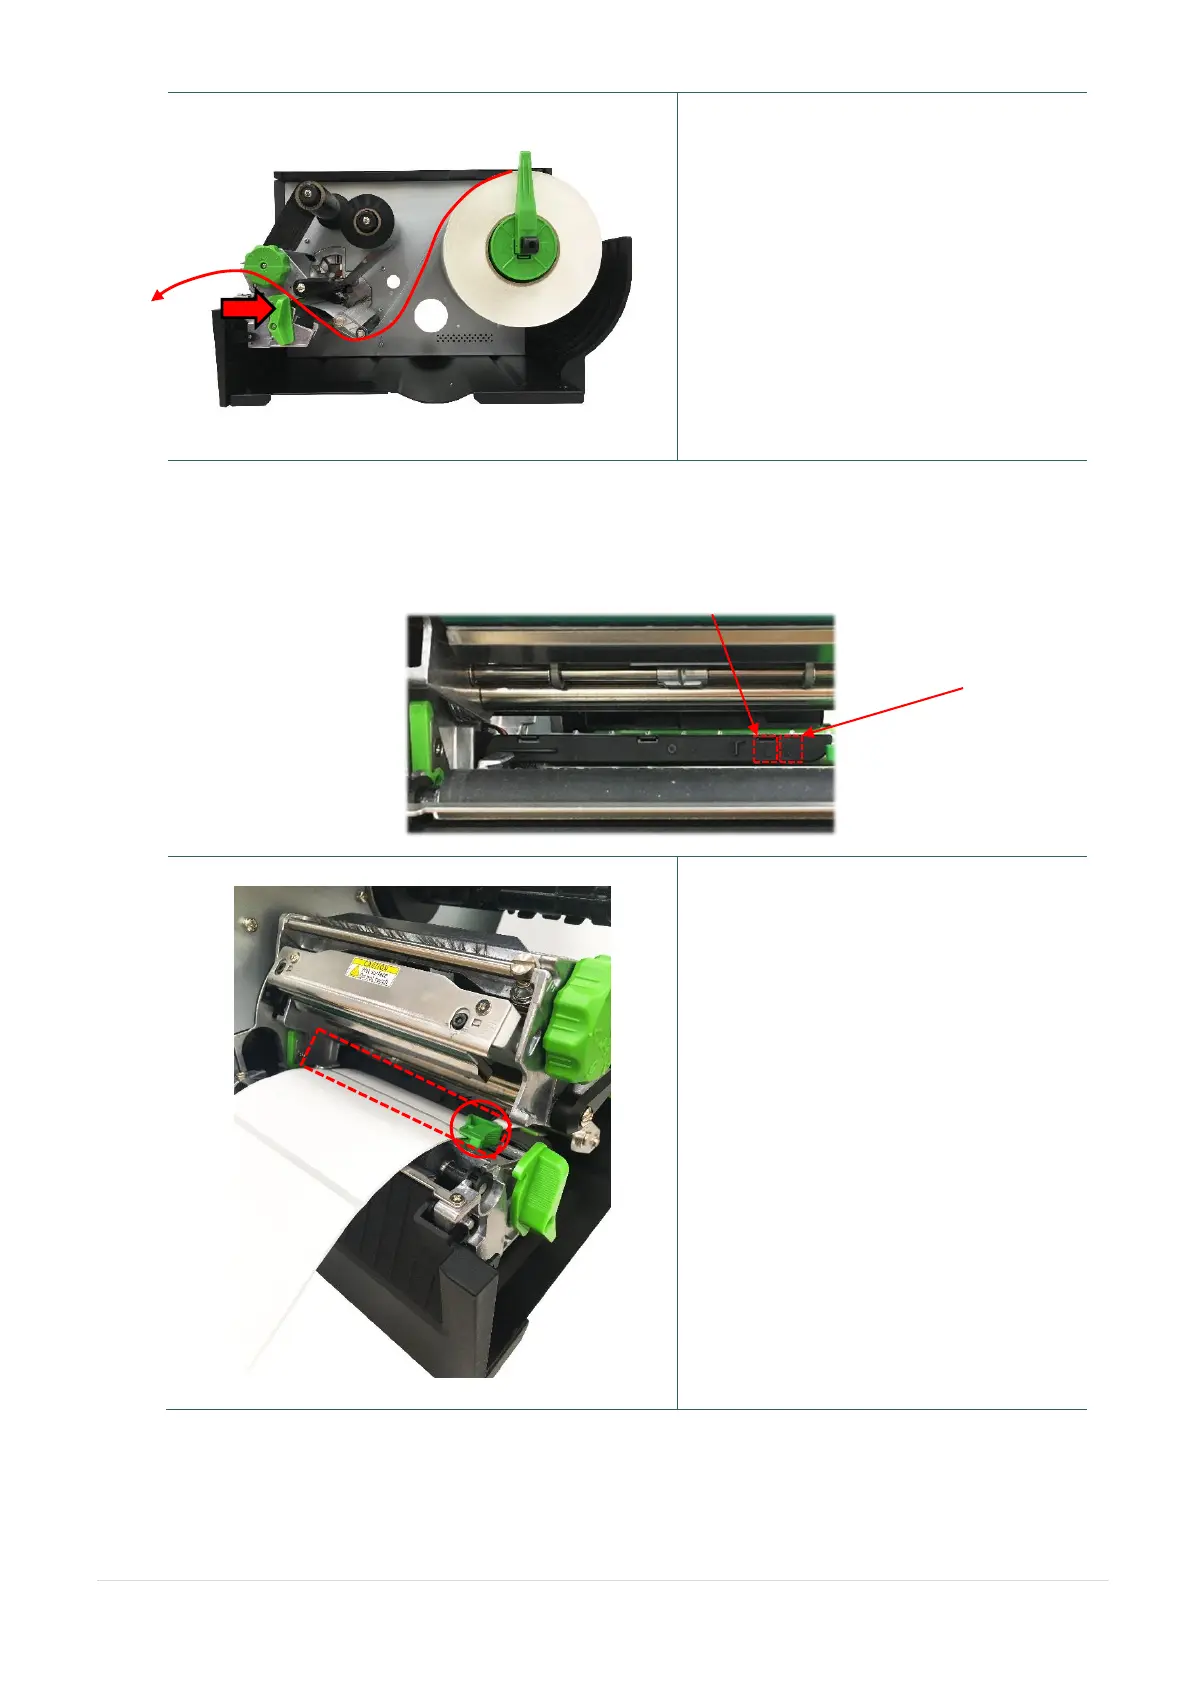
4. Push the print head release lever and
install the label through the damper,
media sensor, and label guide to install
the media.
5. Move the media sensor by adjusting the media sensor position adjustment knob, make sure the
gap or black mark sensor is at the location where media gap/black mark will pass through for
sensing.
6. Adjust the label guide to fix the media
position.
Note:
* Please install the media through
the media sensor.
* The sensor location is marked by a
triangle mark (gap sensor) and
arrow mark(black mark sensor) at
the sensor housing.
* The media sensor position is
movable, please make sure the gap
or black mark is at the location
where media gap/black mark will
pass through for sensing.
Black mark sensor
(shown as
)
Gap sensor
(shown as)

Other manuals for TSC MB240 Series

Questions and Answers:

Question and Answer IconNeed help?

Do you have a question about the TSC MB240 Series and is the answer not in the manual?

TSC MB240 Series Specifications

General IconGeneral
Print MethodThermal Transfer/Direct Thermal
Resolution203 dpi
Processor32-bit RISC CPU
Operating Humidity25-85% non-condensing
ConnectivityUSB 2.0, RS-232
Media SensorReflective, Transmissive
Media TypeContinuous, Die-cut, Black mark, Fan-fold, Notched
Media Width25.4 mm
Media Thickness0.06 mm
Media Core Diameter25.4 mm (1")
Media Max Roll Diameter127 mm (5")
Ribbon Width110 mm
Ribbon Length300 m
Ribbon Core Diameter25.4 mm (1 inch)
Power100 - 240 VAC, 50/60 Hz
Maximum Print Length9999 mm
Label Width25.4 mm
Label Thickness0.06 mm
Power Supply100-240V AC, 50-60Hz
Operating Temperature5°C - 40°C
Storage Temperature-20°C - 60°C
CertificationsCE

Related product manuals