
R
robert43Sep 23, 2025
Why is the cutter not working on my TSC MH261T?
- EEdward FloydSep 23, 2025
If the cutter is not working on your TSC Barcode Reader, the connector may be loose. Plug in the connect cable correctly.
Why is the cutter not working on my TSC MH261T?
If the cutter is not working on your TSC Barcode Reader, the connector may be loose. Plug in the connect cable correctly.
Why is my TSC MH261T printing with poor quality?
Poor print quality on your TSC Barcode Reader can occur due to several reasons. The ribbon and media might be loaded incorrectly, there could be dust or adhesive on the print head, the print density or speed might not be set properly, the printhead element could be damaged, the ribbon and media might be incompatible, or the printhead pressure might not be set properly. Reload the supply, clean the print head and platen roller, adjust the print density and print speed. Run a printer self-test to check the print head test pattern for missing dots. Change to proper ribbon or label media. Adjust the printhead pressure adjustment knob and ensure the print carriage is closed properly.
What to do if my TSC MH261T has a paper jam?
If your TSC Barcode Reader has a paper jam, it could be due to the gap/black mark sensor not being set properly, incorrect label size settings, or labels stuck inside the printer mechanism. Calibrate the media sensor, set the correct media size, and remove any stuck labels from inside the printer.
How to fix no print on the label with my TSC MH261T?
If your TSC Barcode Reader is not printing on the label, it may be because the label or ribbon is loaded incorrectly, you're using the wrong type of paper or ribbon, or the print density setting is incorrect. Follow the media and ribbon loading instructions. Verify that the ribbon and media are compatible and that the ribbon-inked side is correct. Reload the ribbon, clean the printhead, and set the correct density with the media.
What to do if my TSC MH261T skips labels when printing?
If your TSC Barcode Reader skips labels during printing, the label size might not be specified properly, the sensor sensitivity might not be set correctly, or the media sensor could be covered with dust. Check if the label size is set up correctly. Calibrate the sensor using Auto Gap or Manual Gap options. Clear the GAP/Black mark sensor with a blower.
Why is the left side printout position incorrect on my TSC Barcode Reader?
If the left side printout position is incorrect on your TSC Barcode Reader, the label size setup might be wrong or the parameter Shift X in the LCD menu is incorrect. Set the correct label size and press [Menu] ? [Setting] ? [Shift X] to fine-tune the parameter of Shift X.
What to do if my TSC MH261T Barcode Reader SD card is unable to use?
If your TSC Barcode Reader's SD card is not working, the SD card may be damaged or not inserted correctly. Use a supported capacity SD card and insert the SD card again.
What to do if my TSC MH261T Barcode Reader takes label?
If your TSC Barcode Reader displays 'Take Label', the peel function is enabled. If the peeler module is installed, remove the label. If there is no peeler module, switch off the printer and install it. Check if the connector is plugged in correctly.
What to do if my TSC Barcode Reader is missing printing on the left or right side of label?
If your TSC Barcode Reader is missing printing on the left or right side of the label, the label size setup might be wrong. Set the correct label size.
Why is my TSC MH261T Barcode Reader LCD panel dark and keys not working?
If the LCD panel on your TSC Barcode Reader is dark and the keys are not working, the cable between the main PCB and LCD panel might be loose. Check if the cable between the main PCB and LCD is secured.
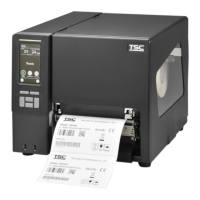
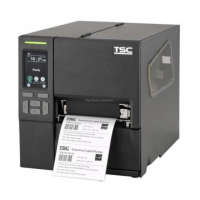
An overview of the MH261T/MH361T Series thermal transfer bar code printers.
Detailed technical specifications and features for the MH261T and MH361T models.
Guide to unpacking and inspecting the printer and its included accessories upon receipt.
Identification of external components and controls visible on the printer's front panel.
Diagram and labeling of the printer's front components and controls.
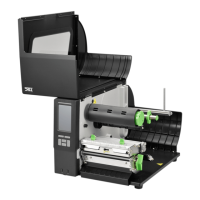
A detailed diagram illustrating and labeling the printer's internal mechanisms and parts.
Diagram showing rear panel connections and ports of the printer.
Explanation of LED status indicators and the functions of the printer's physical control keys.
Explanation of LED status indicators and the functions of the printer's physical control keys.
Interpretation of icons displayed on the LCD control panel and their meanings.
Instructions for navigating and interacting with the printer's touch-sensitive LCD interface.
Procedures for the initial physical setup and connection of the printer to a power source and host.
A step-by-step guide on how to correctly install a ribbon into the printer.
Instructions for safely removing a spent ribbon from the printer.
Detailed guide for loading various types of media rolls and labels into the printer.
Specific instructions for loading fan-fold media into the printer.
Guide for loading media when using the optional peel-off feature for label dispensing.
How to adjust the print head pressure for optimal print quality on different media.
Techniques for adjusting internal mechanisms to prevent ribbon wrinkling during printing.
Procedures for accessing the printer's main menu via touch panel or physical keys.
A summary of the six main functional categories available within the printer's menu system.
Configuration options for printer settings when using the TSPL command set.
Configuration options for printer settings when using the TSPL command set.
Configuration options for printer settings when using the ZPL2 command set.
Process for automatically calibrating the printer's media gap and black mark sensors.
Process for automatically calibrating the printer's media gap and black mark sensors.
Manual setup, threshold detection, max length, and advanced sensor configurations.
Configuration settings for the RS-232 serial communication interface.
Configuration settings for the RS-232 serial communication interface.
Settings and status check for the printer's Ethernet network connection.
Management of Bluetooth status, local name, and PIN code settings.
Configuration and status management for the Wi-Fi wireless network interface.
Settings for the General Purpose Input/Output (GPIO) interface for external device control.
Configuration of language, display brightness, date, and time.
Configuration of language, display brightness, date, and time.
Accessing printer information, performing initialization, and touchscreen calibration.
Calibrating the touchscreen for accurate input response.
Setting passwords, managing ribbon warnings, and print head care procedures.
Configuring key sound and accessing technical support contact information.
Managing files stored in the printer's DRAM memory.
Managing files stored in the printer's DRAM memory.
Managing files stored in the printer's Flash memory.
Managing files stored on the SD card installed in the printer.
Printing printer configuration details and a print head test pattern for diagnostics.
Printing printer configuration details and a print head test pattern for diagnostics.
Capturing and printing communication port data for debugging purposes.
Checking print head temperature, resistance, and bad dots for performance.
Checking the status of the printer's display and sensor readings.
Guide to customizing the printer's menu by adding frequently used settings to Favorites.
Methods and tools for cleaning printer components to ensure optimal performance.
Procedures and recommendations for safely disinfecting the printer.
| Brand | TSC |
|---|---|
| Model | MH261T Series |
| Category | Barcode Reader |
| Language | English |