Setting up the Edge via Detection Management Software 3-11
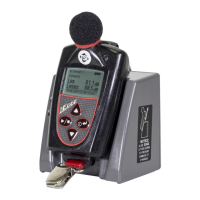
Dosimeter
settings for the
Edge
Name Field
*Note: Refer to Glossary for more detailed
information.
(Optional field) A setup name may be entered into
the Meter 1 and/or Meter 2 fields. When set, it
appears on the top of Edge’s display (example
setup names: OHSHA, MSHA, EU directive).
When the checkbox is selected and a value is
entered for meter 1 and/or meter 2, the threshold is
used to calculate Lavg, TWA, and Dose
measurements.
Select a UL dB level by the up/down arrows or by
typing in a value. (Note: The upper limit (UL) is a
measurement setting in which the user selects a
specific decibel level. The UL value records the
amount of time that the Sound level is at or greater
than the entered level.)
Select either A or C RMS Weighting. (Note: The
RMS (root mean square) are the results from the
Edge with the response time and weighting settings
taken into account.)
Select a Criterion level via the up/down arrow or by
typing in a value. (NOTE: Criterion level is the
average SPL that will result in 100% dose over the
criterion time and is typically set by a regulatory
agency such as OSHA, EU directive.)
Enter in (or select with up/down arrows) 3, 4, or
5 dB. ER refers to how sound energy is averaged
over time. (OSHA uses a 5 dB doubling rate while
most of the world uses 3 dB.)
Display Setting
The display screen is used to customize the parameters which will
appear on your Edge. It is organized by two columns, the “Display
position” and the “Item to Display” and includes a “Set selected Items”
selection/drop down box. The display position indicates the order of the
parameter (or item) which will appear on the display, while the “Item to
display” designates the measurement or parameter. The example/figure
below displays the SPL, Max, Min, Lavg, TWA, Dose, UL, RT, and
battery time remaining parameters to appear on the display.
(NOTE: There are up to 18 selectable parameters. Off indicates no item
will appear.)
1. Click on the Display tab from the Edge’s Instrument Configuration
panel (see 1). To customize the display, click on either the Display
position (see 1) or the Item to Display field (see 2). The field will be
shaded in blue when selected.
2. Click on the drop-down box of the Set Selected Item field (see 3)
and select a parameter (see 4).
3. Repeat these steps as needed to select each position.
 Loading...