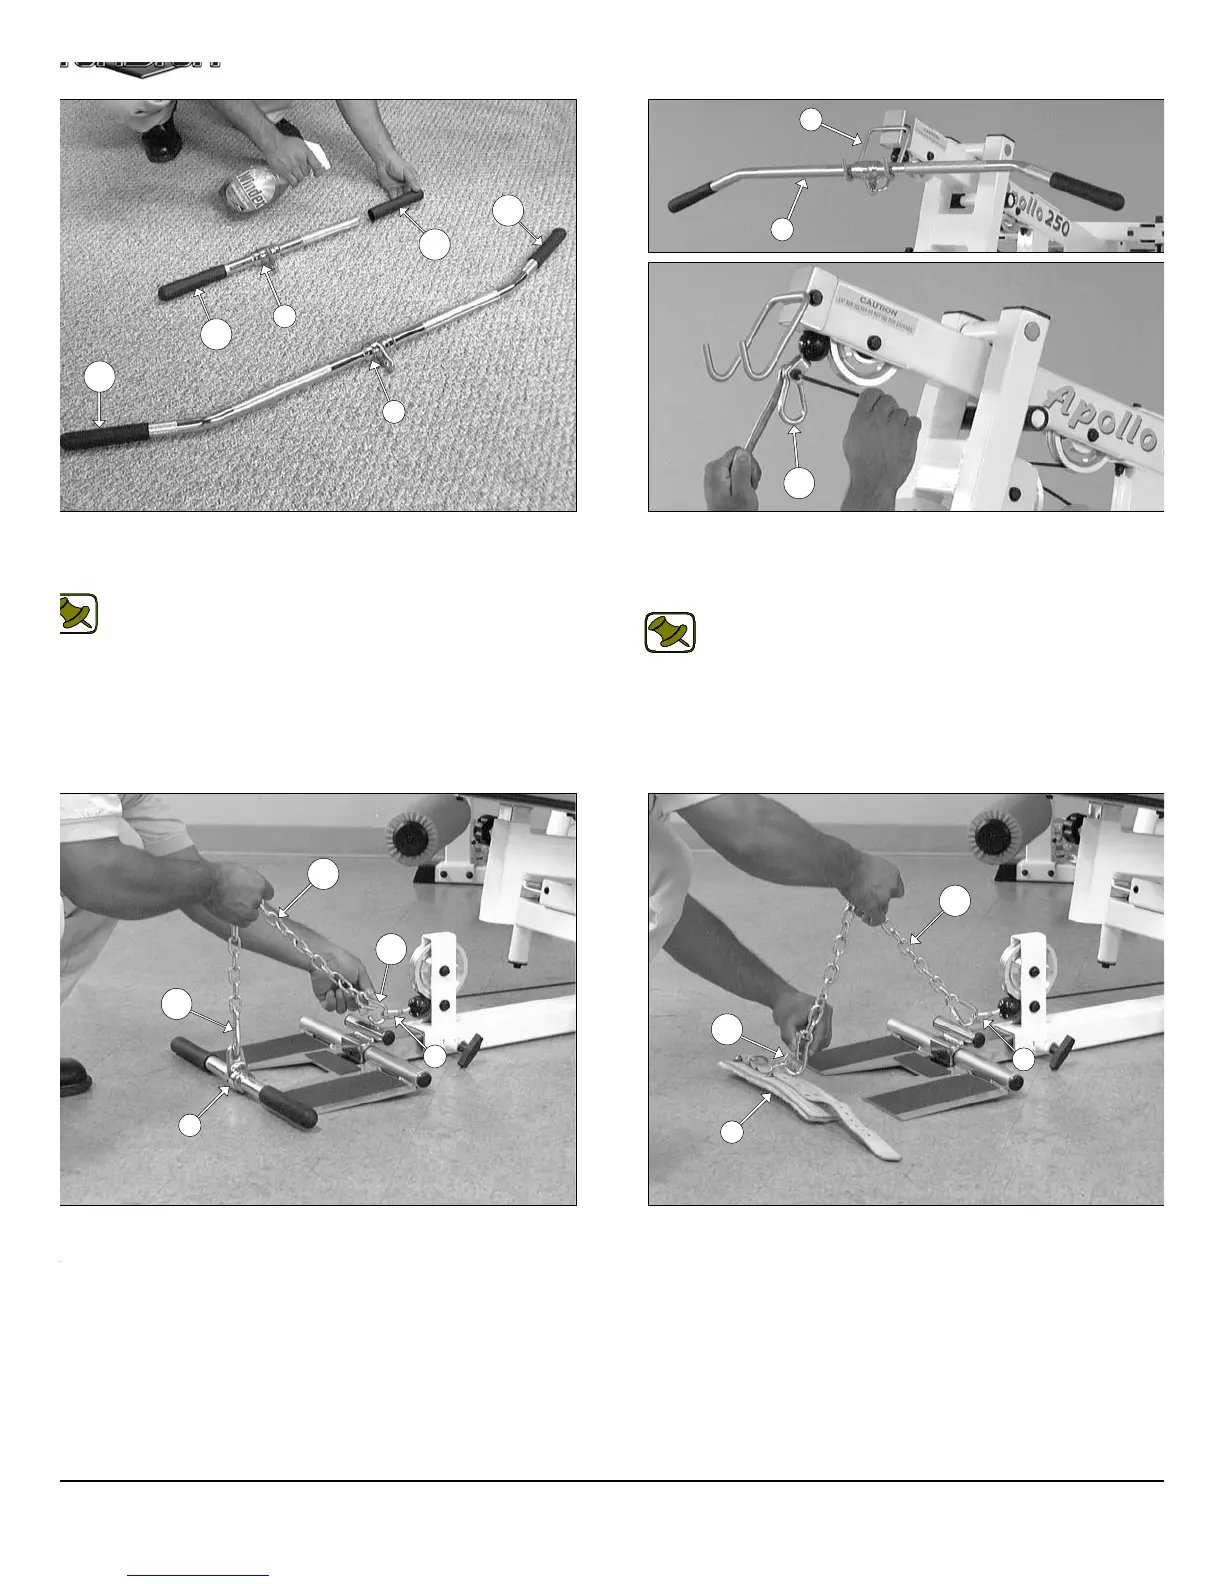
IG. 78 Locate the Coil Chain 3/16 X 21 (#125) and two Snap Links
124) and attach them to the Low Row Bar 20” (#63) and to the Low
ow/Abdominal Cable (#38), as shown above.
FIG. 77 Next, attach one Snap Link (#124) to the Lat Cable (#3
using one Shoulder Bolt 3/8 X 3/4 (#117), and one Nylon Insert Lo
Nut 5/16-18 (#102). Use the supplied Hex Key 3/16” (#126) and a 1/
combination wrench to fasten this assembly properly.
Note: Refer to Fig. A on page 26 for further clarification of th
hardware assembly.
Connect the Lat Bar 48” (#62) to the Lat Cable (#37) using the Sna
Link (#124). Use the Lat Bar Holder (#19) to rest the Lat Bar 48” (#6
onto, when not in use.
FIG. 79 In replacement of the Low Row Bar 20” (#63), use th
Leather Ankle Strap (#64) and attach it to the Leg Extensio
Abdominal Cable (#38) using the Coil Chain 3/16 X 21 (#125) and th
two Snap Links (#124), as shown above.
IG. 76 Insert a Rubber Grip (#121) over each one of the tube-ends
the Low Row Bar 20” (#63), and the Lat Bar 48” (#62), as shown
ove.
Note: To facilitate the insertion of these Rubber Grips, use Win-
dex or household glass cleaner.
121
121
121
121
21
63
62
19
62
124
38
63
125
124
124
64
124
125
38
AP-250S_AP-250D Apollo 2-Stack Gym Syste