5
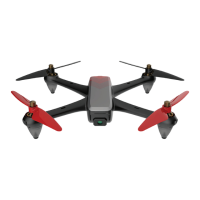
CHARGING THE DRONE BATTERY
ASSEMBLY OF THE PROPELLERS
Remove the battery from the drone. Put the battery in the charger and connect the power supply to a power
source through the provided USB cable.
The red LED light shows that the battery is being charged, the green LED shows that the battery is fully charged.
Charging time is about 280 minutes and the average flight time is about 14 minutes, however this may vary
depending on certain external agents like temperature, humidity, wind, etc.
You can use a max 5V USB adapter to charge the controller and the drone battery
Do not charge the batteries immediately after use. Let them cool down first.
Do not put the battery close to any heat sources and high temperatures and do not throw it in the fire.
The first time you use it, you will need to mount the propellers before proceeding with the flight.
Make sure you mount the propellers in the correct position according to the picture below:
• Left front propeller shown with letter A
• Right front propeller shown with letter B
• Left back propeller shown with letter B
• Right back propeller shown with letter A
Position the propeller, insert the silicone washer and use the metal cap to tighten the propeller.
For propellers marked with the letter A, use retainers with a concave surface.
For propellers marked with the letter B, use the flat-surface fasteners.
Drone battery
Phone charger Power bank Computer Car charger
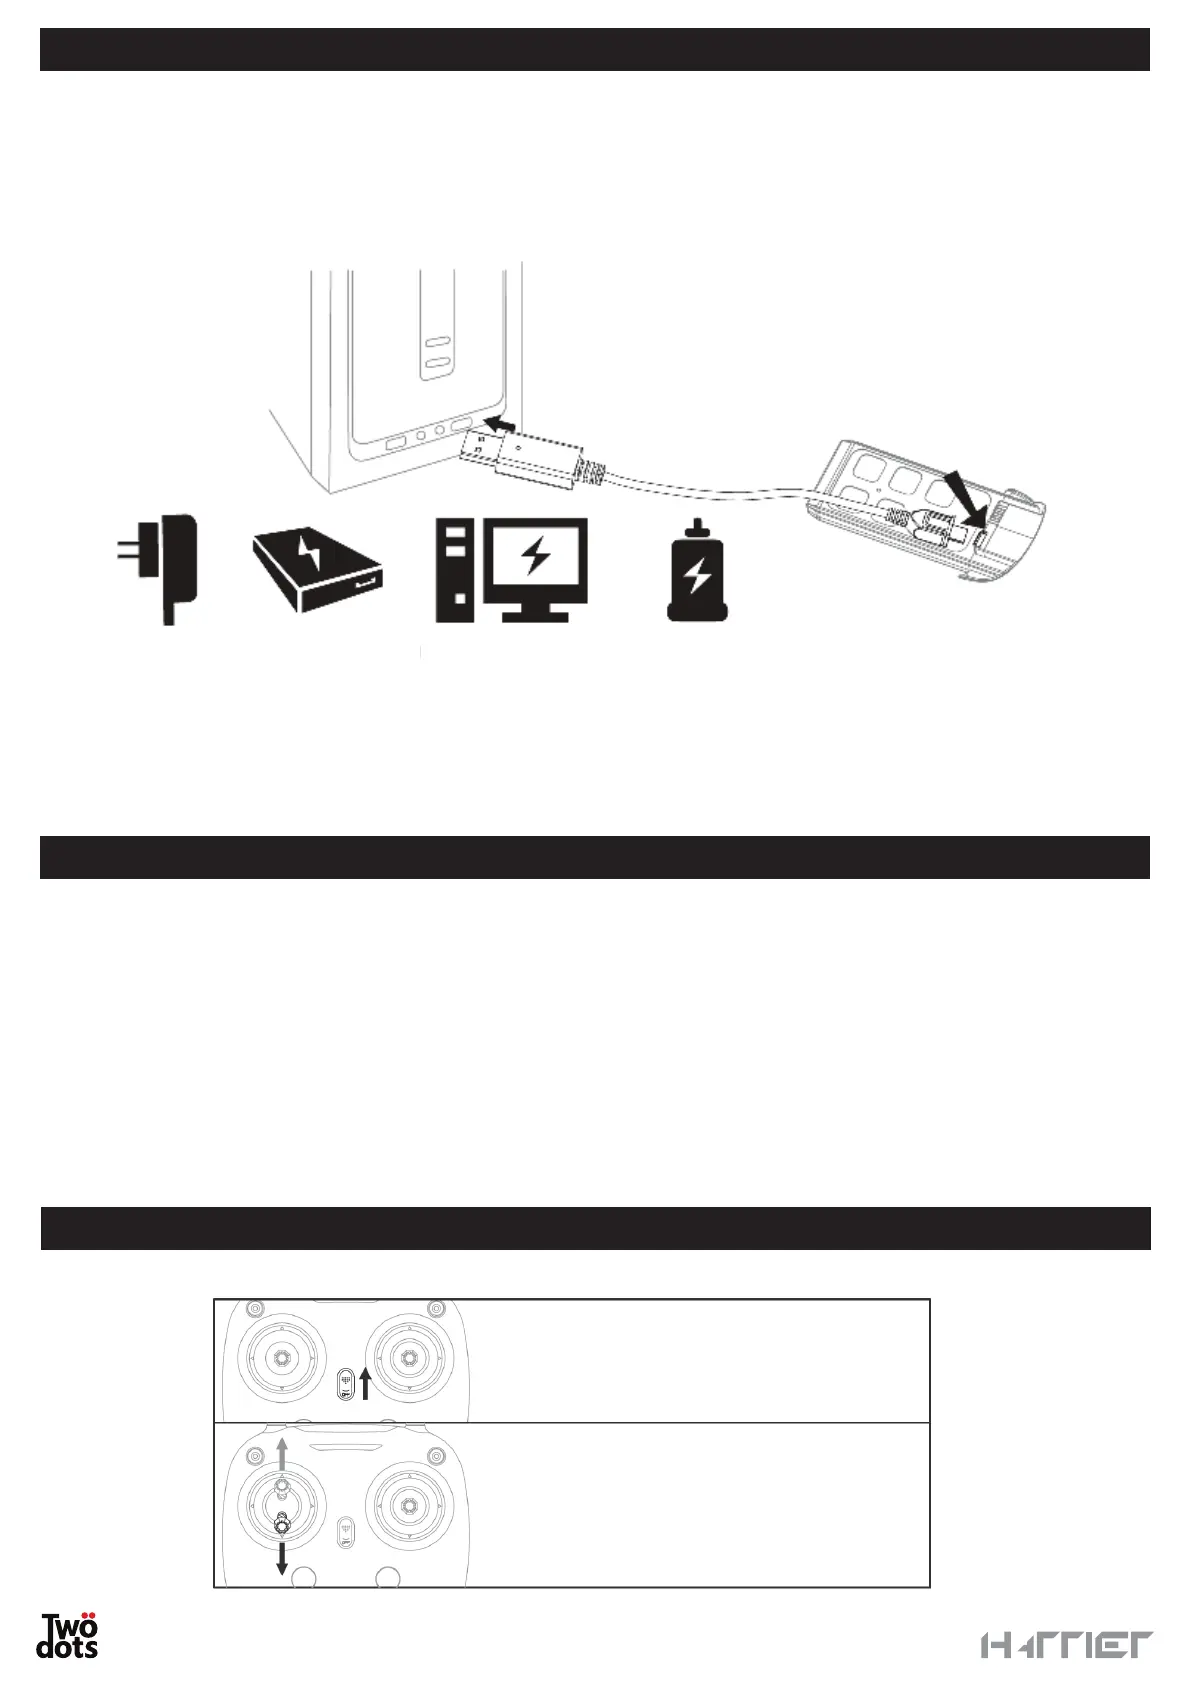
Turn on the remote control, move the left
stick first up and then down. The red LED
will start blinking slowly.
Place the drone on a flat surface and press
the power button for 2 seconds.
The pairing procedure is then completed.
PAIRING