7
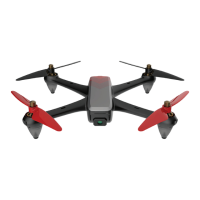
RESET PROCESS
CONTROL
Read the following instructions carefully and do not try to fly the drone before acquiring good skills in controlling
the vehicle.
Place the drone in an open, flat space, free from any encumbrances. Position yourself behind the drone and turn
so that you are headed in the same direction as the drone. The green LED lights indicate the front and the red
LED light indicate the back of the device.
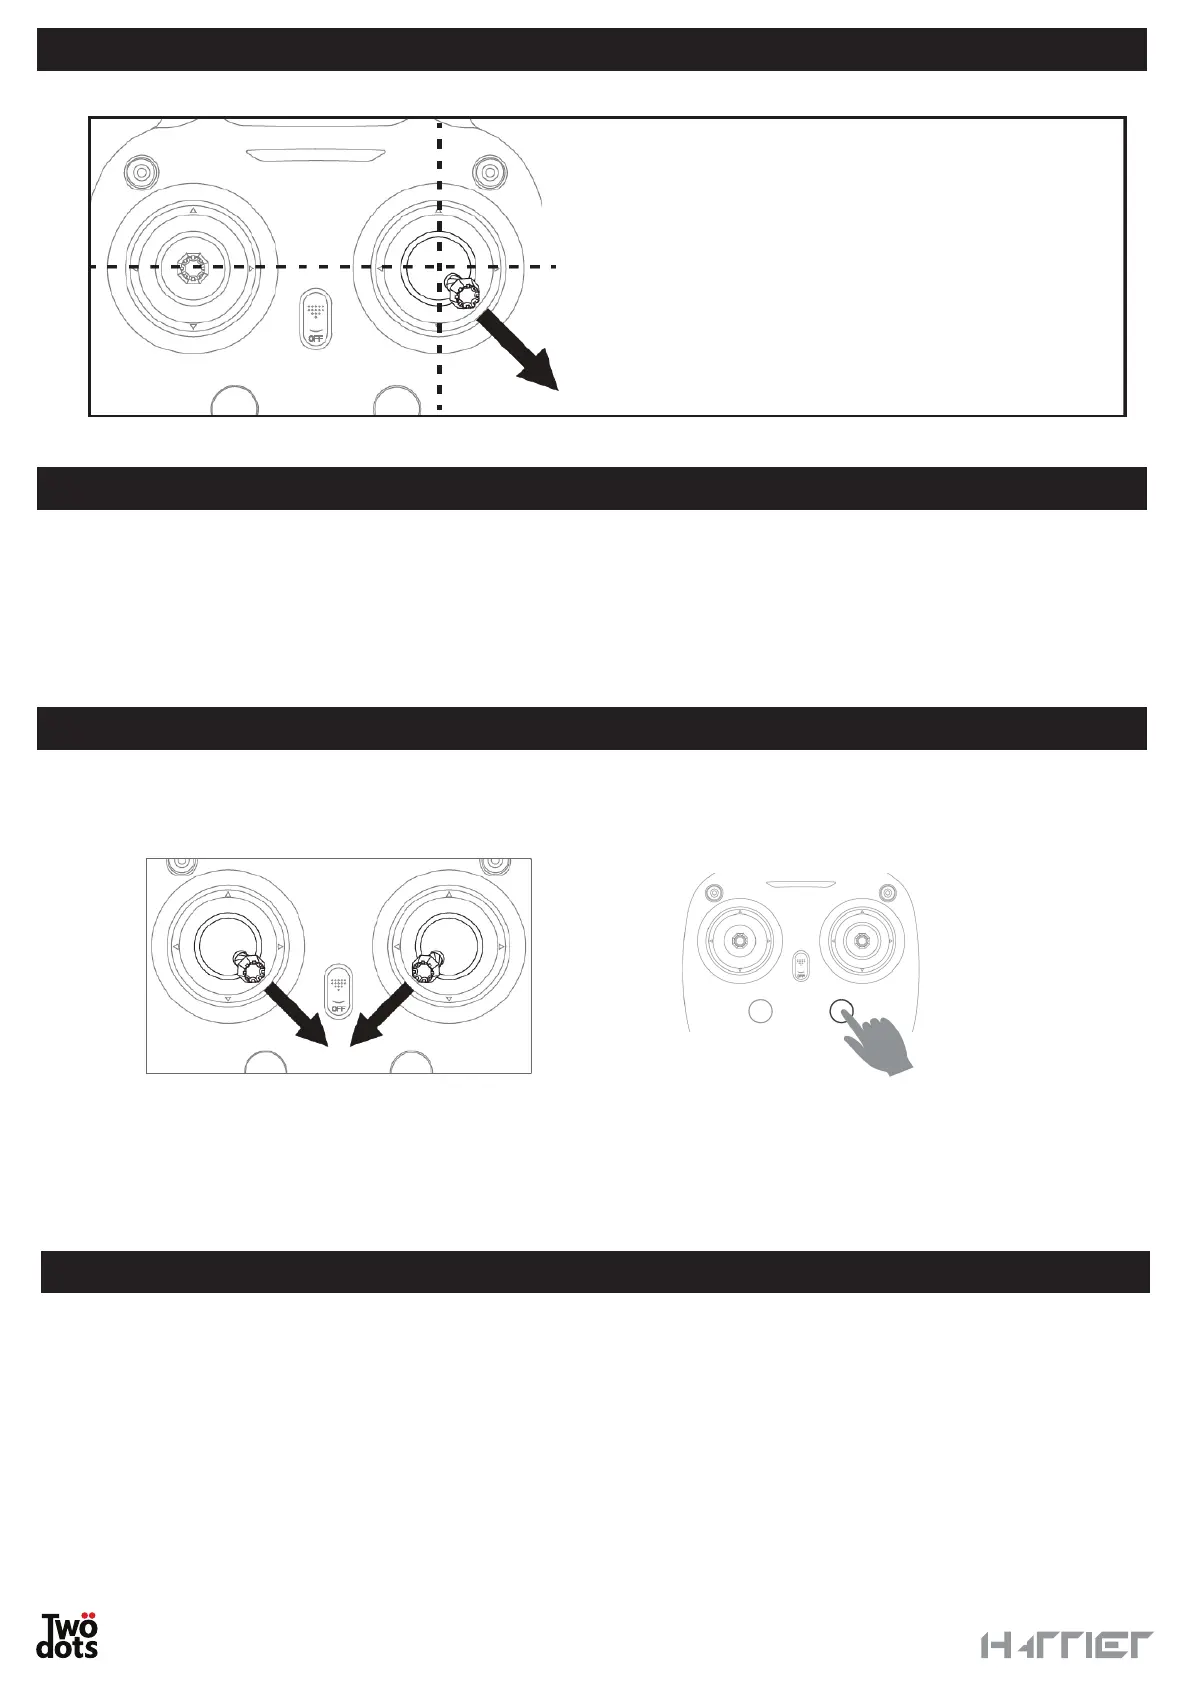
TAKE-OFF
To activate the engines, push both sticks on the controller down and inwards.
The engines will start running.
Move the left stick up and down to lift the drone to the desired height or press the button for automatic take-off
for a second and the drone will automatically lift to above 1.2 metres.
Gently move the left stick upwards to increase the drone’s height. Thanks to the “Auto-Hovering” function, the
drone will autonomously maintain the desired height without you having to act on the accelerator continuously.
LANDING
Move the left stick downwards to land the drone. Keep the left stick down for 2-3 seconds until the engines
stop or press the automatic landing button for a second. The drone will start landing from the position it is in.
Do not move the left stick during the automatic landing phase – otherwise the automatic landing phase will be
interrupted.
PLEASE NOTE: if the drone is in an emergency, you can immediately stop the engines. To do so, start the same
procedure you use to activate the engines.
Before flying or in case of need following bumps or
falls, the gyroscopes on the drone will have to be
reset.
Place the drone on a flat surface and move
the right stick to the lower right corner for few
seconds.
The drone’s LEDs will blink.
The process is completed when the LEDs blink
normally.