1010
1111
1212
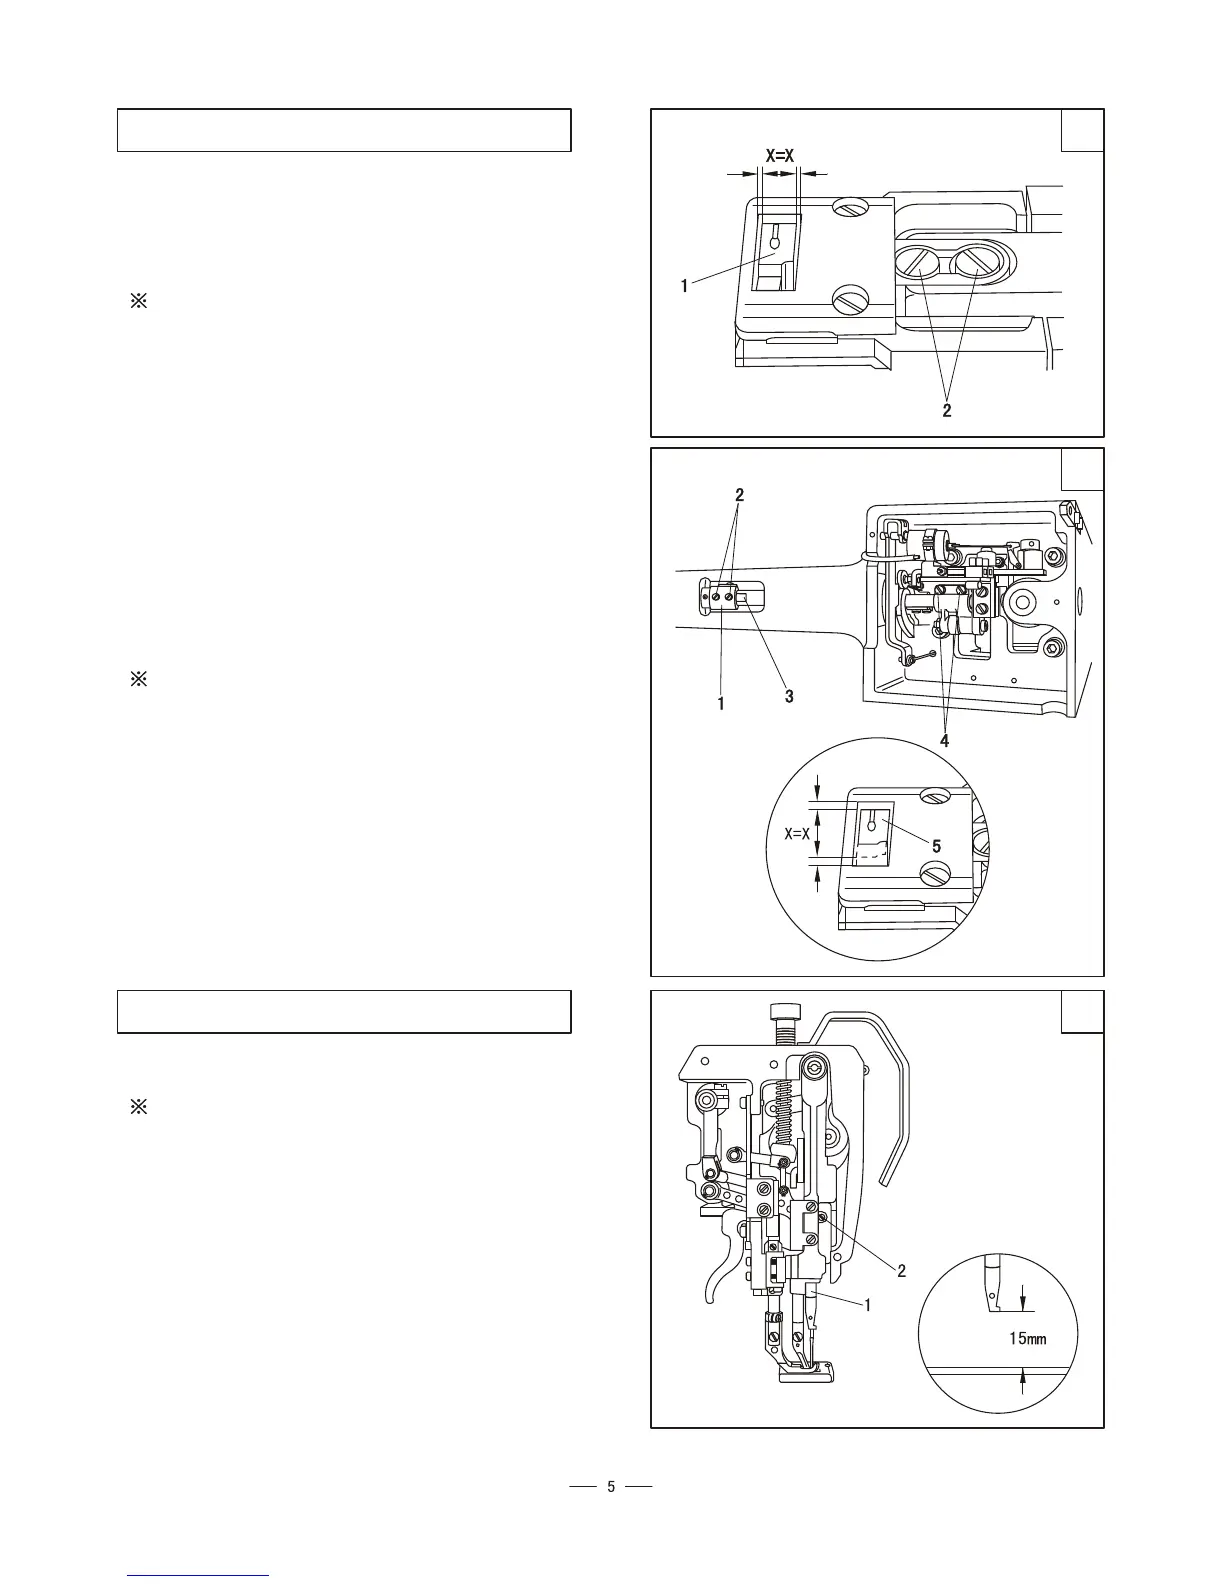
1. Positioning the feed dog in the direction of
sewing(Fig.10)
a. Loosen the screw 2;
b. Adjusting the feed dog as required;
c. Tighten the screw 1;
The feed dog must be of the same distance
from the left and the right of the needle cutout.
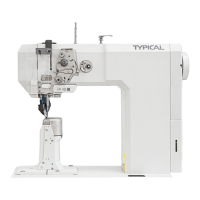
2.Positioning the feed dog in the direction of
sewing(Fig.12)
a. Set it to the max stitch length;
b. Loosen the screw 2 to turn the crank 1 to the left;
tighten the screw 2 until it prop up the surface 3
of the shaft;
c. Loosen the screw 4;
d. Move the feed dog as required;
e. Tighten the screw 4.
When the stitch length is at the max, the front
and the rear clearance between the feed dog
and the needle plate groove should be the same.
1. Positioning the feed dog in the direction of
sewing(Fig.10)
a. Loosen the screw 2;
b. Adjusting the feed dog as required;
c. Tighten the screw 1;
The feed dog must be of the same distance
from the left and the right of the needle cutout.
2.Positioning the feed dog in the direction of
sewing(Fig.12)
a. Set it to the max stitch length;
b. Loosen the screw 2 to turn the crank 1 to the left;
tighten the screw 2 until it prop up the surface 3
of the shaft;
c. Loosen the screw 4;
d. Move the feed dog as required;
e. Tighten the screw 4.
When the stitch length is at the max, the front
and the rear clearance between the feed dog
and the needle plate groove should be the same.
12. Adjusting the feed dog12. Adjusting the feed dog
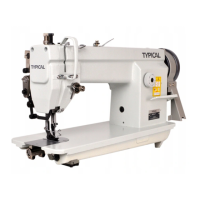
Move the needle bar 1 (by screw 2) up and down,
and as required, adjust it to the right position.
When the needle bar is at its lowest position,
the clearance between the needle plate and the
needle bar should be 15 cm.
Move the needle bar 1 (by screw 2) up and down,
and as required, adjust it to the right position.
When the needle bar is at its lowest position,
the clearance between the needle plate and the
needle bar should be 15 cm.
13.Pre-adjusting the needle height(Fig.12)13.Pre-adjusting the needle height(Fig.12)