Do you have a question about the typical GT856D and is the answer not in the manual?
Overview of the internal components of the control box.
Details of connectors and their functions on the control box.
Electrical requirements and ratings for the control box.
Procedure for replacing blown fuses in the control box.
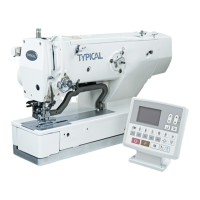
Overview of the control panel layout and its buttons.
Procedure for powering on and initializing the sewing machine.
Instructions for performing basic sewing operations.
Specific steps for executing scallop stitch patterns.
Instructions for sewing bline stitch patterns.
Steps for sewing T stitch patterns.
How to select and sew pre-stored ROM patterns.
Adjusting the width of the zigzag stitch.
Adjusting the stitch length or feed pitch.
Adjusting the maximum sewing speed.
Setting and executing initial stitches for reinforcement.
Setting and executing final stitches for reinforcement.
Adjusting the starting point or baseline of the sewing.
Configuring the needle's stop position at the end of sewing.
Controlling the needle's position after sewing stops.
Mirroring stitch patterns for different sewing effects.
Sewing based on a specific number of stitches.
Controlling the presser foot via pedal or switch.
Activating thread trimmer and wiper functions.
Performing sewing at a very low speed.
Understanding the functions of the reverse stitch button.
Resetting machine parameters to factory defaults.
Managing sewing patterns using a USB flash drive.
Procedure for transferring sewing patterns from a PC to the machine.
Step-by-step guide to creating a specific sewing pattern.
Guide for creating a different type of sewing pattern.
Comprehensive table of adjustable system parameters.
Procedure for changing system parameter values.
Details on needle positioning and feed pitch tuning.
Diagnostic mode for testing input components like sensors and switches.
Diagnostic mode for testing output components like motors and solenoids.
| Model | GT856D |
|---|---|
| LED Lighting | Yes |
| Foot Control | Yes |
| Buttonhole Styles | Multiple |
| Speed Control | Yes |